Greetings, everyone!
I’m Michael Kessler, and today I’m going to talk about Warcaster terrain! This is the first of a two-part article in which we’ll recreate the bottom half of Danny Samuels’ fantastic Marcher Worlds Crane:

First things first: have a look at Danny’s February 2020 Marcher Worlds terrain stream, if you haven’t already seen it:
https://www.youtube.com/watch?v=VbgucD-UDPs
Then, read Danny’s April hobby blog on the same topic: https://home.privateerpress.com/2020/04/16/warcaster-table-terrain/
Got all that information fresh in your mind? So, I have to share a secret before we get started: I am very bad at creating original pieces of terrain. But I really like Danny’s Warcaster terrain, and when I saw it, I wished I had the instructions to build one. Danny didn’t write up instructions, so I took the liberty of figuring it out for the rest of us!
So, grab some tools, visit your local hardware store, and join me as we reconstruct—as much as possible from an outside-the-studio perspective—part of Danny’s fantastic Marcher Worlds Crane!
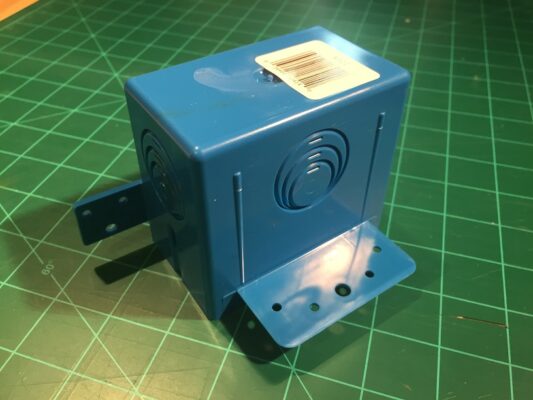
To begin: the structure is made up of three primary parts. The base is made from a CARLON 2-Gang Blue PVC New Work Standard Switch/Outlet Wall Electrical Box.
Item #: 70974 Model #: B232AR-UPC

The middle portion is a CARLON 1-Gang Blue Plastic New Work/Old Work Standard Ent Wall Electrical Box. Item #: 239512 Model #: A122-CAR
The pylon is very specifically a ¾˝ diameter NDS Flo-Span PVC Coupling, Flo-Control part #117-07.

NOTE: I had a great deal of trouble locating this specific part. It appears to be an older model that was replaced recently. As such, you may not be able to locate this exact item. Fear not, however—your local hardware store should have something pretty close. The item is usually listed as a “PVC compression expansion coupling” or “expansion repair coupling.” You’ll need the ¾˝ diameter version, in any case.
You’ll need the following common tools and materials in addition to these three main components:
- Rotary tool, with both cutting wheel and drum sander bits
- Sandpaper, various
- 120 grit
- 400 grit
- 600–800 grit
- Can of spray foam insulation
- Construction adhesive
- Hot glue gun Hacksaw
- Snap-blade knife
- Respirator
- Eye protection
Construction is fairly simple. One reminder before we begin: all this sanding and cutting is going to get messy. Keep a vacuum handy to clean up the debris!
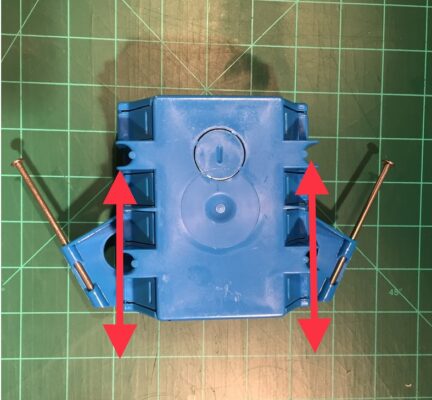
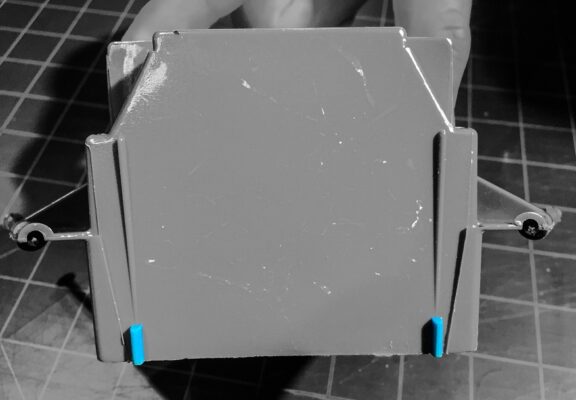
Start by cutting off the “wings” on the electrical boxes with the rotary tool.
Use your drum sander attachment to sand down most of the surface ridges and mold lines on the 2-gang box.
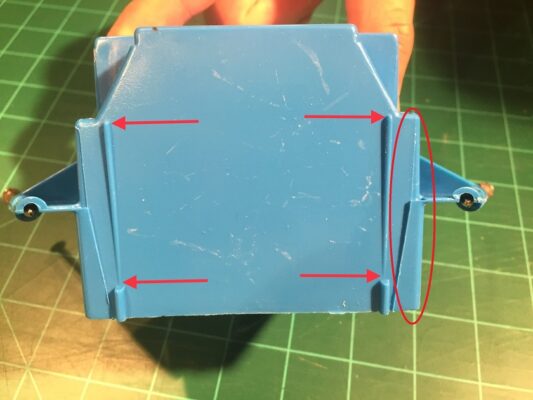
Be careful! Don’t trim off these little nubs on the 2-gang box. They’ll make useful details later on.
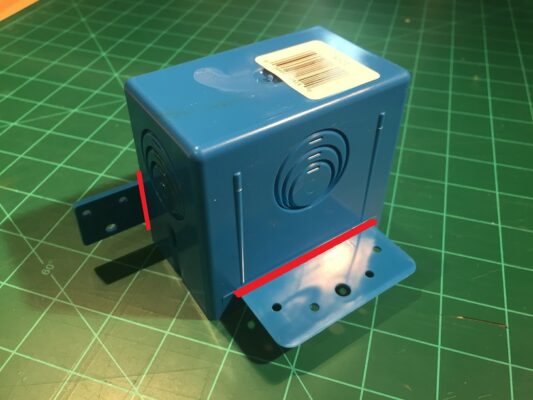
Sand off the bottom 2.5˝ of these bars on both sides of the 1-gang box. You can see where I notched these bars. The measurement needs to be exact because we’ll add details here later. You should remove the nubs on this piece, though. Clean up any random mold lines as well and any remainders from the removed “wings.”
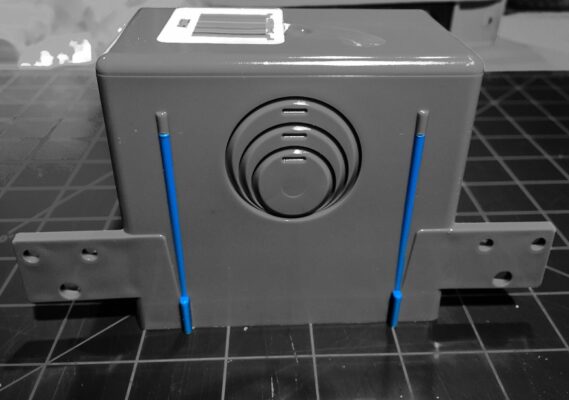
Careful with your sanding and cutting—I went a little deeper here than I planned. Little mistakes like this are okay, though! The Marcher Worlds make do with what they have, and some wear and tear can easily be incorporated into this piece!

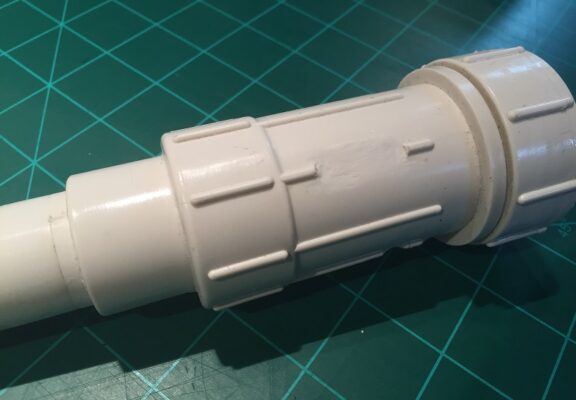
Remove the bottom pipe from the expansion coupling with the hacksaw and thoroughly sand the bottom flat. All of the writing should be removed. This piece should sit flush on top of the 1-gang box.

Using your rotary tool and drum sander, remove all of the writing from the pipe and clean up any especially egregious mold lines. Take care in between the vertical ribs so you don’t remove any details.
SIDE NOTE: Constructing Durable Terrain
Everybody who touches this piece is going to use the pipe on top as a handle; it is human nature. Knowing that, we need to make this piece as durable as we can. We want as much surface area as possible between all joins for stability. There’s very little surface area contact between the 1-gang and 2-gang boxes. We’ll need to fix that before gluing them together, otherwise this will break apart pretty easily.
Feel the inside of your 1-gang box; although the plastic is thin in places, there should be no gaps in the interior. If there are, close them with hot glue, some plasticard, card stock, or something similar.
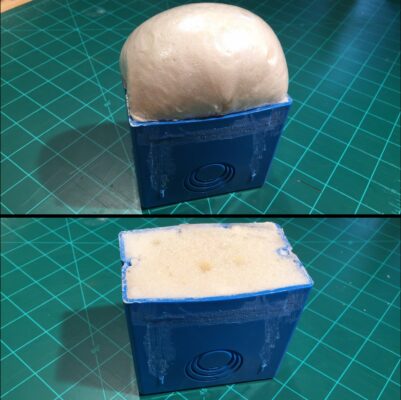
Fill the 1-gang box with spray foam. Let the foam cure and, using a sharp snap-blade knife, trim the excess and sand it flat.
NOTE: As always, follow all manufacturer-recommended safety precautions!
NOTE 2: The Squeakquel
Remember that expanding foam, by definition, expands. Only fill the box about 80% full; the expansion will do the rest! I overfilled this slightly, and had to remove some material in the center to remove the slight bulge. Try to build up the foam on the outside edges and leave a pocket for expansion in the center in order to avoid this.
Final Prep
The bottom electrical box serves as the base. The finished piece is a little top-heavy and unstable in tabletop conditions, so we’ll need to stabilize it somehow. Danny filled his with rocks and resin, but I don’t think we need to do quite that far! Use hot glue to seal the gaps inside the 2-gang box. I will leave the choice up to you. It can be filled with spray insulation, rocks, or whatever you feel is best. (I’m going to fill mine with rocks and resin, but that’s because I like going overboard.)
Use the 400+ grit sandpaper and lightly sand the exteriors of all three parts. Don’t remove detail; just scuff the surface. This ensures that primer will stick later.
Clean all 3 pieces with dish soap, water, and an old toothbrush. Dry thoroughly before continuing.
Assembly
Assembly is straightforward: The 2-gang box makes the base.
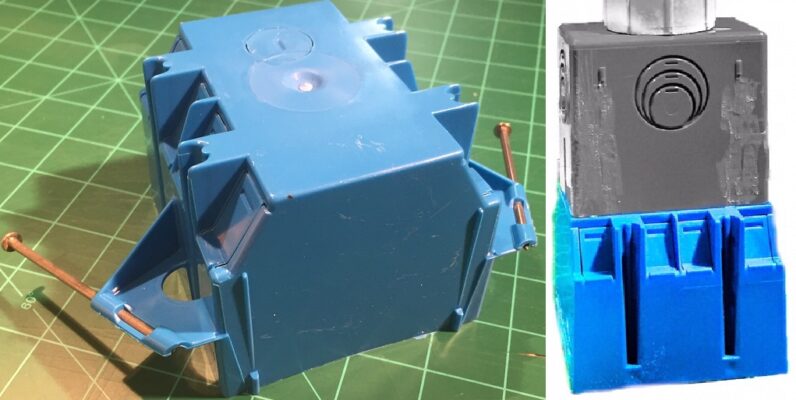
The 1-gang box forms the center. Thanks to the foam, there should be plenty of surface area between the two electrical boxes. Lay down some construction adhesive and glue them together.

And the pipe forms? You guessed it, the pipe on top!

Center the pipe on top and glue the pipe to the box with construction adhesive, and…tah-dah! We’ve completed the basic build for this piece!

That’s all for this time around. It might not look like much right now, but we’ve made tremendous progress so far. Next time, we’ll add details and start to beautify the piece.
Until then, stay safe!
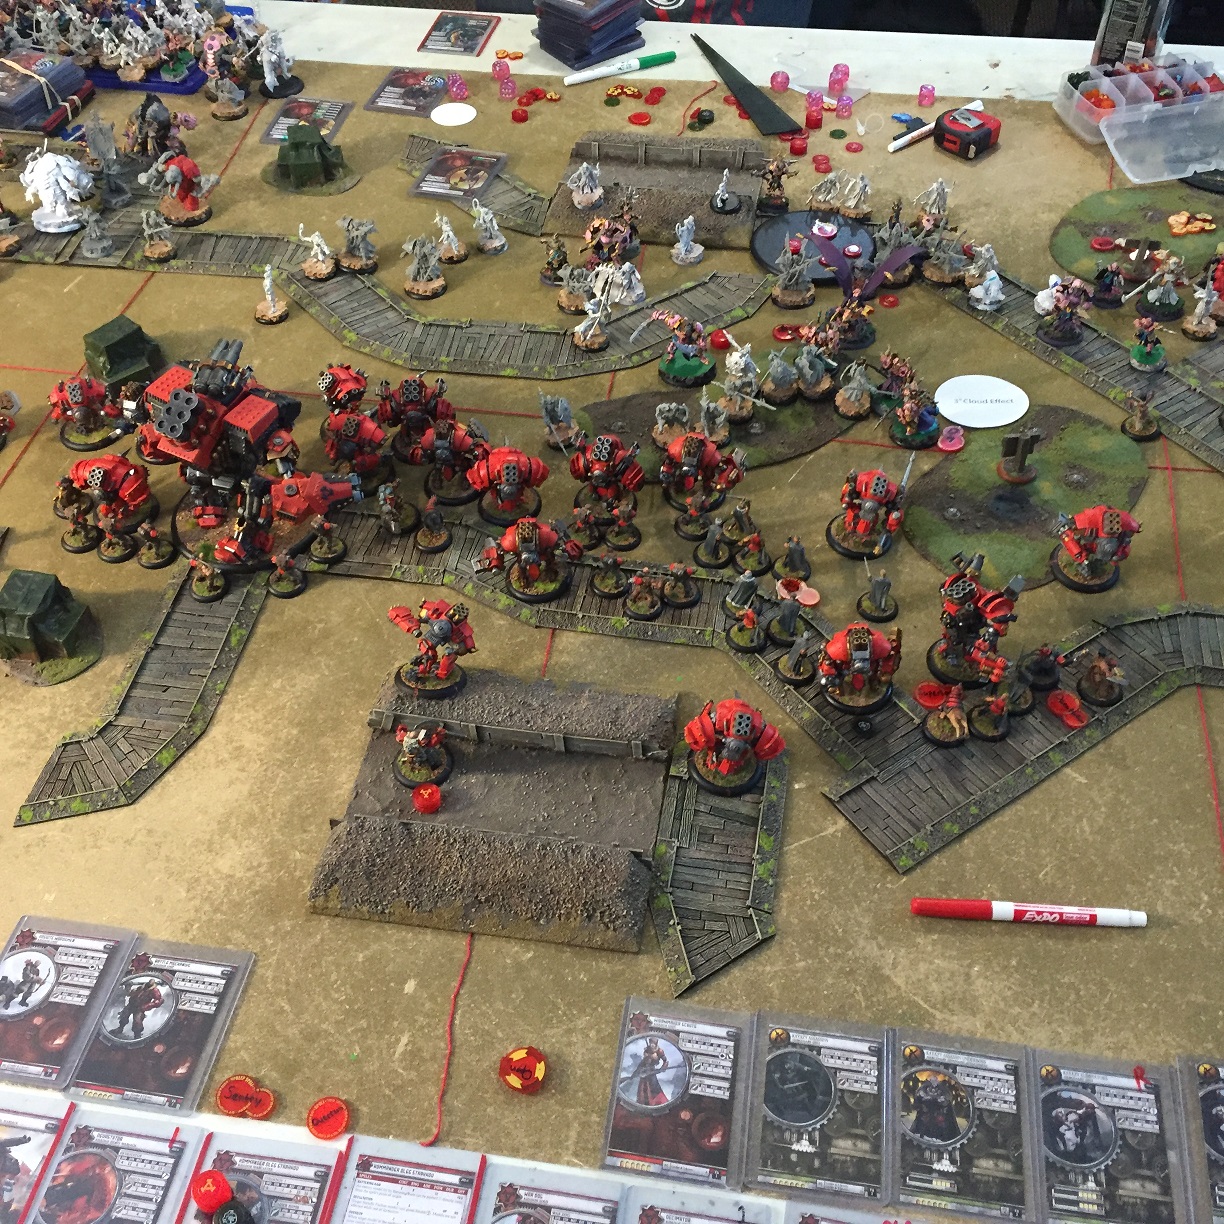
Pictured: Playing a 300-point game of Unbound on homemade terrain
Not pictured: Michael Kessler