Happy 2021! In my first concept art Insider of the year, I’m going to discuss the visual development process for the Death Archon. If you’ve read previous Insiders of mine, you’ll know that every concept or illustration starts with a written description, and the Death Archon was not an exception to the rule.
Similar to the Void Archon; no one knows where it came from, although it tends to hangs around sites of mass carnage, and it can regularly be found where there’s significant numbers of horrific deaths occurring. Visually, it follows the classic Grim Reaper look—a black-robed figure with a massive scythe and black raven wings.
Inside its raised hood, no face is visible, and it doesn’t have feet under its
robes. Its skeletal arms reach out from within the robe to grab the scythe.
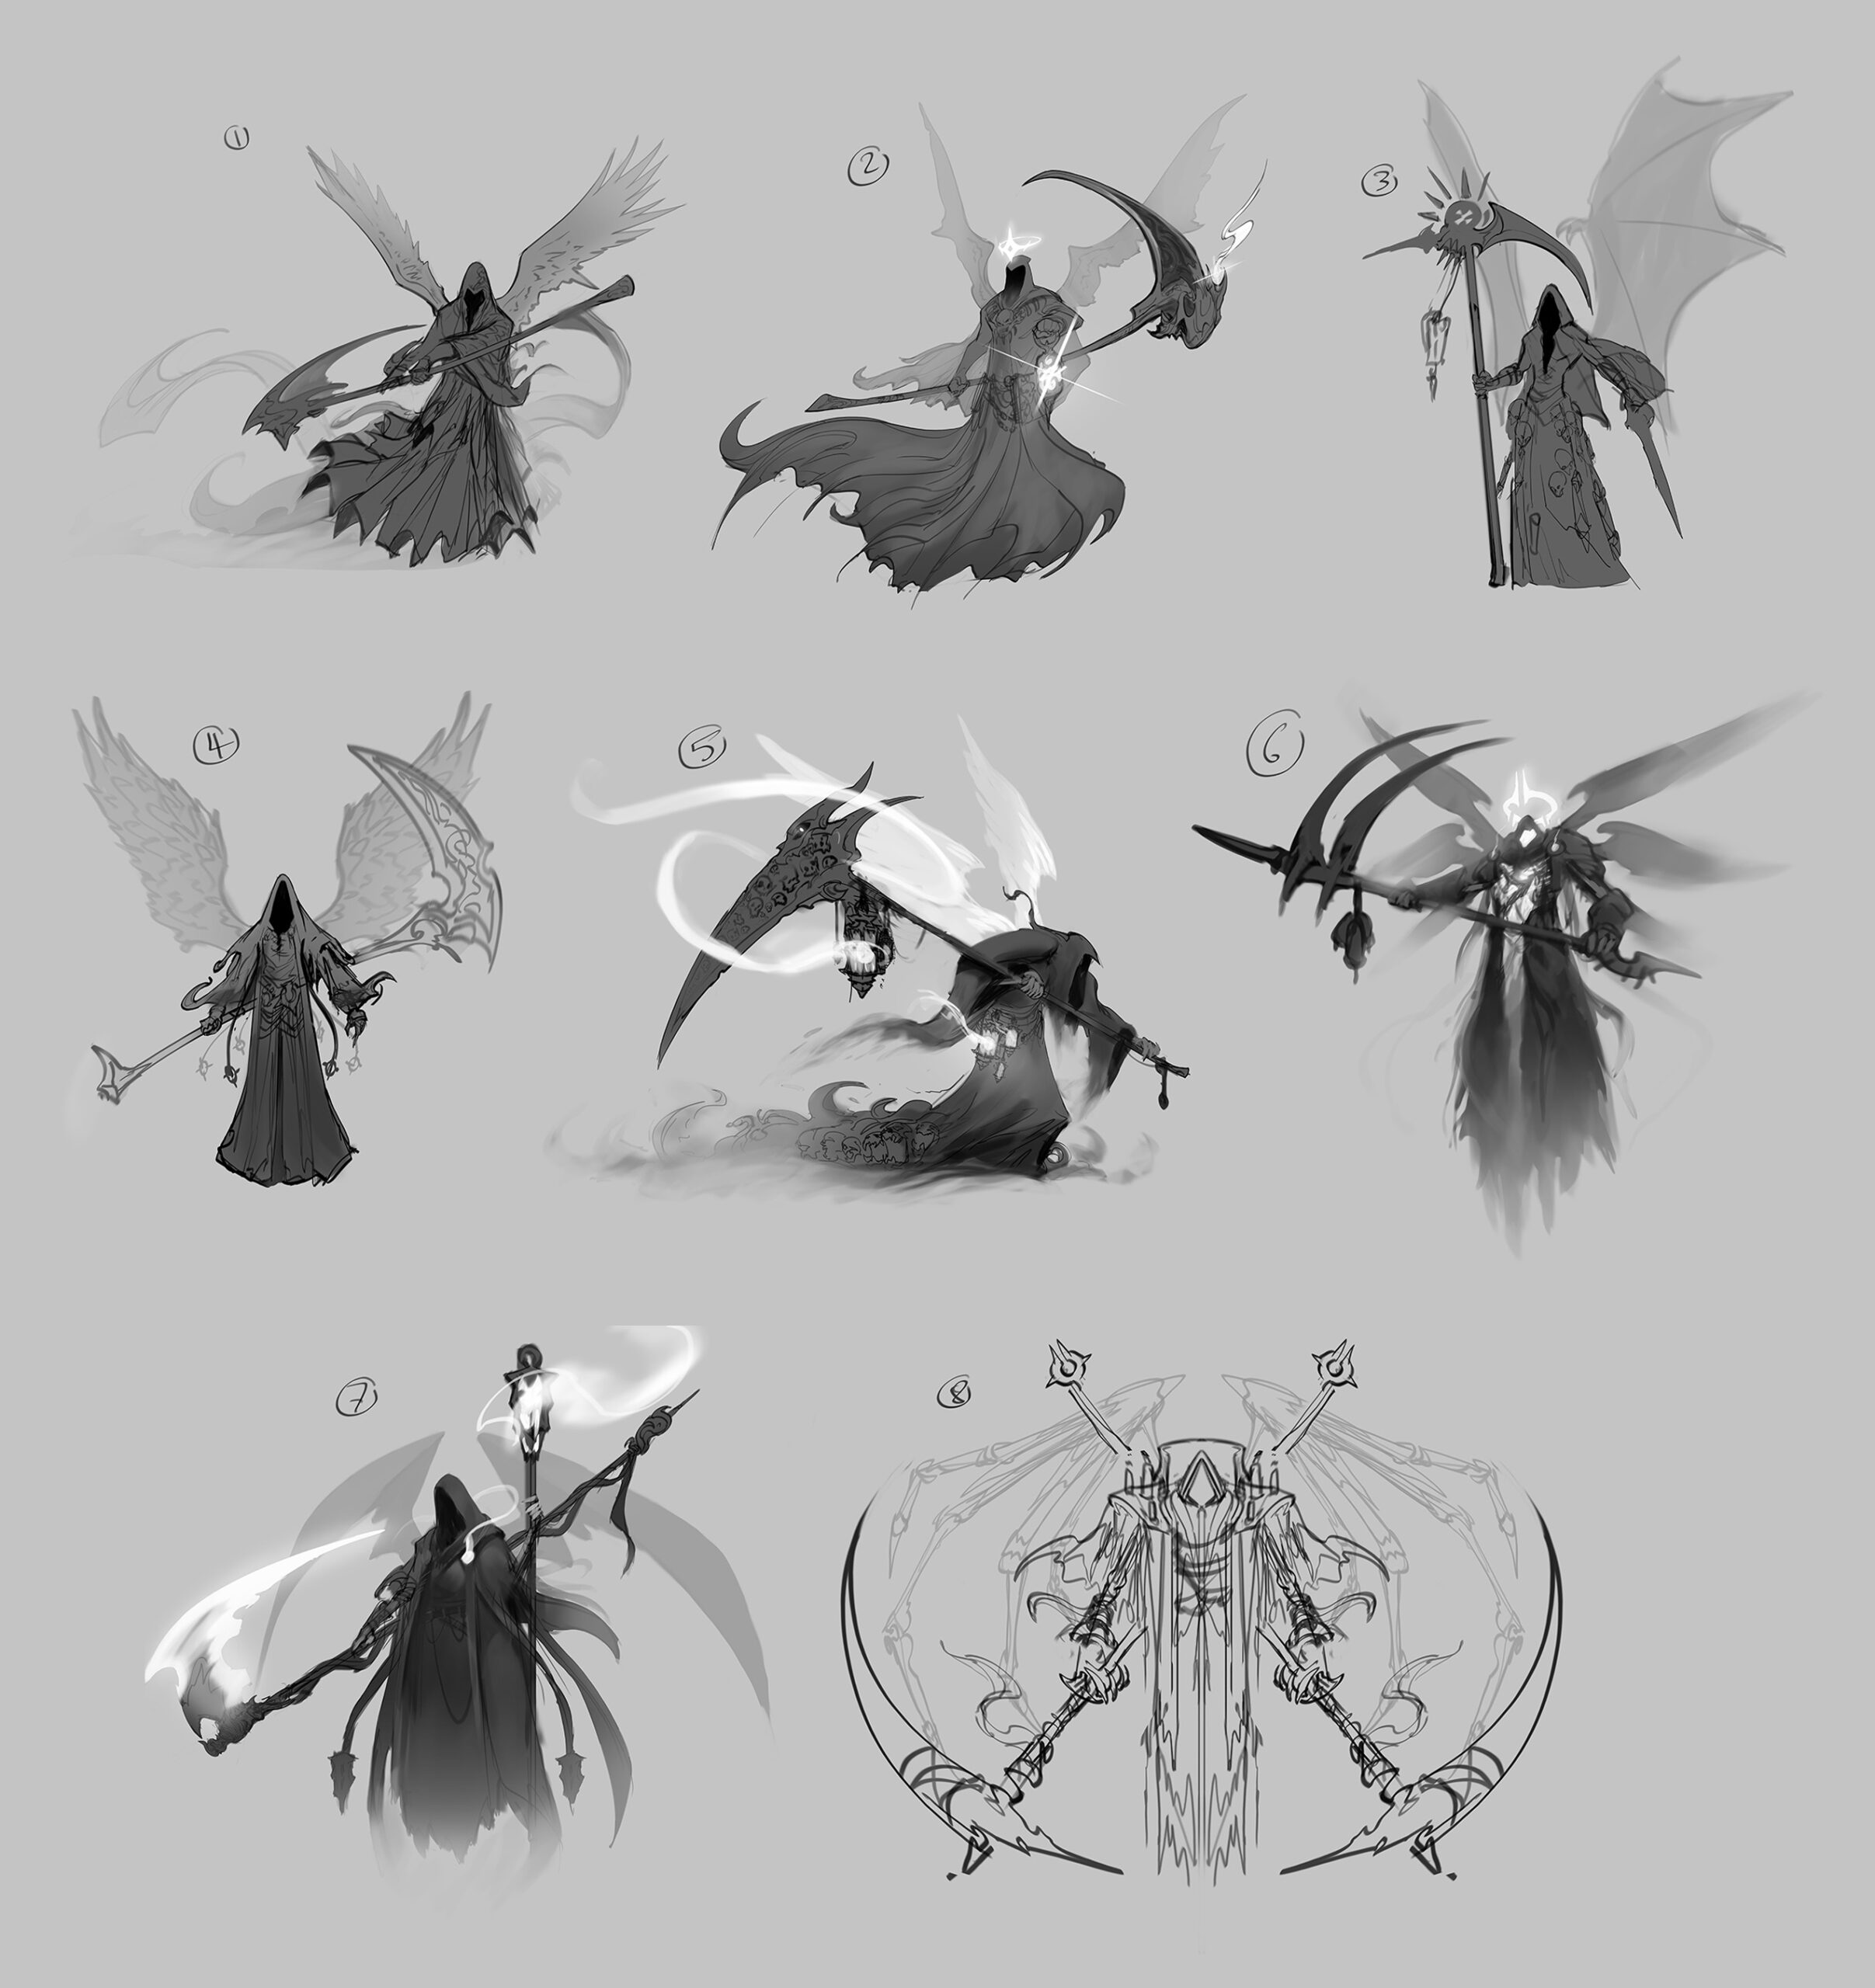
The concept was assigned to the always awesome Eissa Nasser, and she submitted the following sketches for the first round.
As opposed to providing the typical feedback loop, in this Insider, I’m going to share a bit more background into my thought process. I really liked the look of #6 (sans the floating crown) and #7 with the scythe of #2, but the width of the shaft/handle would need to be doubled for production. If we went with #7, the cloth would need to be extended down to the ground to elevate it up and off of the base. Adding massive raven wings on that sketch could’ve helped quite a bit as well.
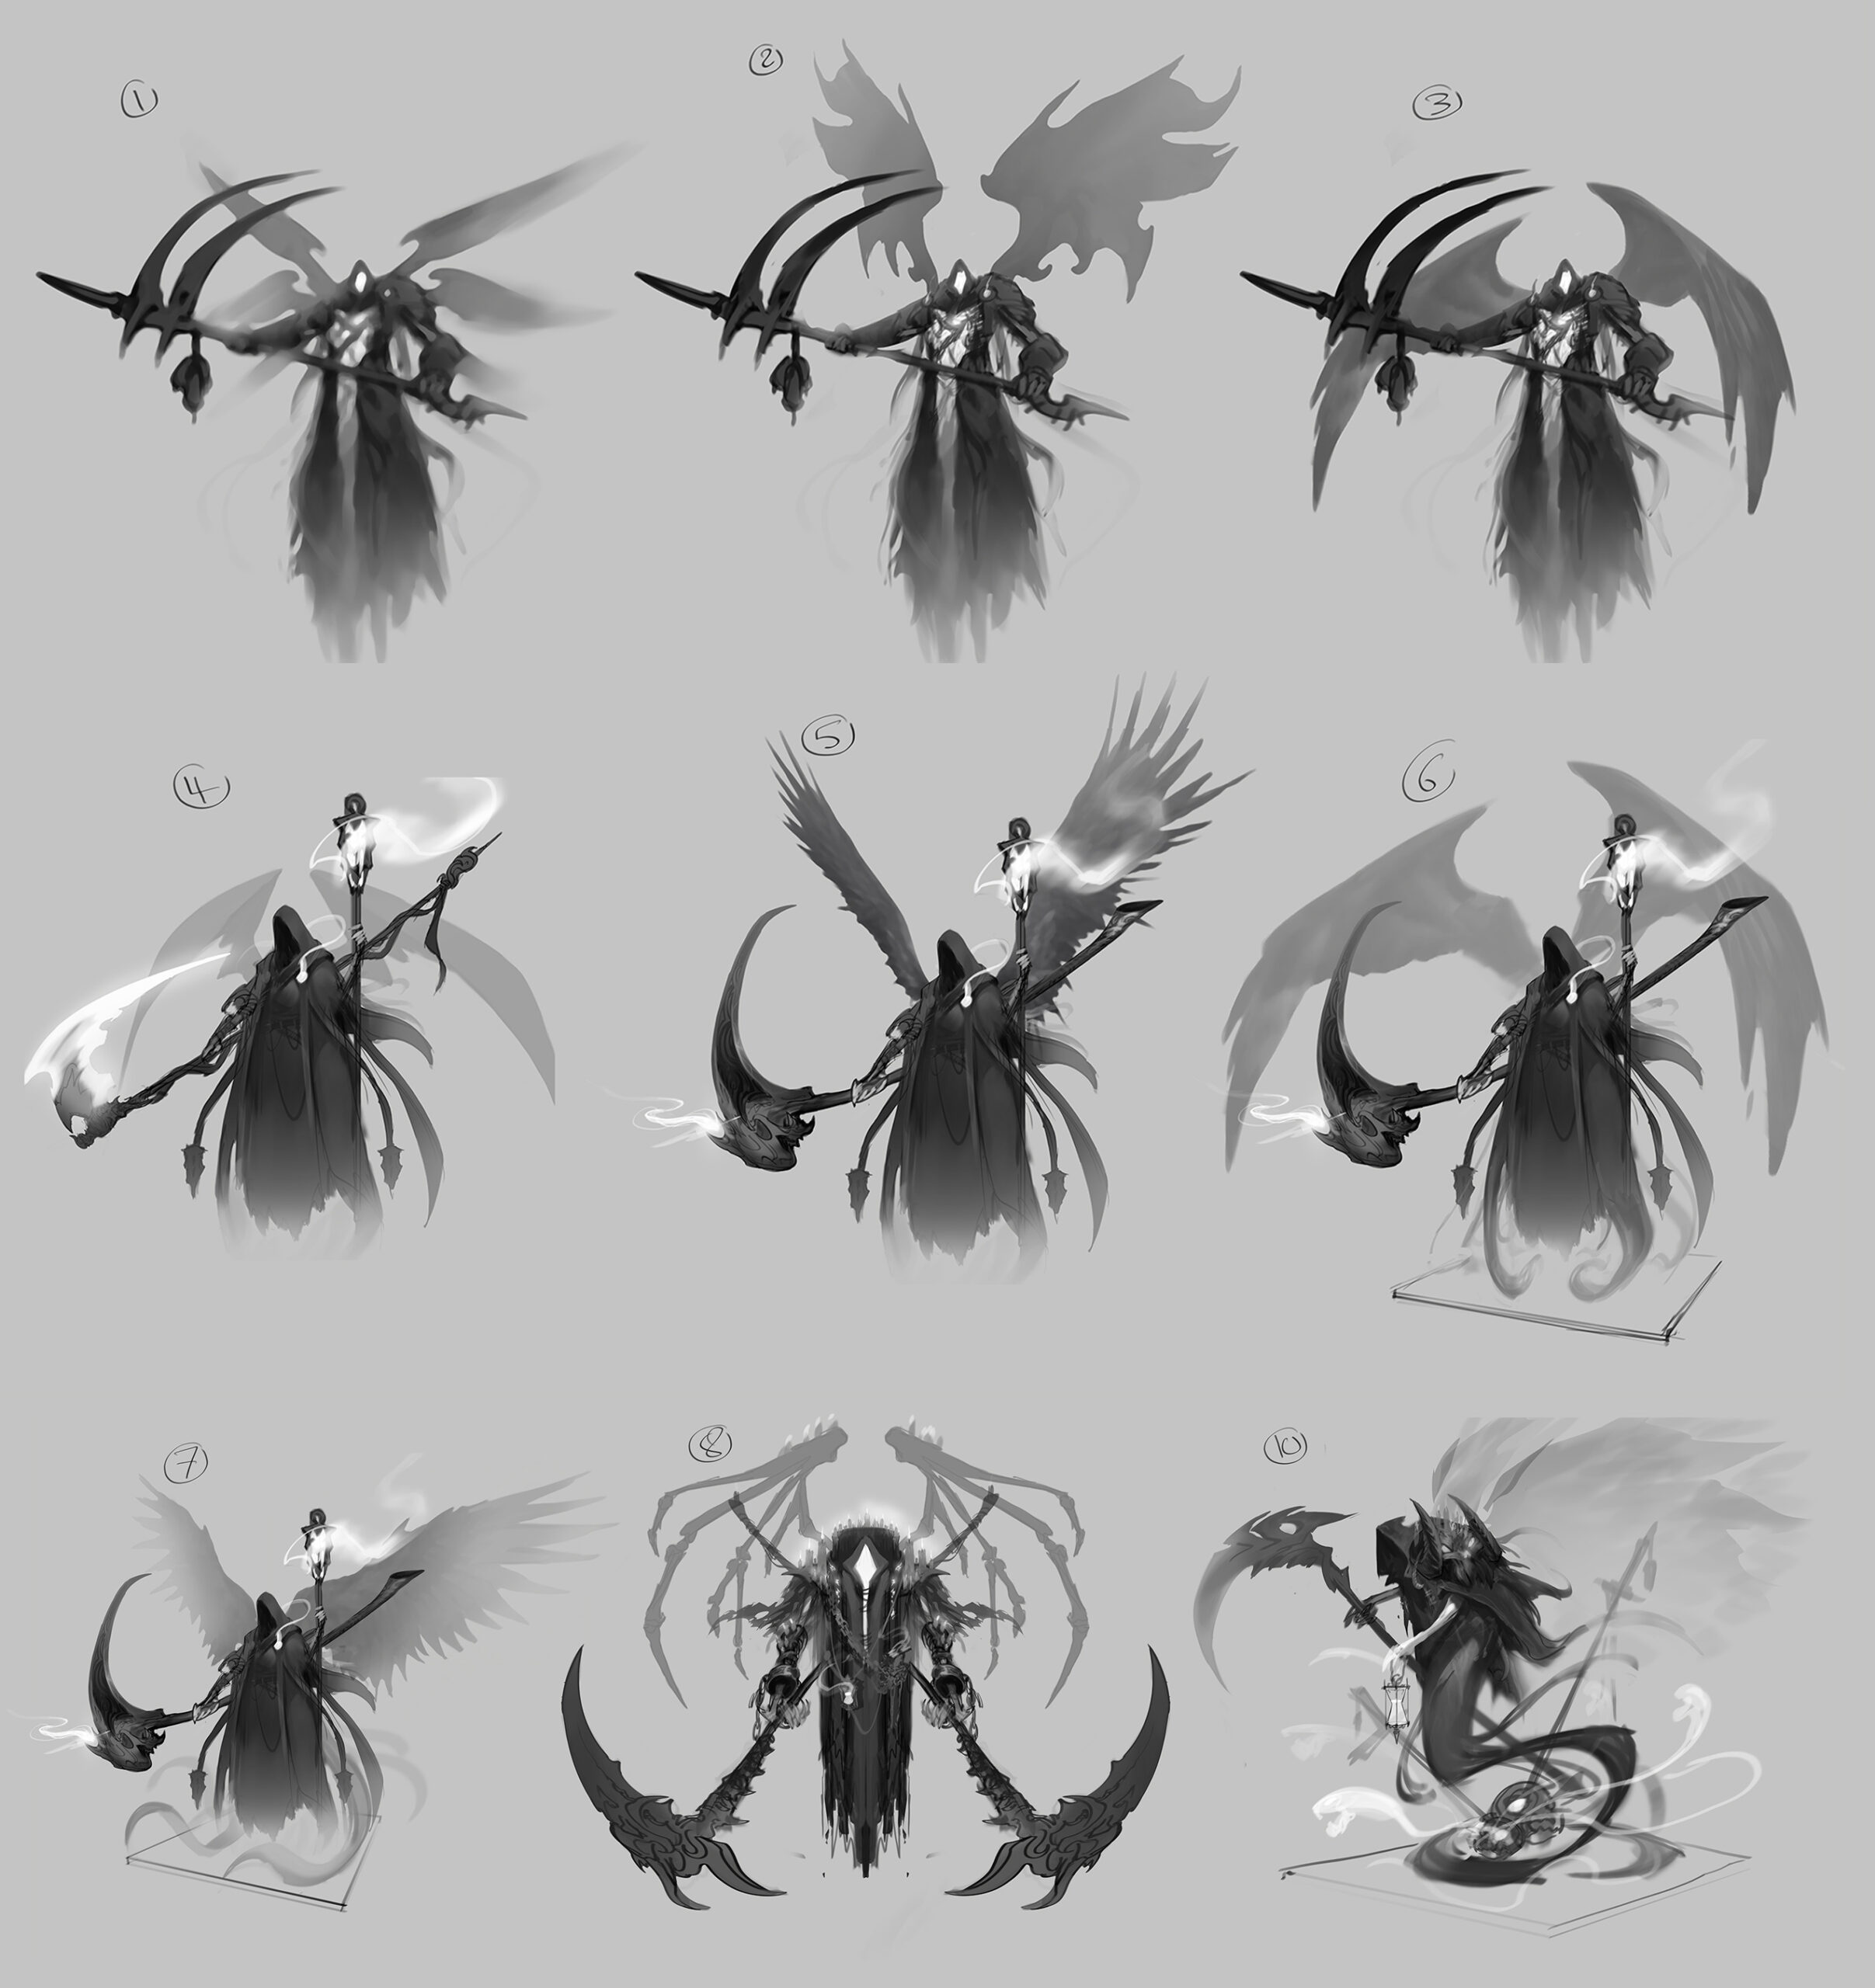
With those notes in hand, Eissa worked up several more options. Ultimately, #8 had the most potential, but the details on the figure wouldn’t translate to the miniature format due to the scale of the objects. The candles would have to be scaled up or eliminated, and we also needed to add membranes between the skeletal wings. The scythe from #7 was selected as the weapon of choice. Eissa moved forward with those notes and worked up the following options:
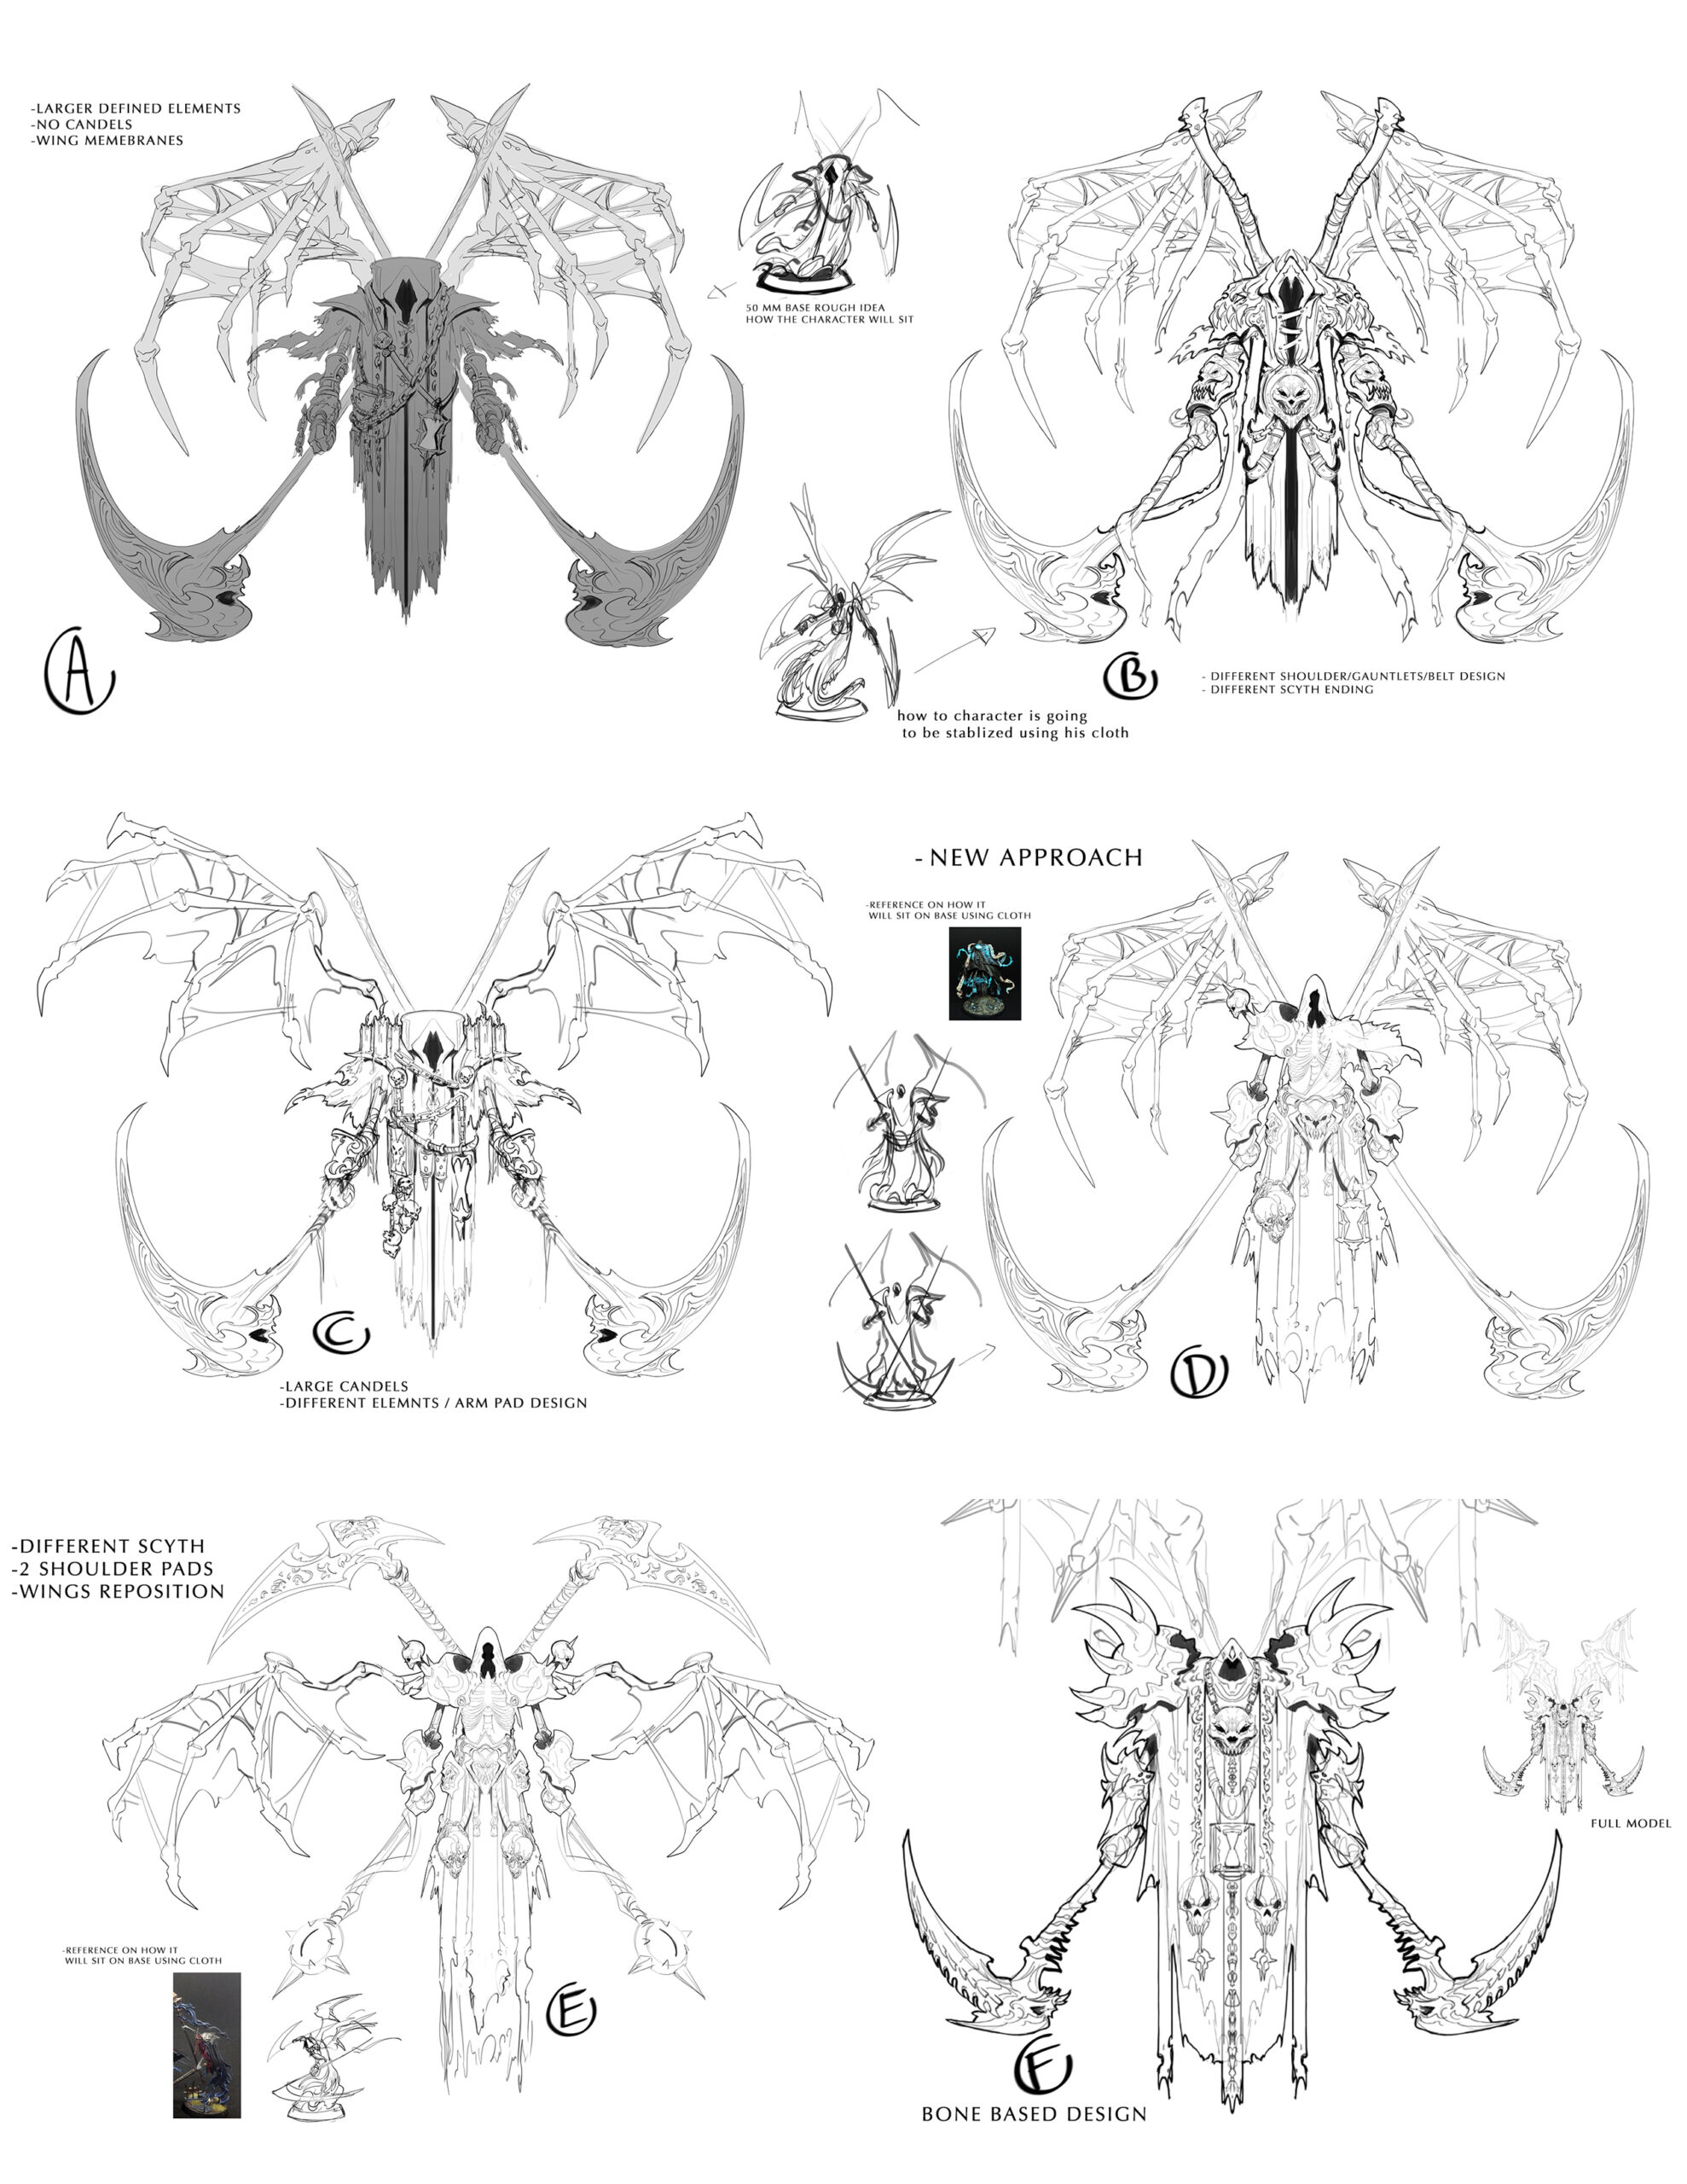
With the revised sketches in hand now, the short list of feedback was:
– Scythe F is the clear winner.
– E has the most potential for the upper torso, but I would kill the skulls and blunt up the shoulder and forearm spikes for production. We also want the cloth drapery from D’s torso incorporated into the design.
– The wings of B look great, but the passthroughs in the wing membranes need to be filled for production.
– The hips, waist and details below the waist in D look great.
– Pose sketch B is a winner.
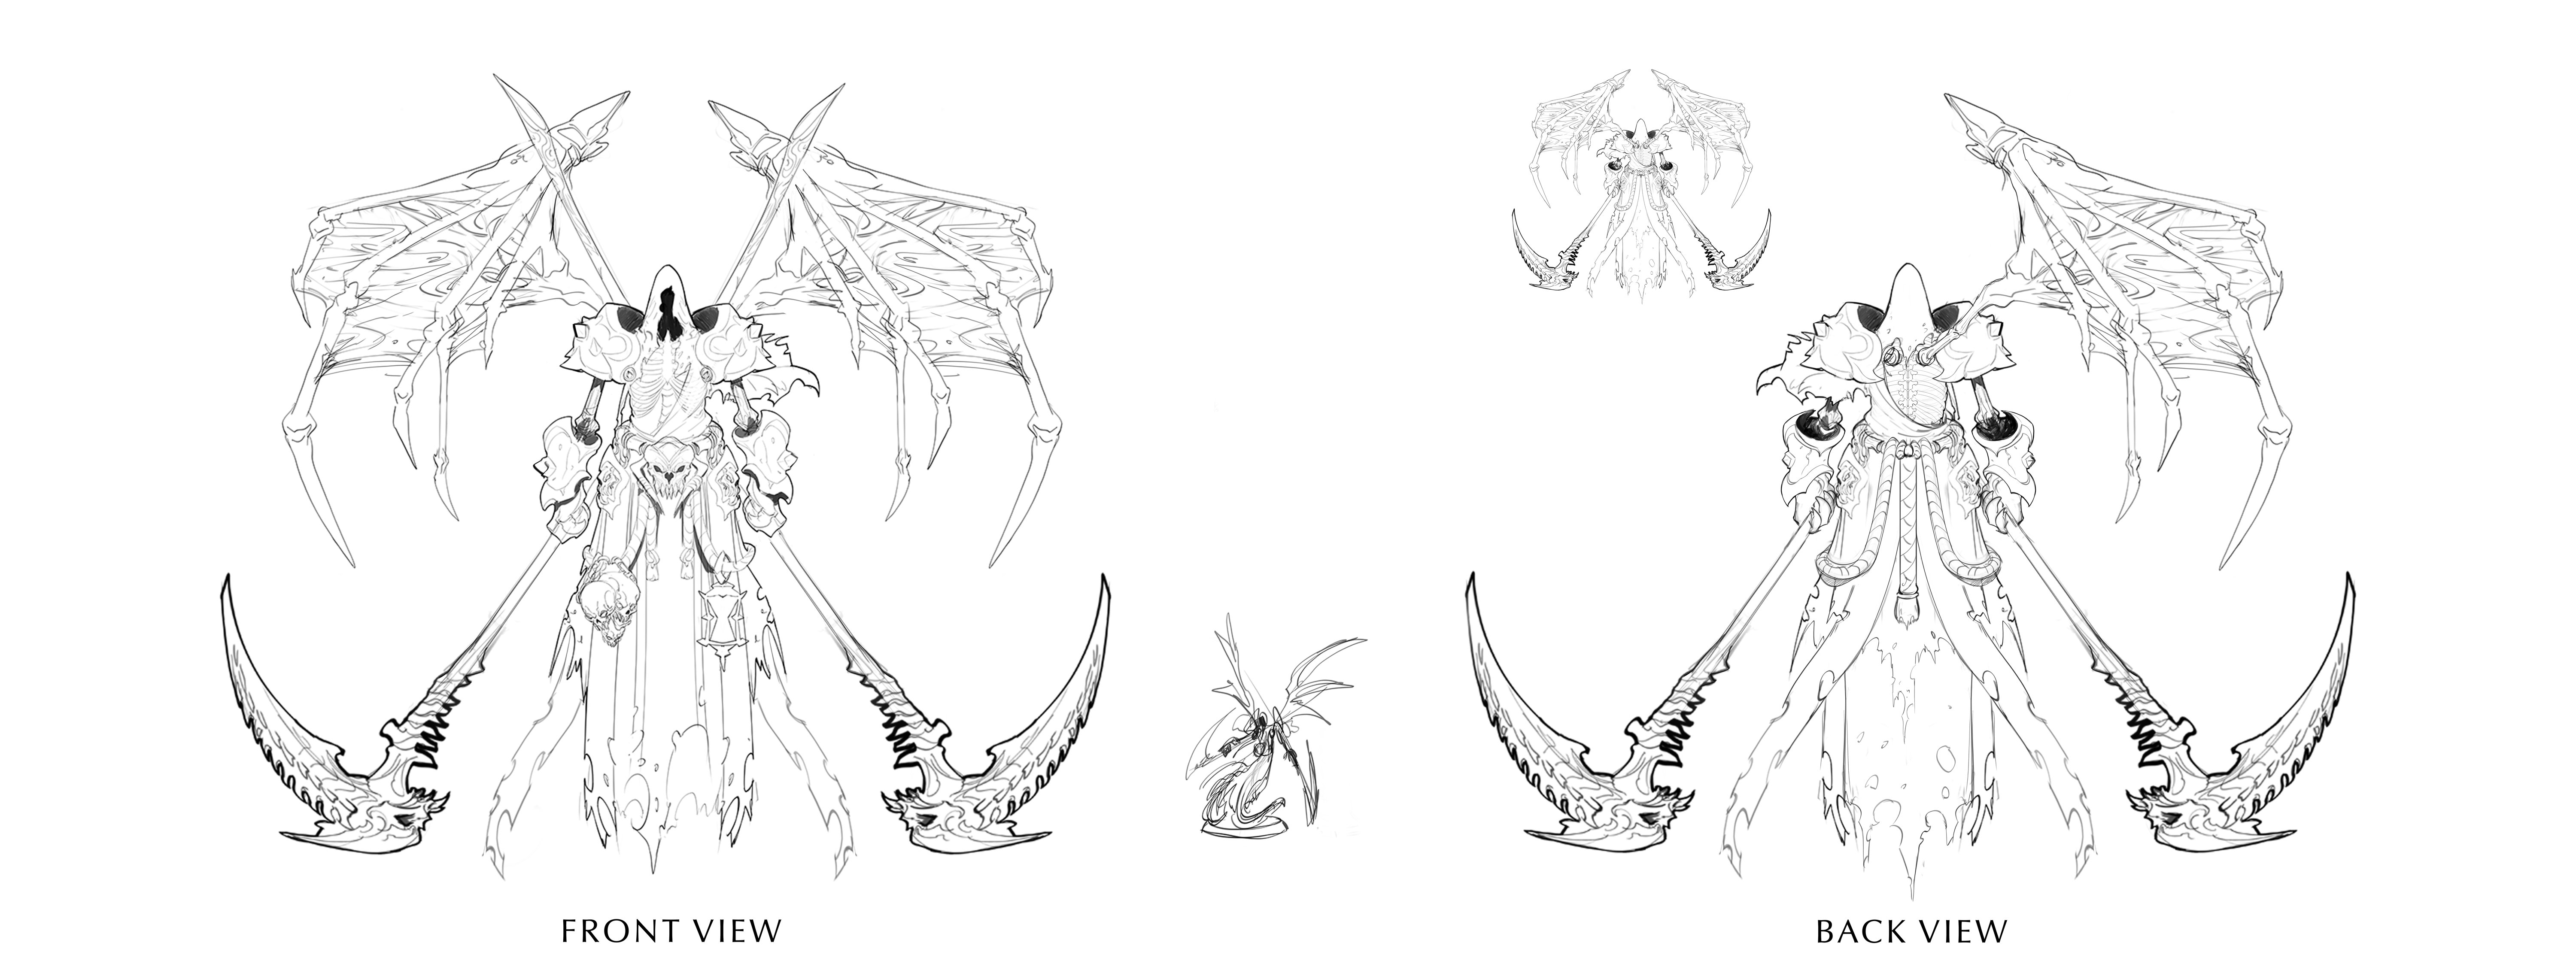
The revision was really close but needed a few adjustments to bring it home.
– Add another finger on the wings on either side, closest to the body, so there’s more material there for production. The wings also need to be bulked up.
– Add cloth below the shoulder pads to cover the bones. The bone isn’t going to be very production friendly.
– Lengthen the skirting to match the pose concept.
– The central rope on the back view (waist) needs adjustment and we want to add another rope; smooth them out (no knots) and add a strip of cloth.
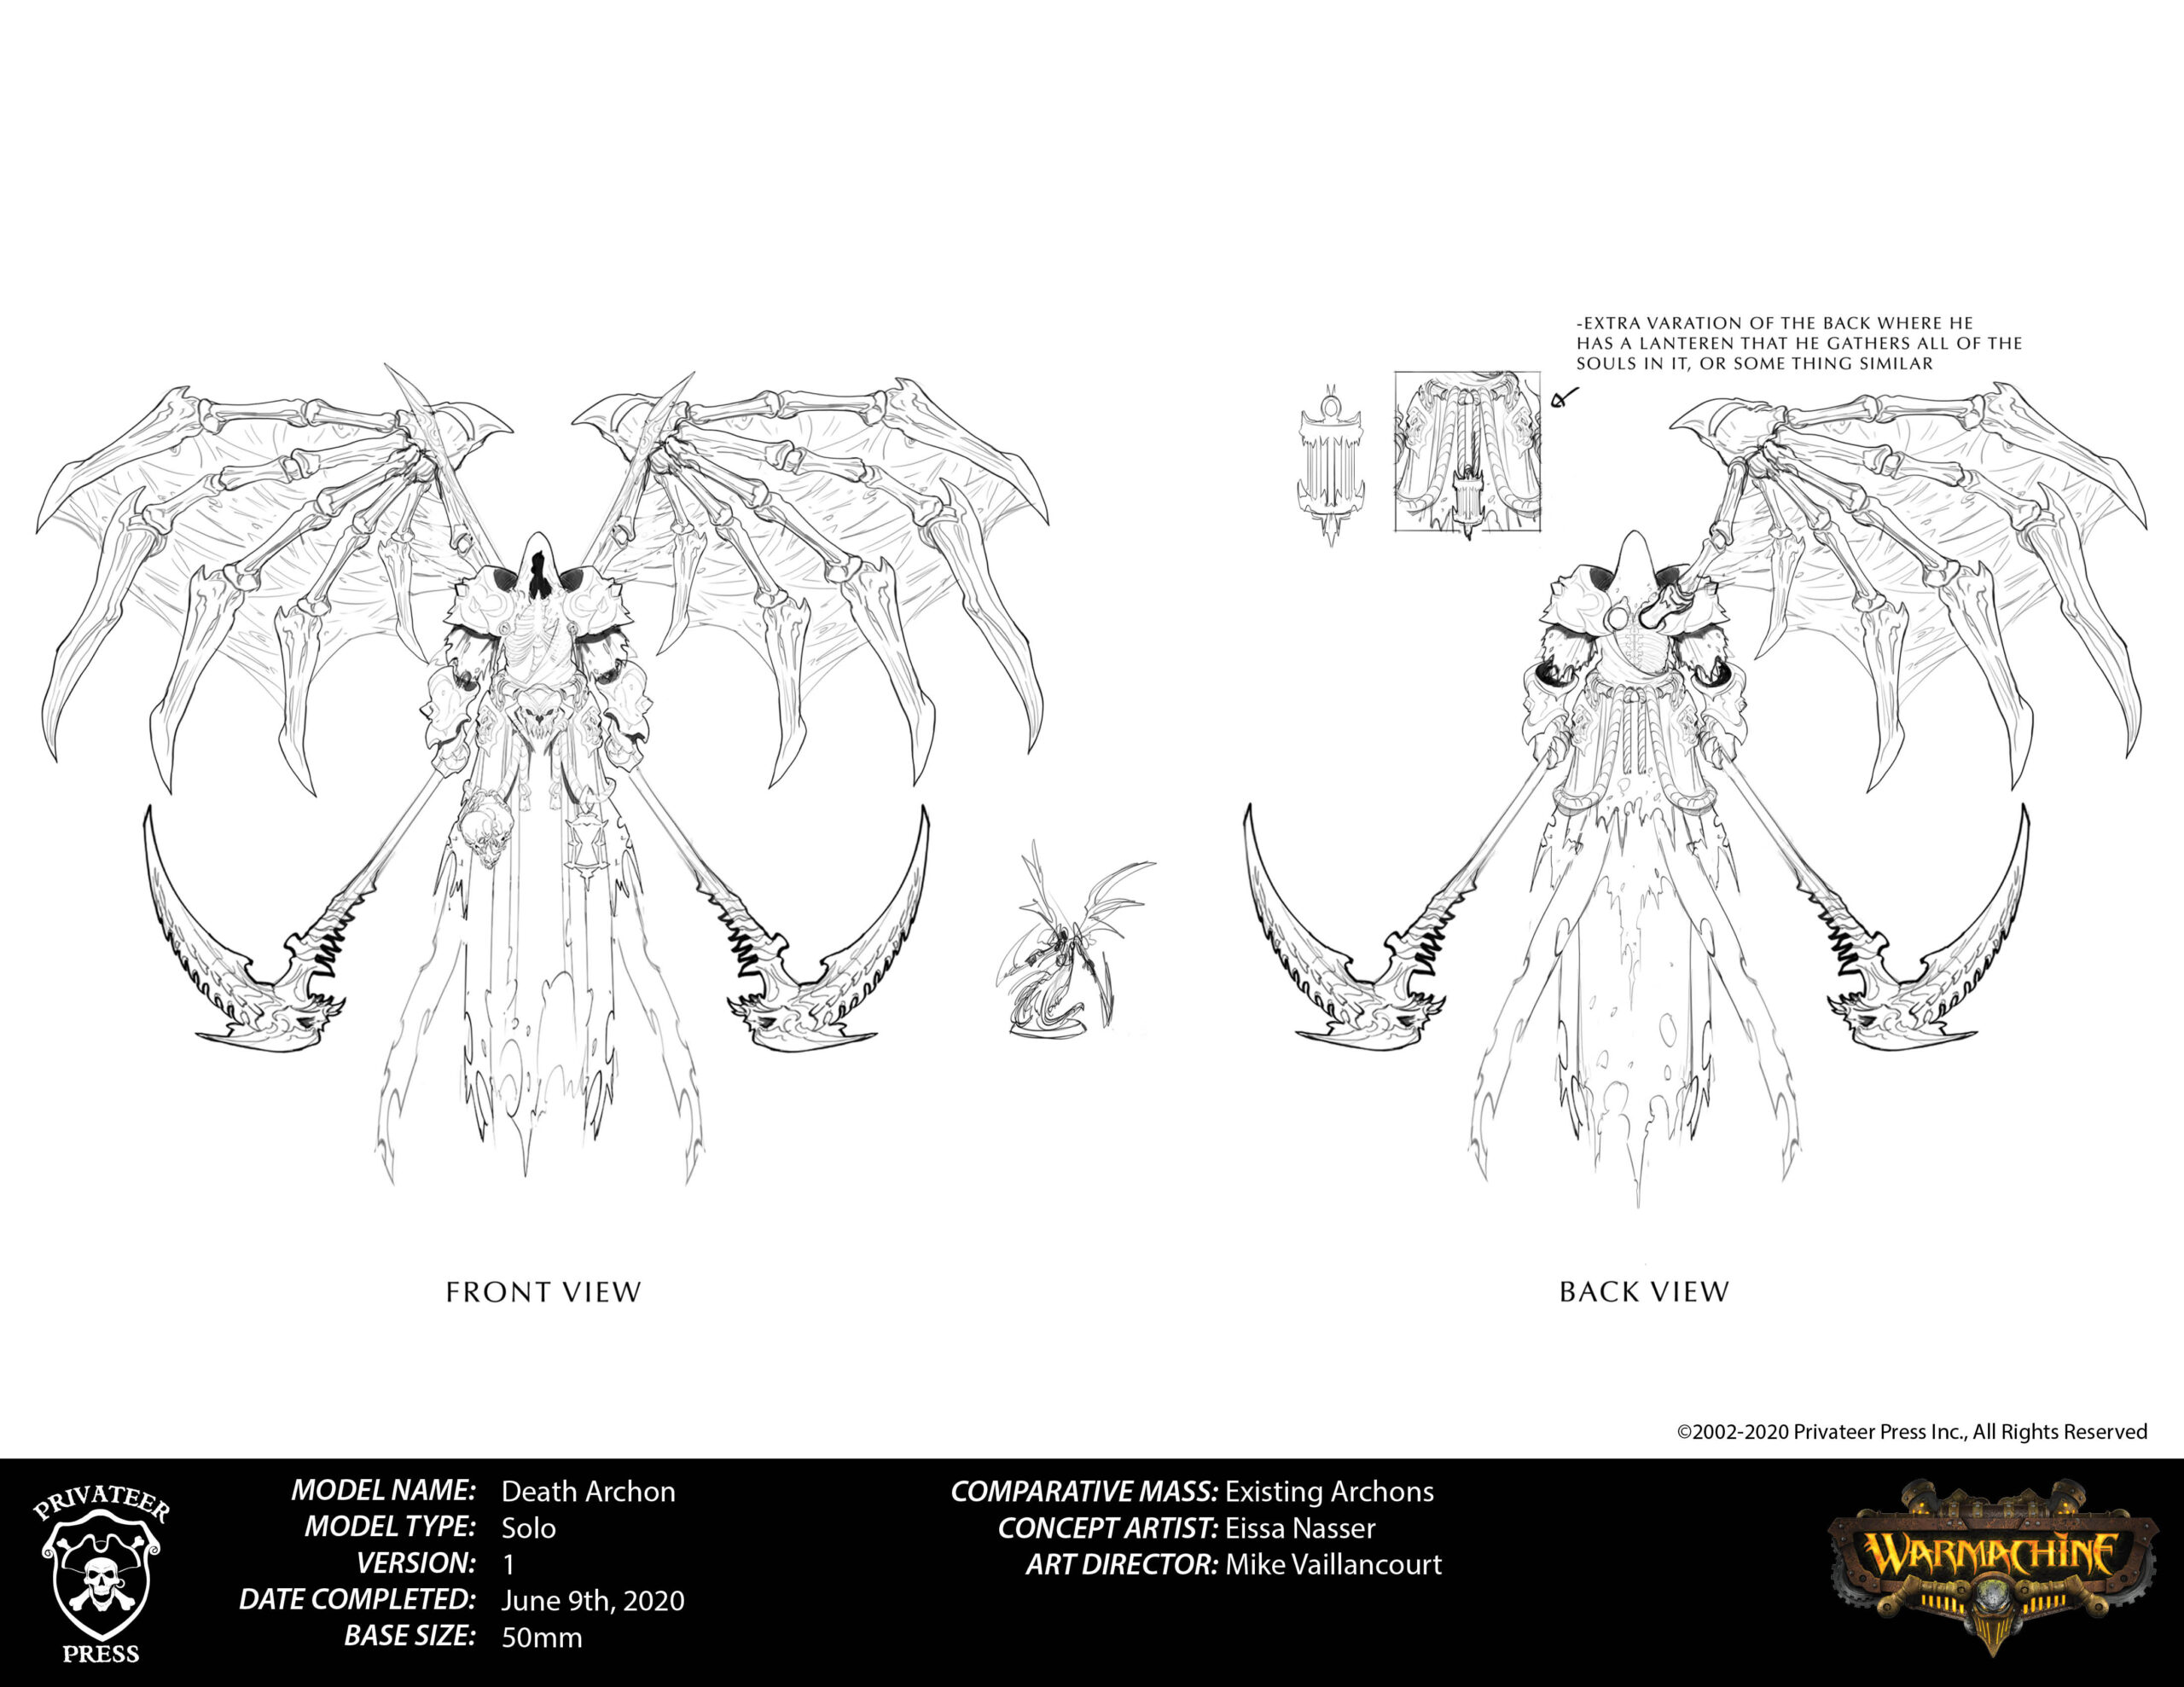
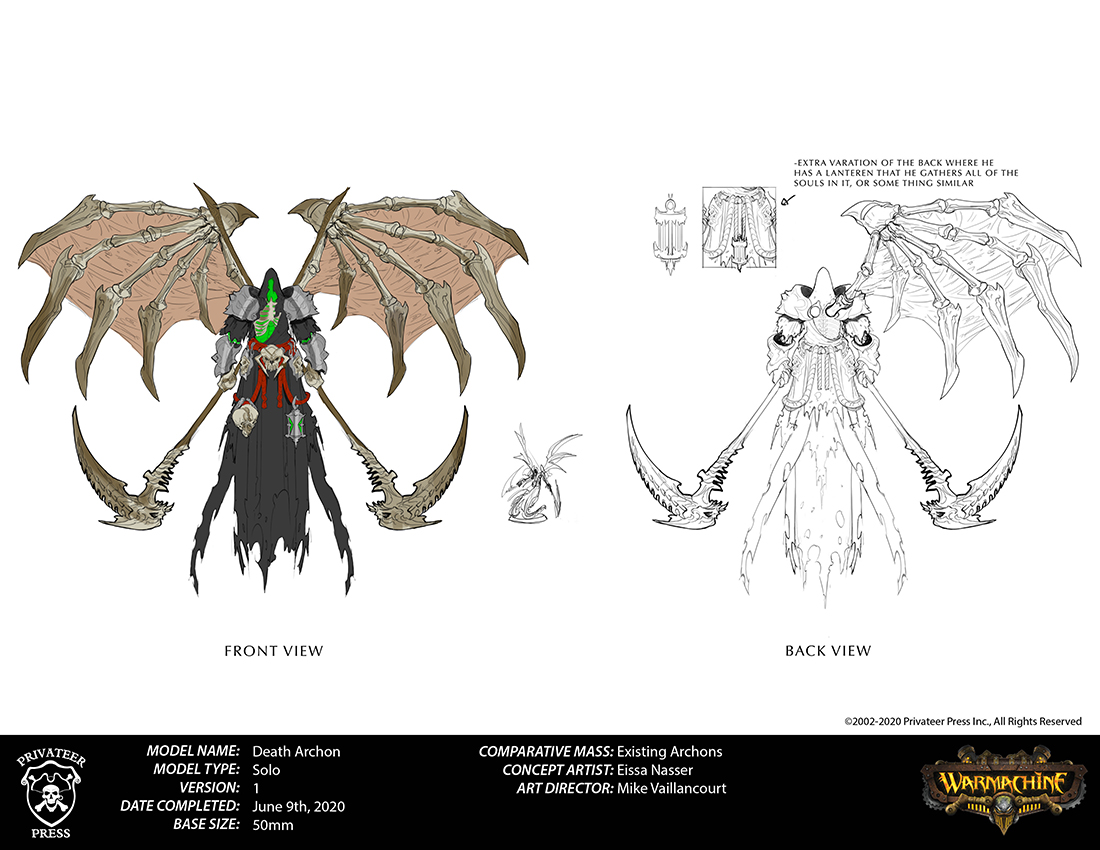
And with those notes addressed, we had a final concept! I worked up the rough color palette and uploaded everything for Studio Director Ron Kruzie to pass off to a sculptor!
I hope that you’ve enjoyed this behind-the-scenes look at the development of the Death Archon. It was a little trickier than I expected to get it all nailed down, but I think that the final design made the extra effort well worth it! The figure is available now on our webstore and at your local retailers, so pick up your copy today! I’m looking forward to seeing these fielded on the table in the near future, and I’m hoping that we’ll all be returning to a closer to normal gaming life later this year. Until that day, get those armies assembled and painted!