by Jason Soles
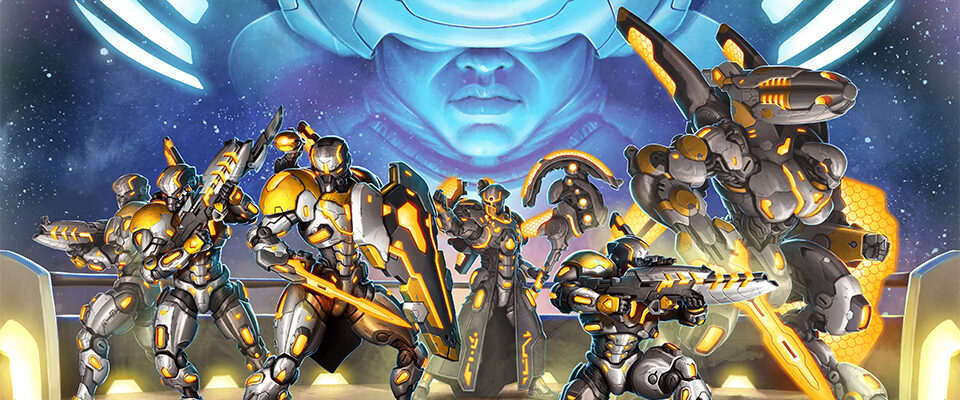
In the first part of this Insider, I examined the background, structure, and traditions of the Iron Star Alliance. In the second part, I provided an overview of the Faction’s unit offerings and tried to give some idea of how the development of those models was informed by the background described in Part I. I am now ready to pull it all together and discuss the tactics and strategies behind the Alliance, beginning with force construction.
![]()
When sitting down to build a force, it is generally a good idea to begin with a basic plan of attack. The Alliance possesses solid squads, formidable warjacks, and potent Cyphers. But for me, above all, the area where the Faction excels is in combined arms. Its melee game is every bit as strong as its ranged game, a boast that not every Faction can make. While it may be a little more difficult to deliver melee attacks to your opponent’s models than it is to get them in range of your guns, after the first couple of turns, once your forces have made inroads up the tabletop, reaching the enemy should not be much of a concern.
Melee combat can also carry something of a psychological edge if your opponent has not considered how to deal with it. A force built exclusively for the ranged game can get outclassed quickly when you bear down on it with melee fighters and begin to tie up their gunlines, especially if you can keep your forces in cover at the same time to blunt the effectiveness of your opponent’s ranged reprisals. When playing with melee combatants, positioning always matters.
While you consider your plan of attack, keep in mind that this is Warcaster, and it is unpredictable! Warcaster defies traditional rules of tabletop wargames; models can be recalled while new threats can suddenly be deployed. Cyphers can act as “get out of jail free” cards, frustrating your opponent’s most carefully laid plans. So, while starting with a basic plan is advisable when you are building your force, once the game starts, try to remain as flexible as possible rather than rigidly adhering to a preconceived notion of how the game will play out. No plan survives contact with the enemy, but the Iron Star Alliance is prepared for almost anything.
With that last caveat in place, I think it is worth mentioning that even when I plan to build a more melee-focused force, I do not neglect my ranged firepower. In Warcaster, you do so at your own peril. The game just moves too fast to put all your eggs in one basket.
When building a force, regardless of which Faction I am playing, I tend to divide the force loosely into three nearly equal parts: squads, warjacks and vehicles, and solos. And by “nearly equal parts,” I mean that of my fifteen unit options when playing a primary mission, I tend to dedicate five of those options to each of these categories. Squads are required for scoring victory points in most scenarios and thus cannot be neglected. Warjacks and vehicles represent your real offensive firepower and get the work done. And because solos account for at least half your potential activations in a given game, you will need a good number of them. Five standard solos plus your allotment of Hero solos will generally do the trick.
I begin by selecting my squads. It can be a little tougher to select squads for the Alliance than it is for other Factions, as all three of the Alliance’s squads have well-defined capabilities and roles on the tabletop.
The Paladin Annihilators provide an incredible amount of ranged firepower, especially if you plan to support them with your Cyphers. Reiteration Complex, which grants a squad an additional ranged attack, is a powerful force multiplier when it is played on a charged squad packing strafe weapons. That kind of firepower can reliably shoot even heavier warjacks off the table. In most of my lists, I take at least two squads of them.
Assuming I am not straying from the formula described above, after adding two squads of Paladin Annihilators to my force, I will have three squad slots remaining to divide between Paladin Defenders and Paladin Enforcers. I value these squads equally and always take both in my forces. If I am planning to try and engage my opponent’s forces in melee and lock them down, I will take two squads of Defenders and a single squad of Enforcers. If I anticipate more of a ranged game, such as when I play against a force with a lot of flying models in it, I will likely go with two squads of Enforcers and one squad of Defenders.
For squad models, the Defenders are some of the best melee fighters in the game and their melee range can be truly oppressive if your opponent is not prepared for them. They also have a spectacular ARM for squad models, and getting them into cover or playing a defensive Cypher on them will make them all the harder for your opponent to remove from the table. It is worth saying that while I can sometimes surprise an opponent by spiking to use Intercept Driver to protect a high-value model from an attack, such as to protect a vulnerable Hero or to keep control of an objective, in practice I find this ability a little hard to utilize effectively, and so I do not tend to focus on this capability during play.
While the Paladin Enforcers seem fairly straightforward on paper with their assault rifle and bayonet combination, their ability to attack with both weapons while charged can be truly effective in the right circumstances. I like to use the bayonets to clear enemy models around objectives and use the rifles for either cleaning up any survivors or to shoot targets of opportunity out of range of the melee battles. The Paladin Enforcers also tend to respond well to any Cyphers that add additional attacks or otherwise enhance the effectiveness of their onslaught.
With a good number of squads in your force, it is also worth thinking about how you intend to support them on the tabletop. I referenced some Cypher support above, and the Alliance really has some great options for Geometrics, which I will dig into deeper below. I also make sure to take at least one Paladin Commander solo to remove activation tokens from my squads. The most obvious support piece for the Paladin squads, however, is the Paladin Aegis attachment. While I only add an Aegis about half the time that I deploy my squads, I make sure to have enough models to cover all of my squads just in case. Not only does the Aegis grant its squad cover while charged, but it also gives its squad a convenient method of clearing Arc by spiking to slam a target hit by the Aegis’ force generator ranged weapon.
After deciding on the squads for my force, I usually turn my attention to warjacks and vehicles. Typically, I will take two of each warjack and a single Interceptor. But if I want a truly fast force to scream across the table, I will drop a Morningstar and take Duchess instead. Despite being a Hero and thus subject to removal from the game at the time of her destruction, Duchess’ high DEF and RAT are a force to be reckoned with.
When it comes to my warjacks, I tend to equip each chassis the same way no matter how many make it into my force. So, if I take two Firebrands, they will be equipped identically to reduce my cognitive load during play. It is a tactic I adopted during playtest when none of my models actually resembled the warjacks they were representing anyway, and so I found keeping my options streamlined sped up play. And not having to remember the differences in my warjacks’ armament meant I could focus on the game more easily, freed up from constantly having to refresh my memory as to the capabilities of each given warjack in my force. Your mileage (and cognitive capacity) may vary.
I tend to value Firebrands over Morningstars simply because their lower Deployment Costs means they are easier to get onto the table. Focusing on lower Deployment Cost models makes my force less vulnerable to the likes of Ranger Fire Teams knocking Arc off my void gates with Null Detonators. That said, the raw offensive power of the Morningstar is hard to overlook, and I will always include at least one in my forces. And if I take more than one, I make sure I have the Cyphers in my deck to support it to make sure I get the most from this potent warjack.
My go-to cortex for the Firebrand is the Reflex cortex, which enables the warjack to move up to 3˝ each time it is targeted by an attack. This ability adds a great deal of tactical flexibility to the model, enabling it to close with an enemy model to bring them into range of an attack, to move into the vicinity of an objective, or to move the warjack into a position of improved security, such as into cover or out of range of the next enemy salvo. I also find the ’Jack Hunter cortex to be compelling. A fully charged warjack with such a cortex should have little trouble blasting the opposition from the tabletop
When it comes to armament, I tend to focus on the offensive capabilities of my warjacks. Sure, a shield is nice for the added ARM, but personally I prefer to risk the staying power of higher ARM to take more guns, even if it means redeploying my ‘jacks more often as they fall in combat. If I am focusing on the melee aspects of my force, I will equip my Firebrands with a Fusion Glaive, an Assault Rifle & Bayonet, and Harbinger Cannon or Maelstrom. While it is not very flashy on paper, the Firebrand’s Force Projector really makes the Bayonet option sing and adds a second melee attack to the warjack while maintaining its ranged capabilities. If I am looking for more range-focused machines, I will arm my Firebrands with Immolators and some combination of the Assault Rifle & Bayonet, Force Hammer, Grenade Launcher, and, rarely, the Repulsor Shield.
I tend to value the Immolator’s long range and fire continuous effect over the Null Cannon’s Arc clearance. That said, the Null Cannons high POW coupled with the Null Strike special rule make the Null Cannon one of the best weapons in the game for knocking out void gates.
And while some players swear by the Sun Piercer, I tend to avoid weapons with the High Intensity special rule because I find the Arc investment required to make those weapons operate at peak efficiency is just too high for my tastes. Of course, I will admit that the sheer firepower of a fully charged warjack opening up with six Power Dice on each attack can also make for a solid counterpoint to my personal preferences.
If the Firebrand is the Alliance’s (slightly) more melee-focused warjack, the Morningstar is the Faction’s dedicated range-focused warjack. Between its ability to extend the RNG of its ranged weapons by 1 for each Arc it is charged with and the Impulse Reciprocator, which enables it to spike to make an attack any time it is targeted and hit by an enemy attack, the Morningstar is an ideal ranged weapon platform.
I usually give my Morningstars the Exchanger cortex, which has the Arc Exchange special rule that enables you to charge it with 1 Arc at the start of its activation if it is not already charged. Potentially even more beneficial, the cortex also enables you to clear any amount of Arc from the warjack at the end of its activation, providing an easy method of freeing up a significant amount of Arc.
Despite my comments on the Morningstar as a range-focused warjack, the Dauntless cortex can give the machine new life as a combined arms fighter. The Dauntless cortex itself enables the warjack to move up to 2˝ each time it hits an enemy with a melee attack. Being a heavier warjack, it has four Hard Points, including two on its arms, ideal for potent and relatively inexpensive melee weapons that will leave plenty of Weapon Points for powerful ranged weapons. The theory goes that giving the warjack a couple melee attacks can greatly enhance its maneuverability, allowing it to close with the enemy or an objective or to scoot to the safety of cover. I particularly like to use this added maneuverability to bring new targets into the range of my guns.
Regardless of which cortex I go with, I typically focus on heavier ranged weapons for my Morningstars. As with the Firebrand, I usually lean into the Immolator for a primary weapon backed by either a Harbinger Cannon (should I decide to also give it a Heavy Glaive) or a second Immolator, if the points work out. I then round out the shoulder-mounted weaponry with a couple of less-expensive weapons drawn from a combination of the Assault Rifle & Bayonet, Assault Shield, Force Hammer, Grenade Launcher, and Seeker. If I equipped the Morningstar with a Dauntless cortex, I will generally lean more heavily into the melee weapon options.
While I see its unquestionable utility of the Gate Crasher weapon, it does not jibe well with my aggression-first play style. I just always feel a little too Arc-starved to get much use of it, and I can typically get enough void gates out to suit my needs using my squads and solos. That said, the Gate Crasher is an undeniably and singularly powerful tool in the Alliance’s arsenal. Use it to build up your strength early and maintain it throughout the battle.
As I mentioned above, I typically include an Interceptor in my Alliance forces. The swift-moving vehicle exemplifies the Alliance’s reliance on dedicated weapons of war. Not only can the high-performance machine spike to play two maneuvers in a single turn, but its high DEF (4), coupled with its ability to move up to 3˝ each time it is missed by an enemy attack while it is charged, can make for a target so hard to hit that your opponent may choose to forgo attacking it altogether. And if your opponent does choose to open fire, there is some chance that the Interceptor can simply reposition itself out the range of subsequent attacks.

I usually arm my Interceptors with either Immolators or Force Cannons. Setting fire to a target with an Immolator conveys a –1 RAT and MAT penalty that plays right into the vehicle’s high DEF. And the Interceptor’s great SPD makes lining up attacks that can get the most out of the Force Cannon’s slam easy.
That brings me to the solos in the army. I always take at least two Paladin Weavers to make sure I can cover most of the table with Fury vectors of attack. While I sometimes take three, two feels like the sweet spot for the Alliance. I try and plan out my Weaver activations to make the most of their Realignment Codex special rule to move my Arc around to where it is the most useful.
I will then round out the force with a combination of Paladin Commanders and Paladin Siegebreakers. The Paladin Commanders are great for keeping squads free of activation tokens, but keeping them charged for this task can be difficult if you have a lot of Arc-needy warjacks in play. For this reason, I usually take just the one.
The Siegebreaker itself is an incredibly hardy model that your opponent may choose to ignore if they cannot focus sufficient resources on it to remove the model from the table. It can also put out a surprisingly high volume of attacks between its Castigator Missiles, strafing Radliffe V9 cannon, and Fusion Sword. It is a great model to use to move on objectives held by your opponent. Not only does its high volume of attacks generally ensure some enemy models will be cleared, but even if it misses with its Castigator Missiles, the weapon’s Blast effect likely means killing a softer target anyway.
That just leaves the selection of the force’s Hero solos. I always start with Justicar Voss. Between his daunting melee capabilities and defensiveness, he almost feels like he can hold a flank all by himself. Keep in mind, though, that while charged, Voss may feel invulnerable, but as soon as he spikes, your opponent will rightly train every gun in their arsenal on him. Deploy Voss in a position of safety, get him charged as early as possible, and only then move him into position.
In addition to Voss, I generally fill out my Heroes with Baron Cassius Mooregrave and Doctor Myra Hurst. Like Voss, Mooregrave is another melee-focused solo, which is not something the Alliance has a lot of. Mooregrave also has some defensive tech that cannot be overlooked, especially his Gorge special rule that says each time he destroys an enemy warrior model with his sword, Mooregrave heals a point of damage. He is another model ideal for targeting objectives held by your opponent’s squads. Your opponent suddenly having to dedicate units to deal with Mooregrave (or Voss) can force that opponent to draw models from other parts of the table, potentially disrupting carefully laid plans.
Doctor Mira Hurst has a broad range of capabilities, from ignoring Stealth to manipulating Arc on your units as well as your opponent’s units, but I am drawn to her because her presence on the table adds a card to my hand of Cyphers. Having extensively played with Hierotheos Raxis in our earliest playtests, this quickly became one of my favorite special rules in the game, and its impact can be scarcely overstated. If you are playing with a smaller deck, this can mean starting any given turn with half your deck actually in your hand.
While Voitek Sudal is loaded with dirty tricks and his very presence can disrupt your opponent’s plans, I tend to favor the more straightforward designs of Voss, Hurst, and Mooregrave. Those models have clear and simple roles on the table, and Sudal requires a little more finesse to work into a position of maximum impact on the game. Still, there is a powerful argument that while Voss and Mooregrave excel at destroying your opponent’s models, Sudal can keep them from even getting to the tabletop in the first place.
The last part of force construction is the selection of Cyphers. I always make sure to tailor my Cyphers to both the models in my force and the tactics I expect to employ. While I sometimes try to play with a trimmed-down deck of twelve cards that cycles through Cyphers quickly, there are so many great options I usually opt for all fifteen cards.
When designing an Alliance force, I usually start by selecting my Geometrics. Not only do the Alliance’s squads get a lot of use out of the general Geometrics shared by the Faction, but they also have some very compelling in-Faction options. For me, the must-haves include Displacement Index (enables each model in the squad to move up to 3˝) and Reiteration Complex (grants an extra ranged attack for each model in the squad). When I am playing any other Faction, Temporal Cycle, which removes an activation token from a squad, also makes this list, but access to the Paladin Commander makes this Cypher a little redundant. Instead, I fill out my Geometrics with some combination of Devotion Paradigm (an Alliance-only Geometric that returns one destroyed non-attachment model to the squad each turn), Divination Algorithm (which increases the RNG and POW of the squad’s ranged weapons by 1), and Tachytelic Metamorphosis (another Alliance-only Geometric that gives squad models +2 RAT, +2 MAT, and +2 DEF).
If I am playing with a lot of Paladin Defenders, I will also consider Discordian Agitator (grants an extra melee attack for each model in the squad) and Plexus Densifier (which grants each model in the quad +2 ARM at the cost of –1 SPD). With an innate ARM of 4, that +2 makes them feel nigh invulnerable.
If you want some real fun, though, put Divination Algorithm on a squad of Annihilators and watch them sing. Bonus points if you have a Paladin Commander nearby to remove the squad’s activation token so they can open fire again in the next turn. Such tactics will draw both your opponent’s ire and firepower.
For Furies, I generally go with Null Collider (which clears Arc from the target in addition to dealing damage), Pyrokinetic Surge (causes the fire continuous effect), and Velocity Projector (slams the target). If I am feeling awake enough to make use it, I may also include Psychonomic Lash (which forces your opponent to reveal their hand of Cyphers to you in addition to dealing damage). In practice though I have enough trouble keeping what is in my own hand without trying to track my opponent’s. While I seldom take Cryo Lock (target unit gains an activation token) because it does not deal damage, I always regret its absence.
Though there are some very compelling squad support options, when choosing Overdrives, I tend to pick cards that focus on my warjacks’ combat capabilities. This is because I want to send my ’jacks where they can inflict the most damage on my opponent rather than using them to support my squads. My must-have hit list includes: Ascension Catalyst (which grants the warjacks +2 SPD and flight), Devastation Optimizer (which gives the warjack gains Tune Up continuous effect), and Impulse Inducer (which removes activation token from a warjack).
Ascension Catalyst is my favorite “get out of jail free” card. That extra SPD coupled with flight’s ability to move through models can be an incredibly potent combination.
If you intend to play warjack heavy, Impulse Inducer is a godsend. There is noting like back-to-back activations to get the most out of a Morningstar.
I then round out my Cyphers with Harmonics. My absolute go-to Harmonics are Aggression Theorem (which allows the target to make one melee or ranged attack) and Arcane Synthesis (which enables you charge a unit with up to its limit of Arc).
Aggression Theorem is a tactically invaluable card that can singlehandedly salvage whole turns if the dice gods are not with you. Whether you miss with the Big Attack or manage to leave your target alive with one health left, Aggression Theorem gives you one more chance.
And Arcane Synthesis is nearly as valuable a card for getting the most out of your warjacks as Impulse Inducer.
I tend to round out my Harmonics with some combination of Psychodynamic Infuser (which removes an activation token form a vehicle), Dominion Imperative (which enables all your solos in play to move up to 2˝), and Eschatonic Well. That last one is worth a little more conversation. It is a one-use card that gets discarded after playing it, but it puts a void gate into play with up to 3 Arc on it. While I tend to eschew Gate Crashers as warjack weapons, I love this card because I feel like my opponent never sees it coming.
I would like to finish up with a few thoughts on the first turn of the game. I like to start the game with a single squad, vehicle, or warjack and a solo in play. This combination always gives me a warrior model to place my first void gate and makes sure all my activation tokens will be removed at the start of my second turn. Whether I choose a warjack, vehicle, or squad will be determined by the scenario being played. For my solo option, I generally start with Doctor Mira Hurst to get that extra Cypher card in my hand as early as possible.
Thanks for reading! Next up will be an overview of the Marcher Worlds coming in a couple weeks.