
by Charles Foster III
Back I go to the painting desk to continue with the Riot Quest minis line. In today’s Insider, I’ll be painting up Destructotron 3000 in an alternate scheme. And in this case, I’ve decided to add a challenge for myself: every so often, I look over at a finished model from years ago and think, Hmmm. I bet I could paint that way better now. After years of painting, practicing, and learning new skills, I want to test myself, and see for myself: could I really do better? Back at Warfaire Weekend 2021, I had a community member surprise me by showing me a Transfinite Emergence Projector I had painted up around 2015. Take a look:
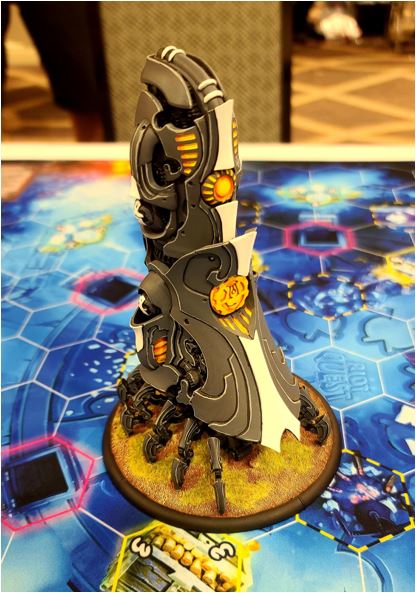
My goal will be to replicate the color scheme but improve on how I painted it—to try to take it up a level. I’m excited to see if I can pull it off and how this will turn out. So, here we go: Better or Bust.
Colors Used
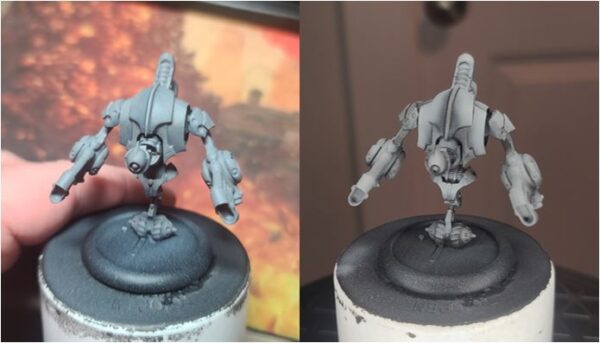
Preparation
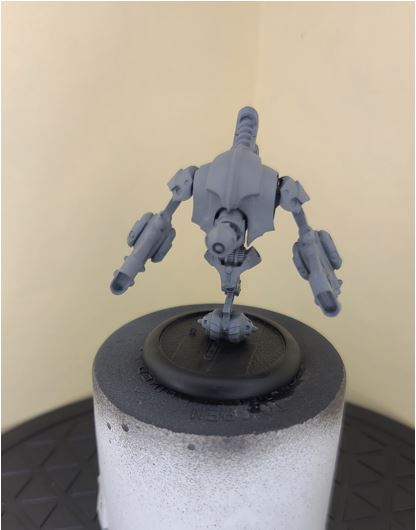
Step 1) I start off with a nice light coating of black primer.
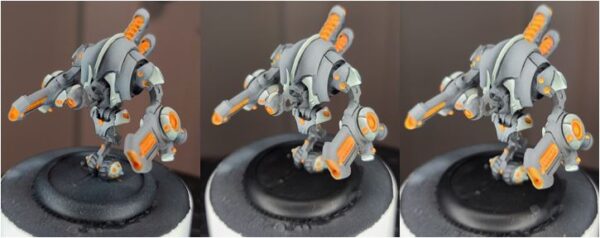
Step 2) For this model, I’m going to go ahead and airbrush on a solid layer of Ironhull Grey. No worries if you don’t have an airbrush; hand-painting this layer will work just as well.
Grey Plate Armor
Step 1) I start by shading the Ironhull Grey with a little Greatcoat Grey.
Step 2) For the darkest areas, I do a 50/50 mix of Greatcoat Grey with Thamar Black.
Step 3) Using Thamar Black, I blackline any of the areas where one plate meets another.
White Plate Armor

Step 1) Basecoat the area using a three-part mixture in equal parts of Menoth White Base, Underbelly Blue, and Trollblood Highlight.
Step 2) Shade this layer by using a 50/50 mixture of Bastion Grey and Trollblood Base.
Step 3) For the first layer of highlight, mix Underbelly Blue with Menoth White Base and apply a nice thin highlight.
Step 4) For the second layer of highlights, use Menoth White Highlight, focusing on the higher edges of the model.
Step 5) For that final highlight, use Morrow White and focus only on the hard edges to really make the white stand out.
Orange Glow
Step 1) Lay down a basecoat using Khador Red Highlight. Be patient—use thin layers, and do two or three coats to ensure a nice even coverage.
Step 2) Highlight the previous layer using Ember Orange. I make sure to leave areas of the Khador Red Highlight still showing through.
Step 3) To really bring the orange glow up to the level I’m looking for, I add a final highlight using Heartfire.
Black Gears and Accent Areas
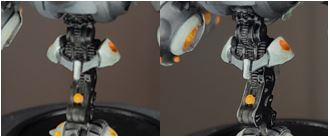
Step 1) I noticed that there were several areas on the Transfinite Emergence Projector that had black gears and accents. I definitely need to incorporate some of that to match the previous paint scheme, so I pick some places, mostly the gears, and black them back out using Thamar Black.
Step 2) To highlight these areas, I use a simple hard-edge highlight of Ironhull Grey.
Basing
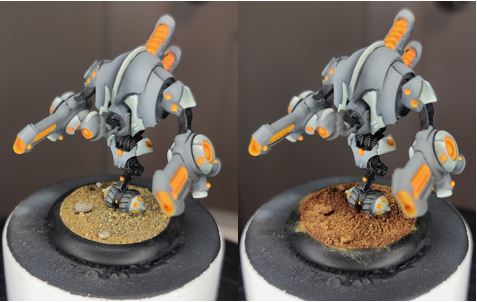
Step 1) Add in sand and ballast with Elmer’s white glue and let it dry completely.
Step 2) Water down a bit of Bloodstone and apply across the base material to let it soak in.
Step 3) Once it’s dry, I drybrush on a little bit of Rucksack Tan.
Step 4) I drybrush on one final highlight of Menoth White Base.
Step 5) Glue on some static grass.
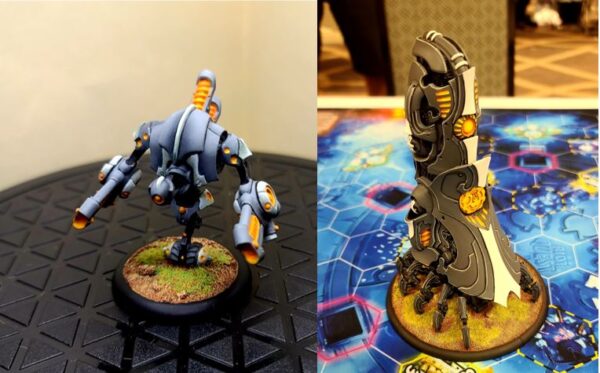
I wish I were able to put the models side by side and do a comparison, but the image from Warfaire Weekend will have to do for now! Let me know in the Facebook comments or on Twitter which one you like better, the original or the new one? Next time, I will take on Feora the Forsaken and ask the eternal question: does it always have to be a Lich King or can it be a Lich Queen?