by Charles Foster III
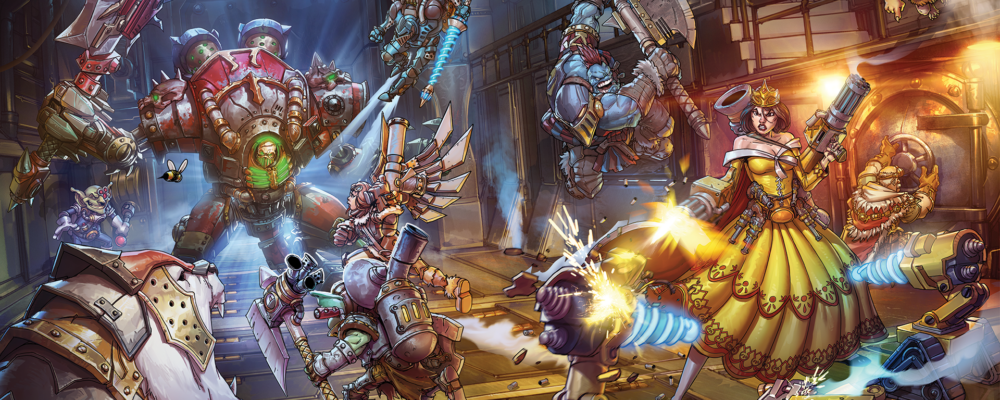
We’re back from the Las Vegas Open, which means I’m super-excited to paint models again, and I promised when I last left off that we would be diving into Bumbles! Thankfully, during the flight out for the convention, I caught a bit of inspiration. While flipping through the movie choices to watch on the plane, I noticed they had the 2007 movie The Golden Compass. Right there on the cover art were two bears, fighting it out, one in golden brass armor and one in silver. I pulled out a quarter and with a heads-or-tails flip decided to go with the golden brass look.
Colors Used

Setup

Nothing fancy for this one, just some good old-fashioned black primer.
Bear Fur
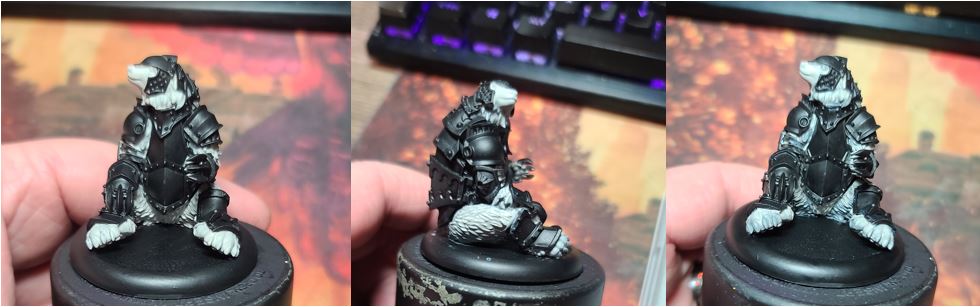
Step 1) I start by laying down a solid basecoat with a 50/50 mix of Trollblood Highlight and Menoth White Highlight.
Step 2) I want to shift the colors to be a little blue in the shade on the fur, as we’re going to go with red/brown shading on the armor later, so I use a grey with high blue content. I shade the model with Ironhull Grey.
Step 3) For highlighting, I use a mix of 75/25 Menoth White Highlight and Trollblood Highlight for the higher areas.
Step 4) As I make my way down to the lower areas with the highest shading, I use the same mixture from the previous step but add a drop of Trollblood Highlight.
Step 5) For the highest areas, I use Menoth White Highlight straight from the pot and put a few hard-edge highlights on the raised fur strands.
Gold Armor

Step 1) Lay down a solid basecoat using multiple layers of Rhulic Gold.
Step 2) To create a complementary shade, I mix Brown Ink, Yellow Ink, and Rhulic Gold in a 3:1:1 ratio. Shade your yellow metals with this color.
Step 3) To really make the armor stand out, I add a final layer of shading using a mixture of Umbral Umber, Sanguine Base, and a small amount of Brown Ink in a 1:1:1 ratio for the mixture. Apply this color to the deepest areas only.
Step 4) To highlight this color, use Solid Gold.
Step 5) After sealing the model with Dullcote, return for one final highlight using a 50/50 mixture of Solid Gold and Cold Steel.
Silver Metal Accents

Step 1) I decided to break up the brass just a little bit with the accent colors rivets and a few nuts in silver. First, I basecoat Pig Iron on any accent area I find.
Step 2) I shade with a healthy amount of Armor Wash, taking care not to get any on the gold plating we just did.
Step 3) Once the Armor Wash has dried, highlight the areas with some Cold Steel.
Step 4) After using Dullcote to seal the model, return to these areas for a hard-edge highlight of Quick Silver.
Leather Areas

Step 1) For Bumbles’ belt, I decided to go with a pretty standard leather color. Start by painting a solid basecoat of Bootstrap Leather.
Step 2) Next mix in a small amount of Brown Ink with the Bootstrap Leather to make a nice brown wash.
Step 3) To really define this color, take a little bit of Thamar Black and mix a few drops of Brown Ink in. I tried for a 1:3 ratio of Thamar Black: Brown Ink. Apply this as a final shade.
Step 4) Add a highlight by mixing a 1:1 ratio of Bootstrap Leather and Beast Hide.
Claws

Step 1) For the claws and nose, I decided that layering up from black is probably going to work best, and so I basecoat using Thamar Black.
Step 2) I mix Thamar Black with a little Coal Black in a 50/50 mixture and apply it as the first layer.
Step 3) I use Coal Black right out of the pot to apply as a layer over the top.
Step 4) I make a final highlight with a 50/50 mix of Coal Black and Menoth White Base.
Toe Beans
Sadly, I couldn’t find any light or decent camera angles to cover this area. However, if you are interested in it, here is how I painted the paws.
Step 1) I start off by basecoating the area with Idrian Flesh.
Step 2) I mix Idrian Flesh with Carnal Pink in a 50/50 ratio to create the first layer.
Step 3) Next, I go over any raised areas in Carnal Pink.
Step 4) I finish these areas by adding Ryn Flesh with Carnal Pink in a 50/50 ratio for the highest points.
Basing

Step 1) Add in sand and ballast with Elmer’s white glue and let it dry completely.
Step 2) Water down a bit of Bloodstone and apply across the base material to let it soak in.
Step 3) Once it’s dry, I drybrush on a little bit of Rucksack Tan.
Step 4) I drybrush on one final highlight of Menoth White Base.
Step 5) Finally, glue on some static grass.

I can Bear-ly believe how it turned out! Six models are already completed, but I think we may need to speed things up, as we’re still quite a ways from the end of the line but already in February. And after all, I’d like to get them all painted before the end of the year. So, we’re gonna need to give it the beans. Join me next time for Destructotron 3000 and, if time permits, an additional bonus model!