
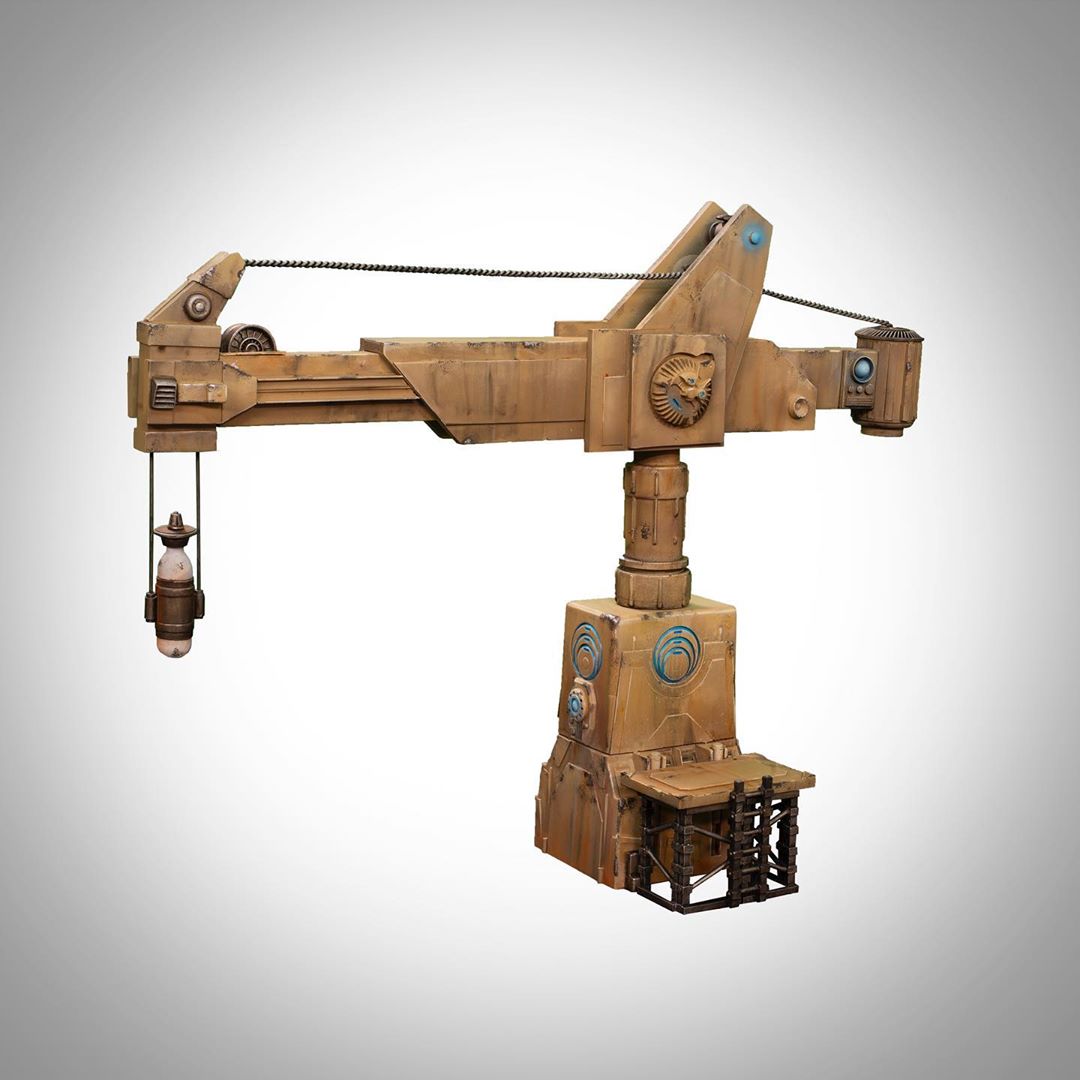
Hi, everyone! I’m still Michael, and today we’re going to finish building the bottom half of the Marcher Worlds Crane!
Wait, you don’t remember where we left off? Well, take a look at the last article! You can find it here:
Time to Gear Up!
We don’t need much in the way of supplies this time around; so, grab the following and we’ll get started!
- Evergreen Sheet Styrene, Item No. 9020, .020˝ Thick (0.5mm)
- ¼˝ Wooden Dowel Rods (or Styrene/ABS Equivalent)
- Googly Eyes
- Super Glue
- Styrene Glue
- Plastic Cement
- Hobby Knife
- Eye Protection
Extra Bonus Value-Add!
What’s that? We’re getting high-tech in here? Oh, yeah!
I’m very bad at scratch building with styrene; I have a difficult time duplicating parts. My copies always seem to come out slightly out of proportion, but you know what’s great at perfectly duplicating parts time and again? Cutting machines!
If you don’t already own one or know someone who does, you can always print the files and cut the parts by hand.
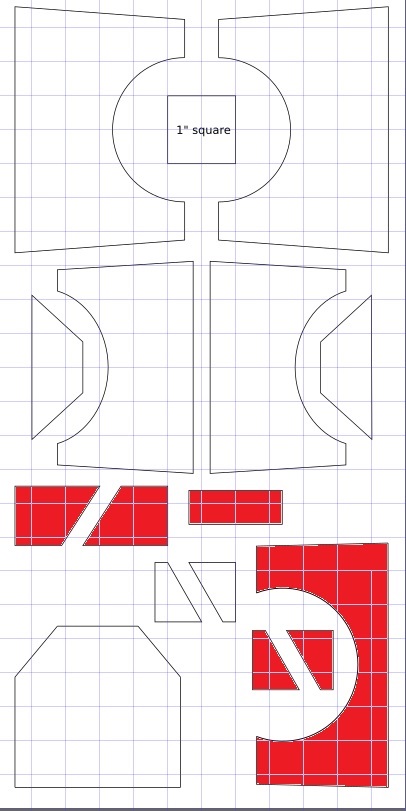
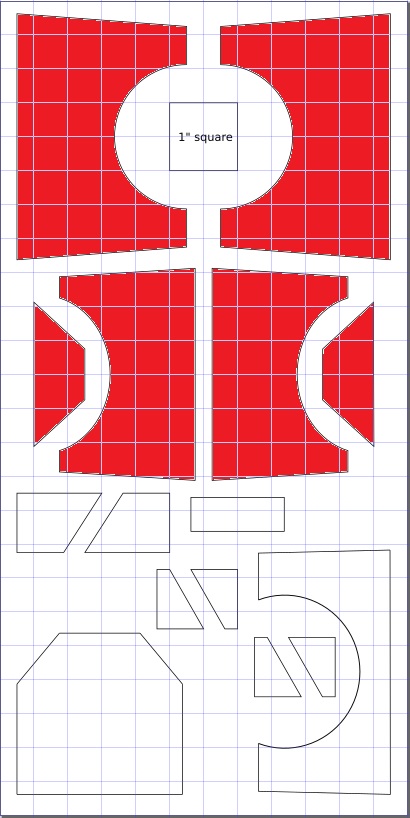
For those of you with cutting machines, here are the files:

![]()

Different machines have slightly different settings and behaviors, so you will probably need to modify the files as necessary for optimal results.
NOTE REGARDING SCALE: I tried to keep this simple. Scale the SVG file so the square marked “1 inch square” is one-inch square!
The Main Event
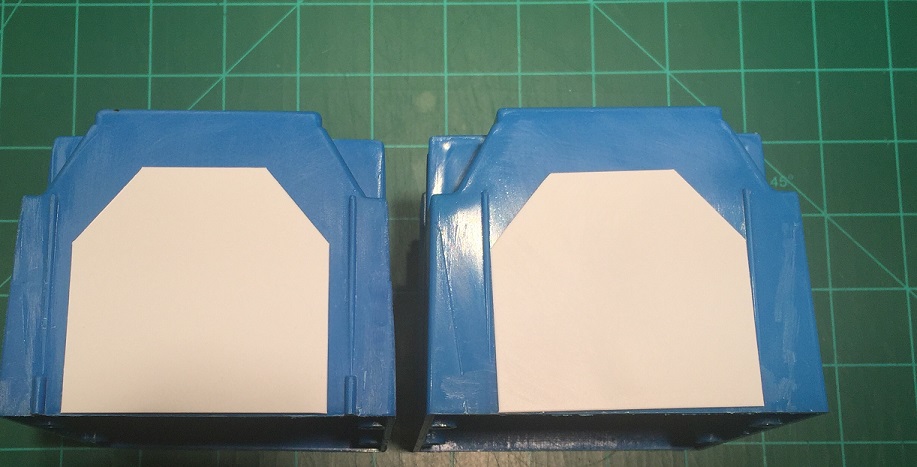
First, we’ll add styrene details to four faces of the crane: two on the bottom 2-gang box and two on the upper 1-gang box. The 2-gang box has asymmetrical details on opposite faces.
Let’s start with the side with the large semi-circular piece and the trapezoids. Cut out the following pieces from your styrene sheet:
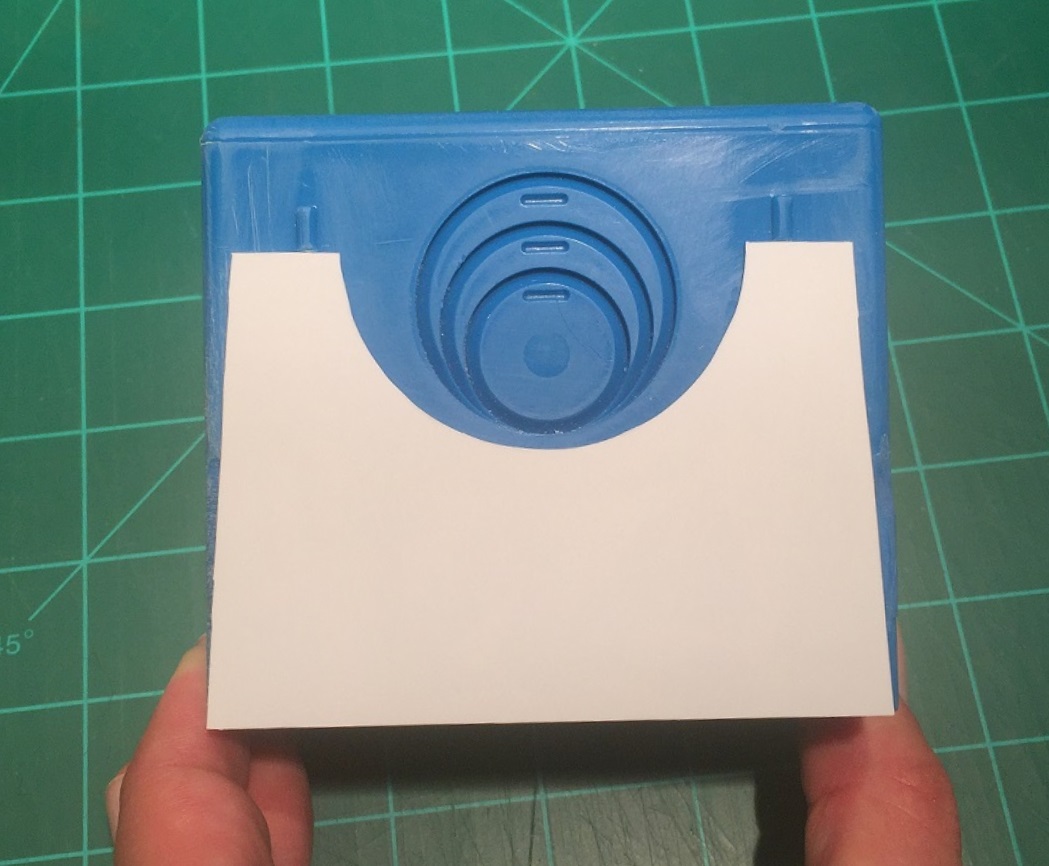
Here’s a screencap from Danny’s terrain stream showing where the pieces go (what with pictures being worth some number of words, after all)…
Glue the large semi-circular piece down first. The two larger right trapezoid pieces are glued to the bottom corners of the semi-circular piece.

The large rectangle is centered on the top, and the two smaller right trapezoids flank it as shown, lined up with the angles on the upper edge of the 2-gang box.

Grab two googly eyes of appropriate sizes and glue them in the center of the upper right trapezoids. One side down, three to go!

He knows when you’ve been sleeping…
Flip the 2-gang box to the other side and let’s work on the “door” panel detail.
Cut out the following pieces from your styrene:

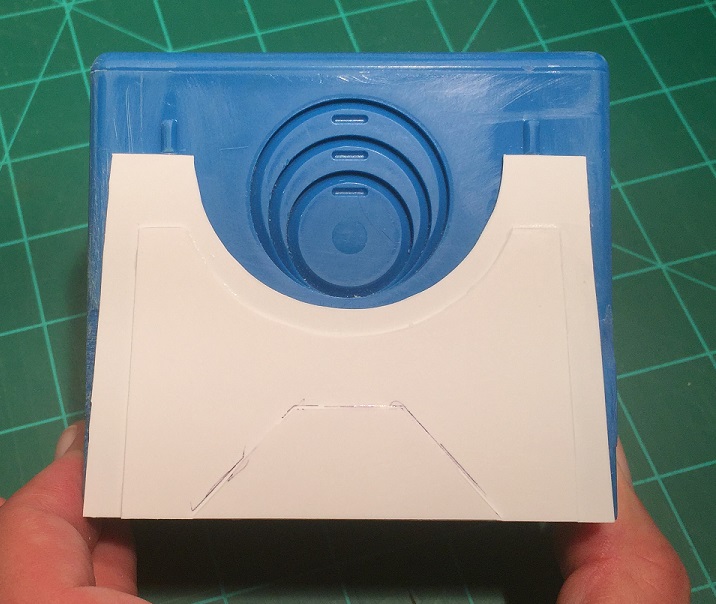
Let’s go back and look at the studio picture. Zoom…enhance!

The “door” rests between the two vertical ridges, and the right trapezoids are glued to the upper surface.

Pretty straightforward!
Fun fact: Sometimes we learn interesting trivia when building terrain, such as the fact that there are two subtly different models of the 2-gang electrical box. I have included two separate “door” shapes in the SVG, PNG, and studio3 files. The larger door is off to the side of the page. Use whichever one is appropriate for your project; just be aware that you may have to trim the upper trapezoid pieces to get them to fit with the larger door.
Let’s move to the second level and detail the 1-gang box. Cut the remaining details from your styrene.
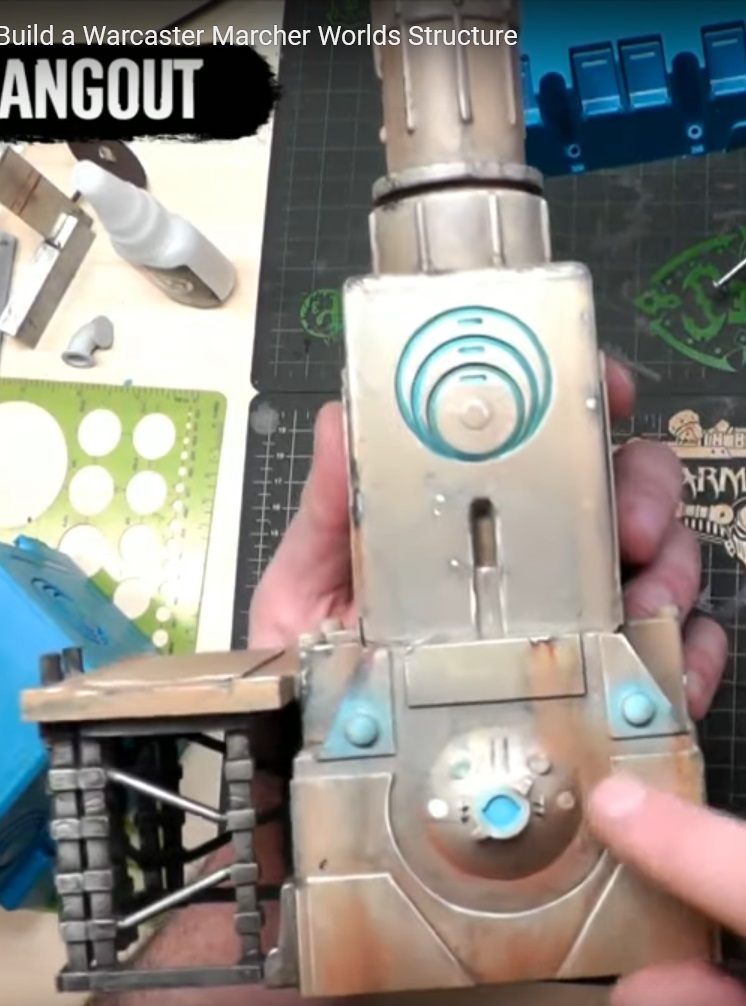
Now…Danny stream screencap… Zoom…enhance!

Assembly is straightforward. Glue the larger semi-circular piece to the 1-gang box, centering it on the built-in circular detail.
The smaller semi-circular piece is centered and applied on top of this.
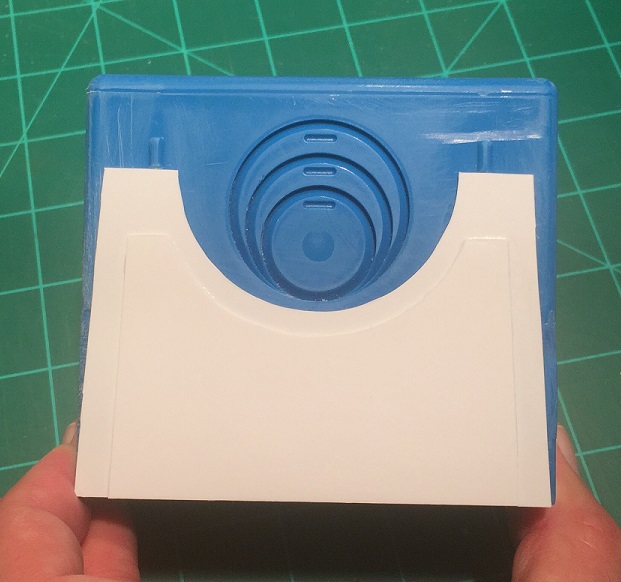
Lastly, the isosceles trapezoid is centered and glued on top of the second part. Tracing the outline can help ensure the piece is centered when applying glue.
Repeat this process on the opposite side.
Remember the pipe from the first article? Well, the pipe is adjustable. Pick a length that looks good to you and glue the pipe in place. I personally chose a shorter length of 3 ¼˝. (Personally, I am considering some additional details to turn this structure from the bottom half of a crane into some sort of smokestack, so I don’t want it to be too tall when it’s finished!)
Cut four pieces of dowel rod to 1 7/8˝ and glue them in place in the recesses of the 2-gang box. Push the rods until they’re snugly wedged into the slots. The tops of the rods should protrude slightly above the top of the box. Make sure the bottom of the rods line up with one another; you can always sand down the upper edges if necessary, but correcting the lower parts is difficult!

We’re almost there!

The Finishing Touches!
Now it’s your time to shine—go all out and add as many final details as you want!
Danny’s crane includes a platform supported by resin girders and some resin-cast surface details (also known as greebles, greeblies, or nurnies). Now, I wasn’t able to identify these gibbons. I can only promise there will be a third part to this hobby blog if I should solve the mystery!
Copious online resources for scratch-building griblies and other details like these. There’s a world out there to explore! Go forth and flex your creativity; I know I’m going to have to do the same!
If you’re ever in my neck of the woods, you can stop in and see how I chose to finish mine…

I’m pretty exited about Warcaster; I can’t wait to get my hands on the game. I would tell you more about my boundless anticipation, but, alas, we have reached an end to this article.
I hope you enjoyed my first two Warcaster terrain hobby blogs! And watch this space…there will be more where this came from in the weeks ahead.
Wear those masks and stay safe out there!
Until next time…