April brought with it the release of some very exciting new models for WARMACHINE & HORDES!
Normally, we’d all be playing our games face-to-face, but in light of recent events, that isn’t a possibility. So, it’s time to do the next best thing to actually playing with a new release: talking about its strategy!
Today, I want to discuss Archnumen Aurora, the Negation Angels, and the Wastelander. One of the best things about gaming communities is we’ve all got our own enthusiasms, passions, and opinions on our games. This article is no different! So, bear in mind that these are just my personal opinions on how I enjoy using each of these models. Maybe you’ll agree, maybe you won’t, but talking strategy is always a good way to learn something, whether it’s something you want to try or something you want to figure out how to overcome!
Or, if the idea is particularly stupid, something you never want to attempt.
I’ll try to avoid discussing any stupid ideas.
No promises.
Okay, so, let’s go!
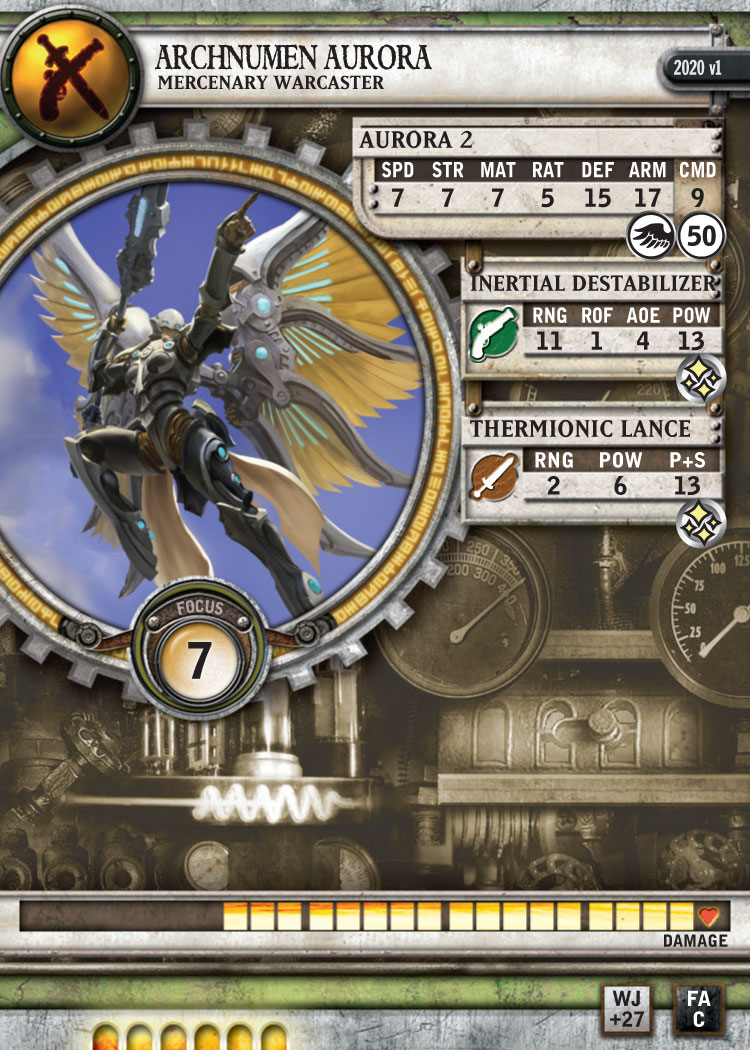
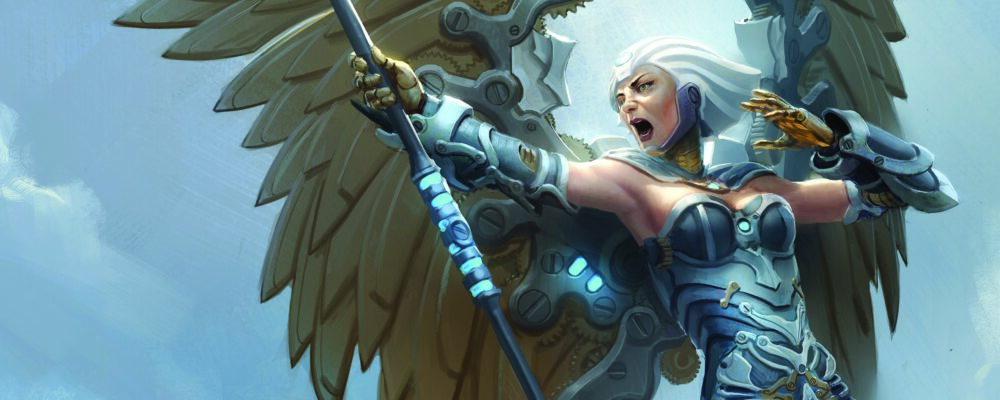
Aurora 2 is a ’caster with just loads of options turn after turn. She’s definitely more complex to play than many warcasters in the game, and you’ve got to carefully build your army with her strengths in mind. I think there’s a lot to unlock with this ’caster as she enters the meta, so it’s incredibly challenging to predict which specific lists we will end up seeing.
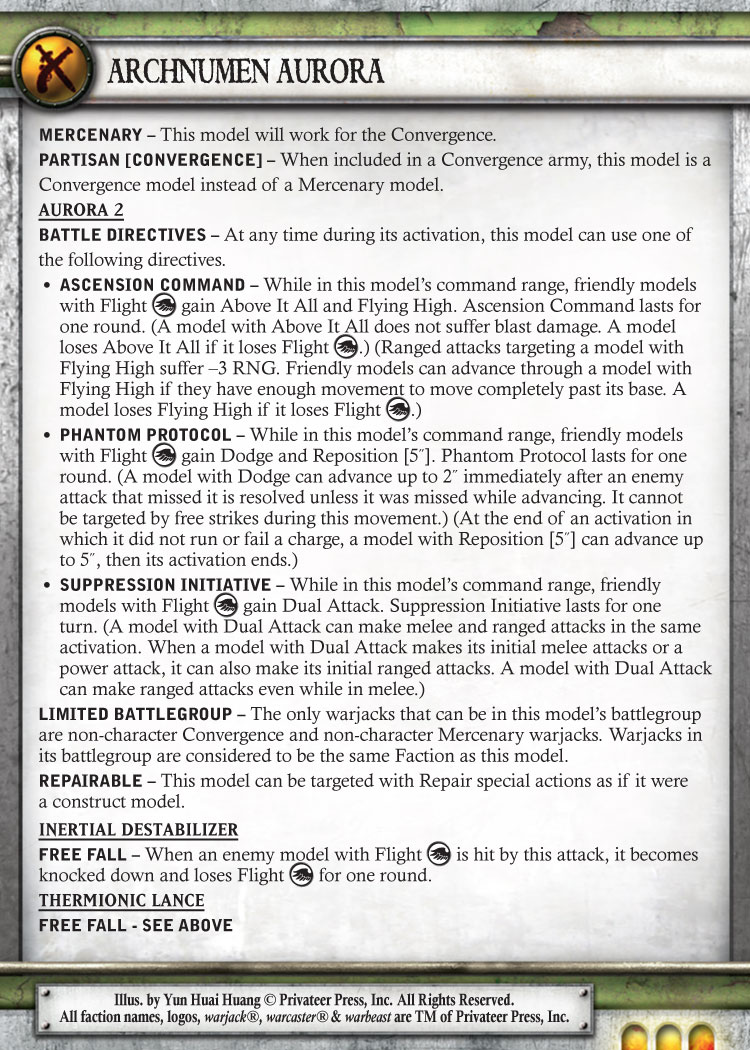
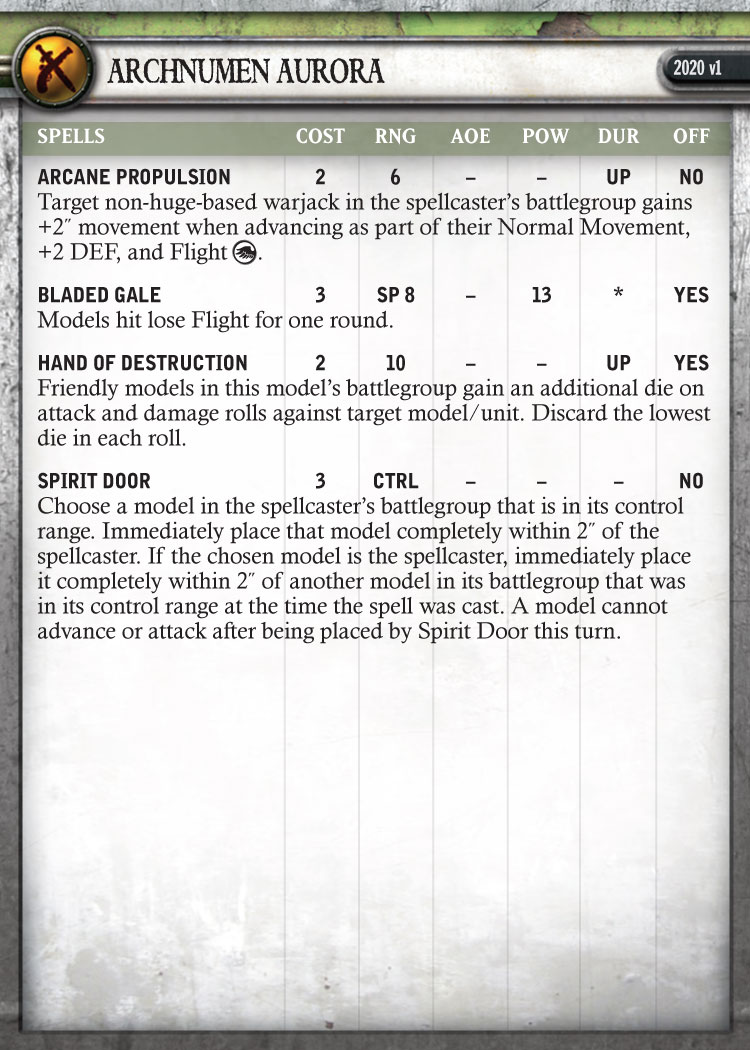
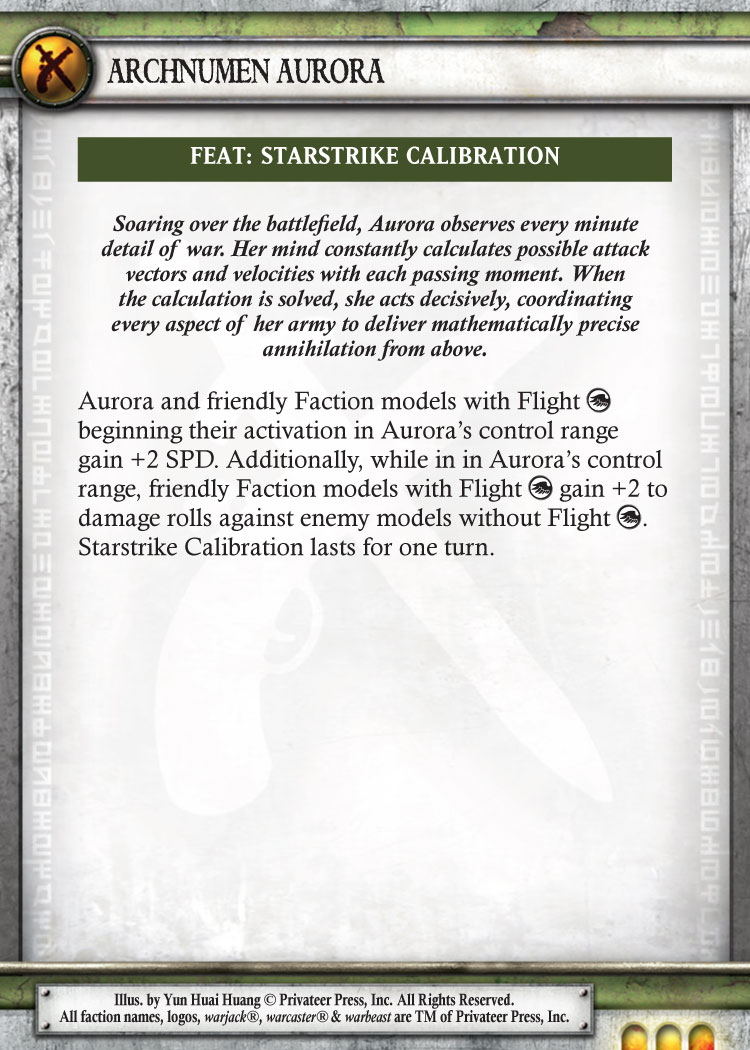
I tend to gravitate toward the most obvious aspect of her kit, which is supporting models with Flight. Not just a few models, mind you, but the entire army. I want to utilize her Battle Directives throughout the entirety of the game as much as possible and not lose access to them when my units or warjacks with Flight are destroyed.
I tend to prefer building lists with her using the Strange Bedfellows theme force, primarily because it makes all the Mercenary options I want to take count as friendly Faction models, thus allowing them to benefit from Aurora’s feat. I also like taking a combined arms approach with her lists, bringing a good balance of battlegroup and infantry.
My plan is, at its core, to apply scenario pressure as early as possible while threatening a strong alpha strike due to Aurora’s feat. If my opponent is playing a heavier brick-style list that I can’t crack armor on effectively, then my list should be capable of outmaneuvering them thanks to its mobility. This mobility should, hopefully, allow me to threaten multiple scenario elements at once. If I can only score one flag all game but keep my opponent locked out of points, or at least keep myself in the lead, then I’ll take it.
When building the battlegroup, I like to run multiples of the new Tesselators, along with a Corollary for support, and then a single heavy warjack as a target for Arcane Propulsion.
I am—and have always been—a huge fan of the Mangler. So, he usually gets the nod as that heavy in my list. The main list consideration I’ve been bouncing back and forth between is do I add more Tesselators, or do I run the full complement of Angel units? I think both options have their merits.
While the list below is by no means perfect, this is an example of the type of list I’m looking to play with Archnumen Aurora at the moment.
Theme
Strange Bedfellows
Caster and Battlegroup
Archnumen Aurora [+27]
– Corollary [6]
– Mangler [15]
– Tesselator [7]
– Tesselator [7]
– Tesselator [7]
Solos
Prefect Hypatia [5]
Void Archon [8]
Void Archon [8]
Widget, Tinker Extraordinaire [3]
Asphyxious the Sanctified [14]
– Scavenger [7]
Units
Clockwork Angels [5]
Clockwork Angels [5]
Clockwork Angels [5]
Negation Angels [Free from Theme]
Negation Angels [Free from Theme]
Negation Angels [Free from Theme]
As mentioned, I’m trying to decide how many Angels is too many Angels. Part of my consideration is just how much I love the new Negation Angels. I blame all my time playing Rask.
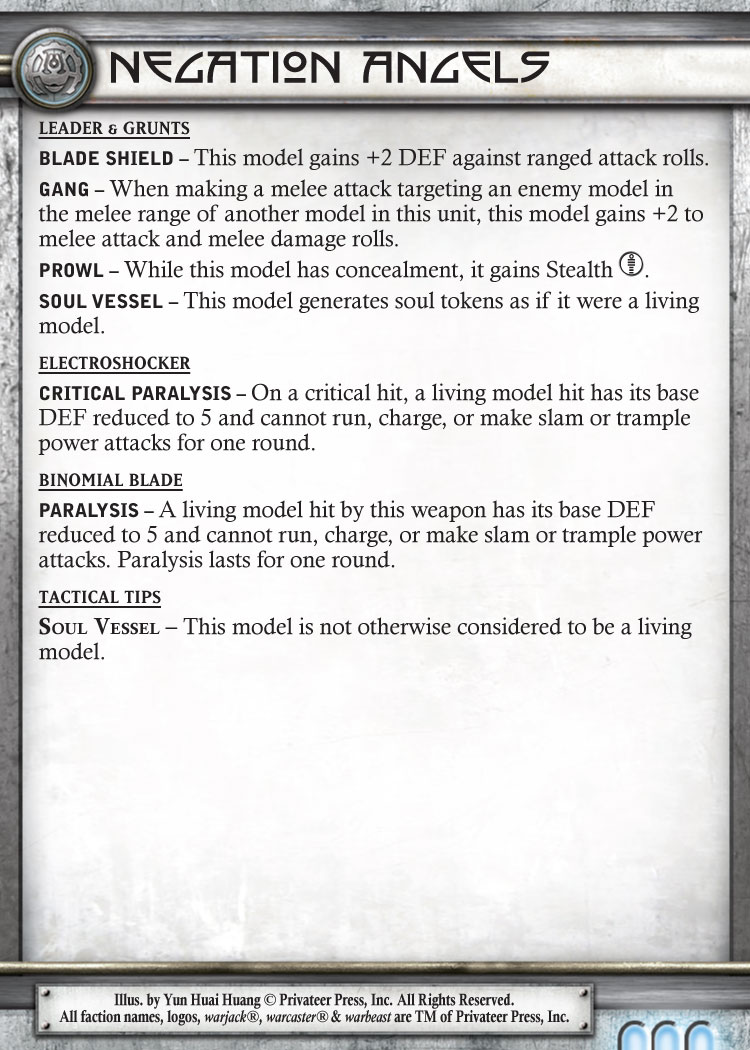
Why Rask? Because Rask was the ’caster that, over my many games playing with and against, really, REALLY cemented just how powerful Paralysis can be. It’s an obviously powerful ability at first glance, but knowing when and where to apply it and how it can completely destroy your opponent’s order of operations is a skill worth practicing.
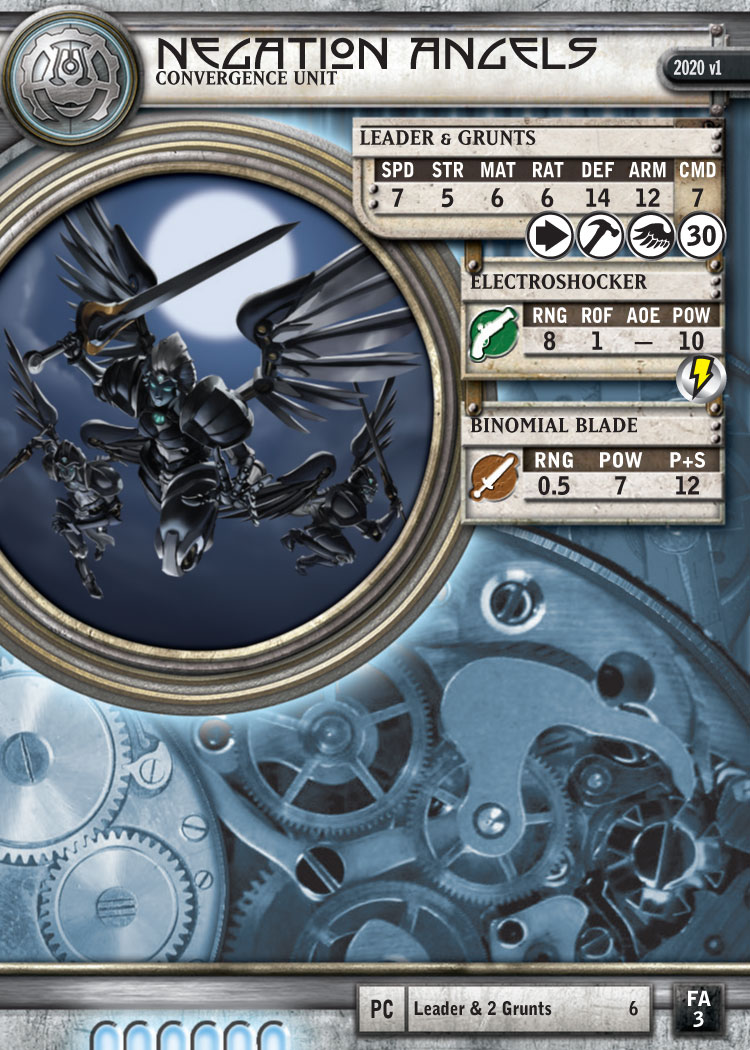
With the Negation Angels, I’ve got a unit of three models all capable of causing Paralysis. I don’t like relying on the Crit Paralysis of their ranged weapon if I can avoid it, so I’m always specifically looking to apply it via melee, which is guaranteed.
Now, with SPD 7 and a 0.5˝ melee range, my top consideration is getting my Angels to survive long enough to actually hit what they want. Aurora’s feat will help them get there with the SPD boost, but I can’t just rely on terrain to block LOS and give me Prowl all the time.
When I run three full units of Negation Angels, which I currently like to do, I find the decision between using Aurora’s Ascension Command or Phantom Protocol a fun choice. Now, if the -3 RNG of Ascension Command means my angels won’t be shot at all, I’m using that; however, in many situations, I find that it’s more a choice of:
- I want the enemy to move forward to get in range due to Ascension Command
- I want the enemy to try to aim to hit my defense because I have Dodge due to Phantom Protocol
I like this aspect of the Battle Directive choice. While I can’t dictate my opponent’s actions, I can encourage behavior that will, if I’m planning my following turns correctly, pay off for me in the end.
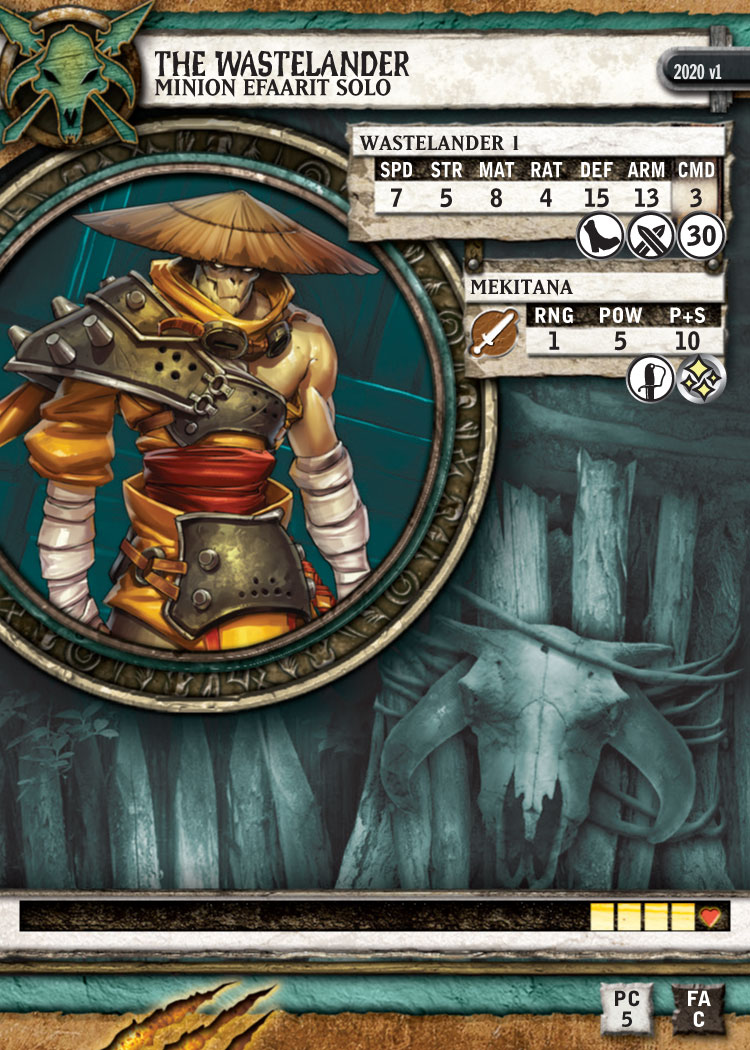
Switching gears, let me talk about the Wastelander for a bit.
Anyone who knows the history of my personal army collection knows that I’m a Minions (and Cephalyx) guy. Usually Gators, but I like playing all forms of Minions. The Wastelander is a Minion solo I expect to see a LOT of in tournaments in the future.
At first glance, Wastelander is a solid combat solo. High MAT, high SPD, great DEF against ranged attacks, movement tricks, and he can hit like a truck. All great stuff.
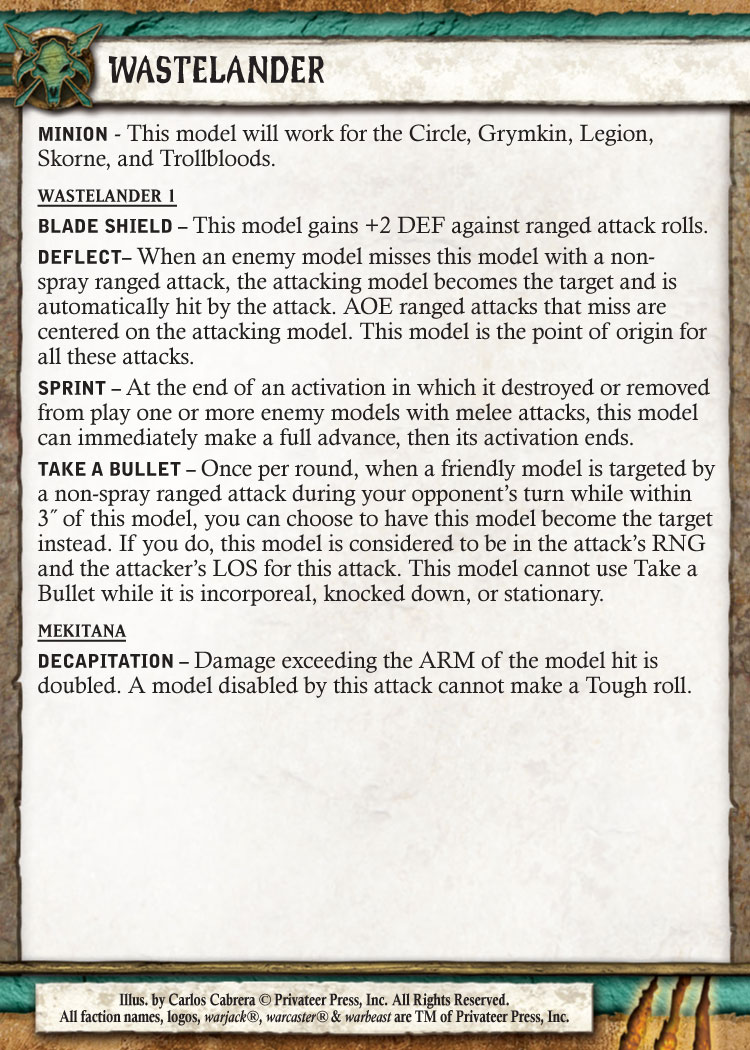
But the real power of Wastelander is in Deflect and Take a Bullet. Actually, let me go further. The REAL real power is Take a Bullet. Deflect is great, don’t get me wrong, but Take a Bullet does things you might not expect that sets it apart from Shield Guard.
With Shield Guard, you move the “model hit from an attack” from the original model to the model with Shield Guard. At that point, the attack is already successful and is hitting someone, no matter what. Take a Bullet, though, changes the target regardless of the attack’s RNG or LOS to the Wastelander, and changing a target can do all sorts of weird and wonderful things.
For example, say you have Stealth on the Wastelander. Your opponent shoots a model near him, and the attacking model isn’t within 5˝ of the Wastelander. You change the target to him, and now the attack automatically misses due to Stealth and you trigger Deflect.
While Take a Bullet says the attack ignores LOS and RNG, it doesn’t ignore all the other aspects of now targeting the Wastelander. If you keep him in cover—behind a wall for example—that ranged attack meant for one of your other models is now looking at hitting effective DEF 21, which is crazy!
There are more lists I’m putting Wastelander into than I can call out in this Insider. Once you get your hands on him, I recommend trying him out. He’s a potent addition to almost every army you can field.
Don’t forget: Take a Bullet works on friendly models, not friendly Faction models. No matter what army you play, if you can bring the Wastelander and your opponent has any ranged threat you are worried about, he is worth his weight in gold.