by Charles Foster III
Hello, hobbyists—welcome back to another Hobby Insider! On my quest to paint up 100 models in 365 days, I’ve only moved the counter forward to 2/100 so far this year. I’ve got to get some more models painted and fast! So, this week it’s time to pick up some ground and get four more on the table in painted form by tackling my Pyg Cannon Crew models. Time to grab some paint and brushes and get going!
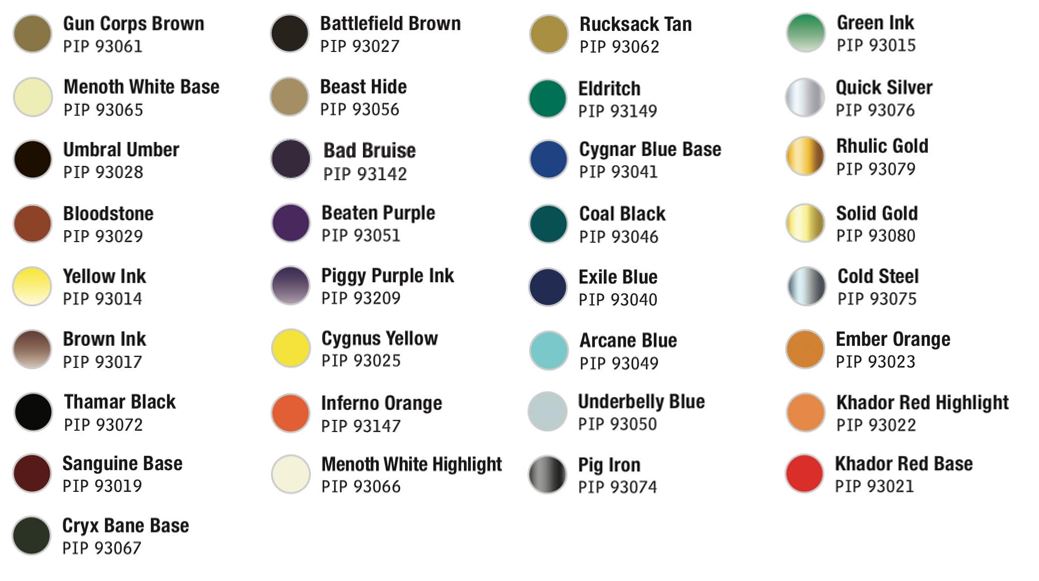
Colors Used
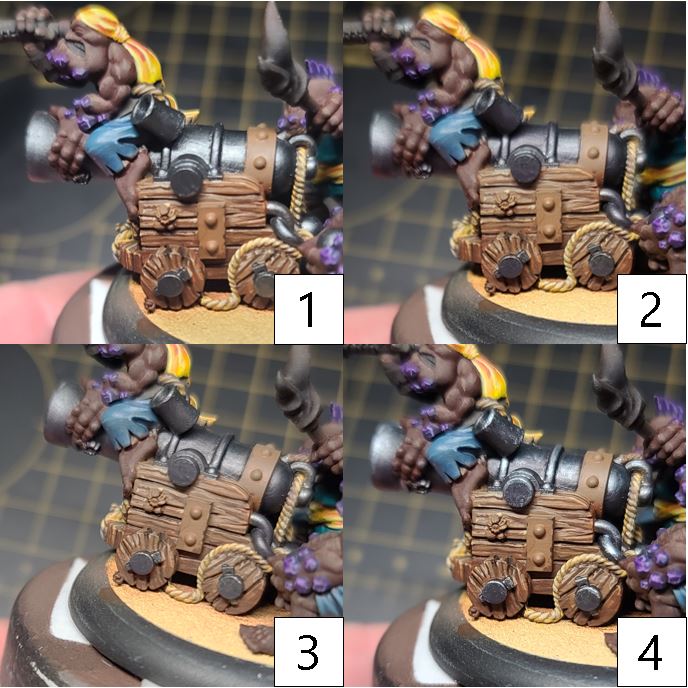
Woodgrain
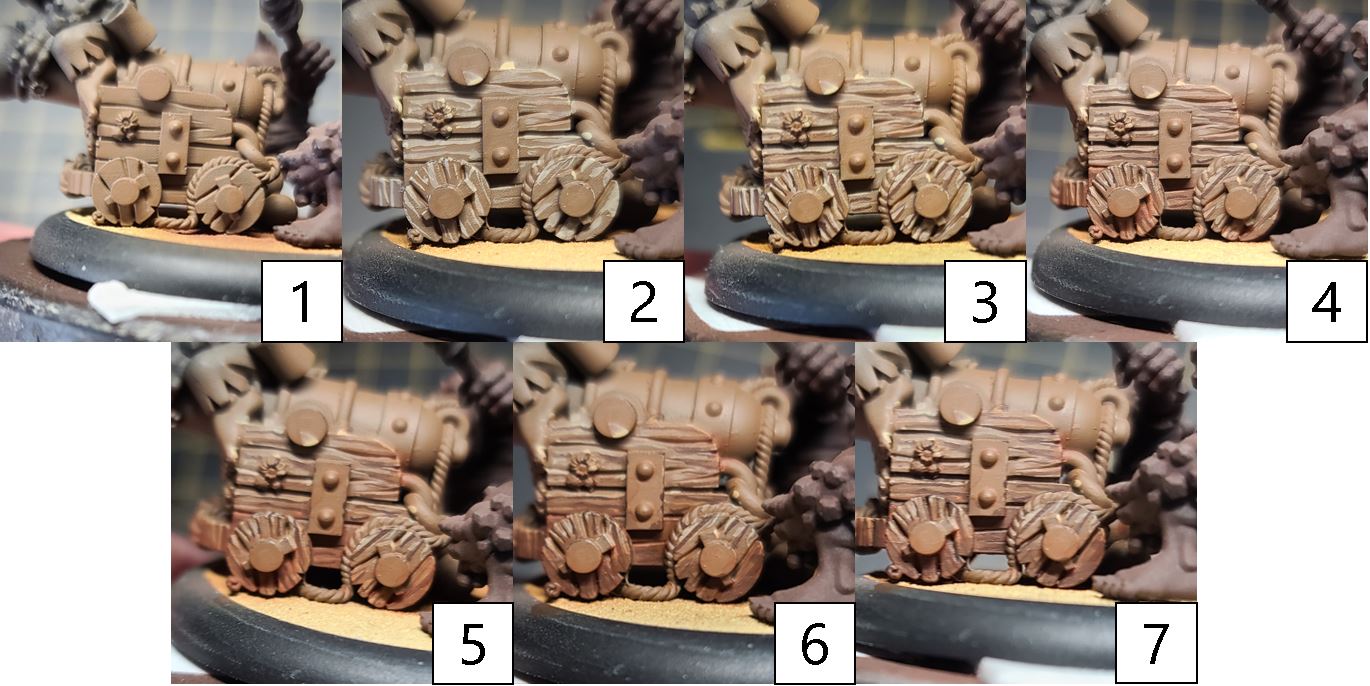
Step 1) I want to start off by tackling all of the woodgrain. I start by applying a basecoat of Gun Corps Brown.
Step 2) Next, using a little bit of Menoth White Base, I draw out the brighter grain structures of the wood. I stick to small lines with the occasional bump or two to break it up from looking too uniform.
Step 3) Following the same pattern as the previous step, I define the shadows on the wood structure by using Umbral Umber, basically making a woodgrain sandwich: Menoth White Base on top, Gun Corps Brown in the middle, and Umbral Umber on the bottom.
Step 4) To create the vibrancy of the wood, I mix Bloodstone, a drop of Yellow Ink, and Brown Ink together. With this color mixture ready, I blend up a glaze across the woodgrain, essentially creating that stained wood look and finish.
Step 5) After the previous step has completely dried, I repeat this color, but this time going only about half as far as the previous step to further deepen the colors and transition from shadow to highlight.
Step 6) Finally, for the final shade, I add a single drop of Blue Ink to the previous mixture and blend into the shadows.
Step 7) To finish off the wood effect, I add a drop of Thamar Black to the previous mixture and use it to define the spaces between the planks.
Skin Tones
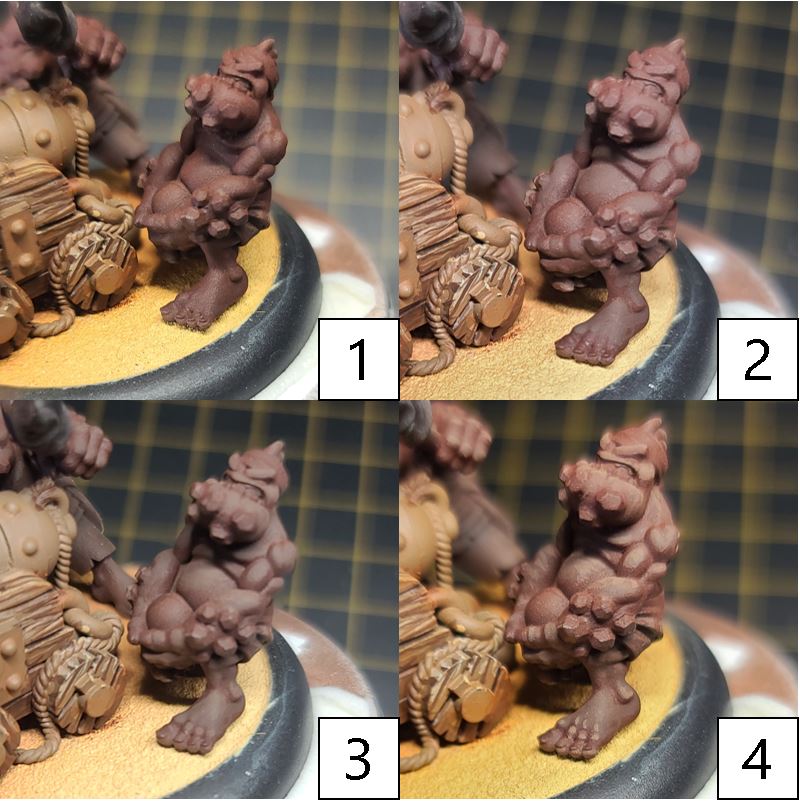
Step 1) With the wood complete, it’s time to work on the skin tones. To get a quick clean look, we’ll be starting with the darkest tones and working our way up to the lightest. Start with a basecoat of Umbral Umber.
Step 2) Next, start your highlights by applying Battlefield Brown. Make sure to leave the previous color showing through while working this color up toward the raised areas and surfaces.
Step 3) Continue highlighting with a mixture of Battlefield Brown and Beast Hide, once again making sure that the colors from the layer below show through in small amounts.
Step 4) Finally, add some hard-edged highlights of Beast Hide to the uppermost areas or anyplace you would want to define the muscles.
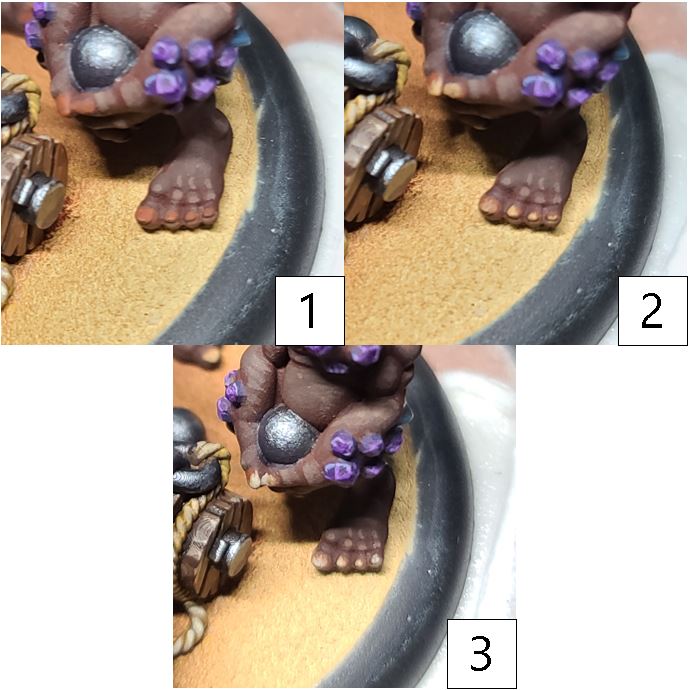
Chitin
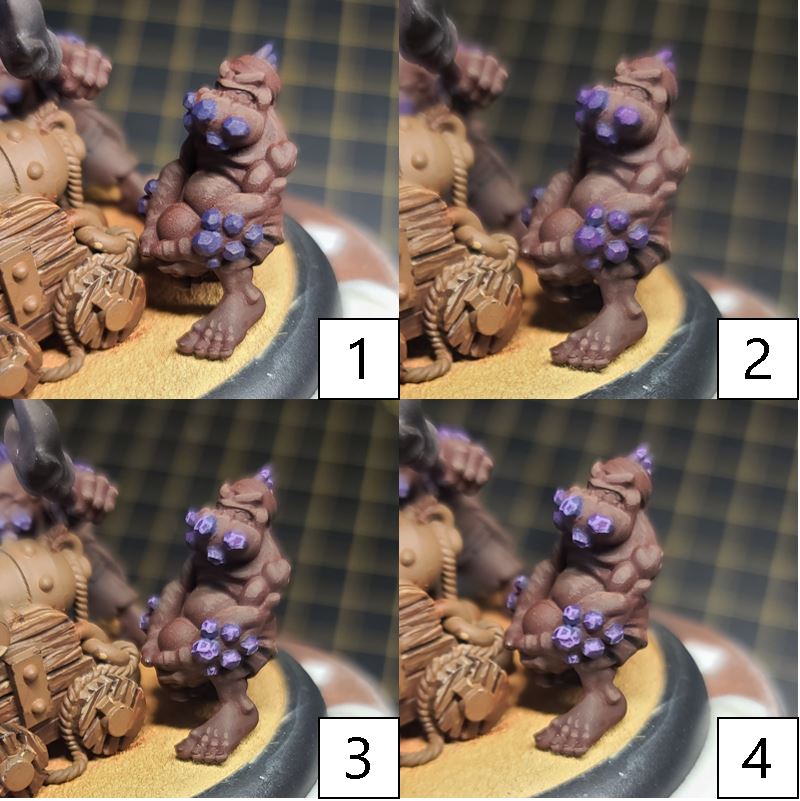
Step 1) For the chitin/rocks in the skin, I start off with a basecoat of Bad Bruise.
Step 2) Working my highlights upward, I add a layer of Beaten Purple, making sure the layer below isn’t completely covered up.
Step 3) To continue highlighting, I mix Beaten Purple with Menoth White Base for some of the raised areas and hard-edged highlights.
Step 4) To richen the tones, thin out Piggy Purple Ink with water in a 1:15 part paint to water. Apply this as a thin glaze across the area. Let each layer dry and build about 5–6 layers to get the desired look.
Step 5) Finally, to finish the chitin off, mix Beaten Purple with Menoth White Base and apply this to a few hard edges to make it look like light bouncing around.
Headbands
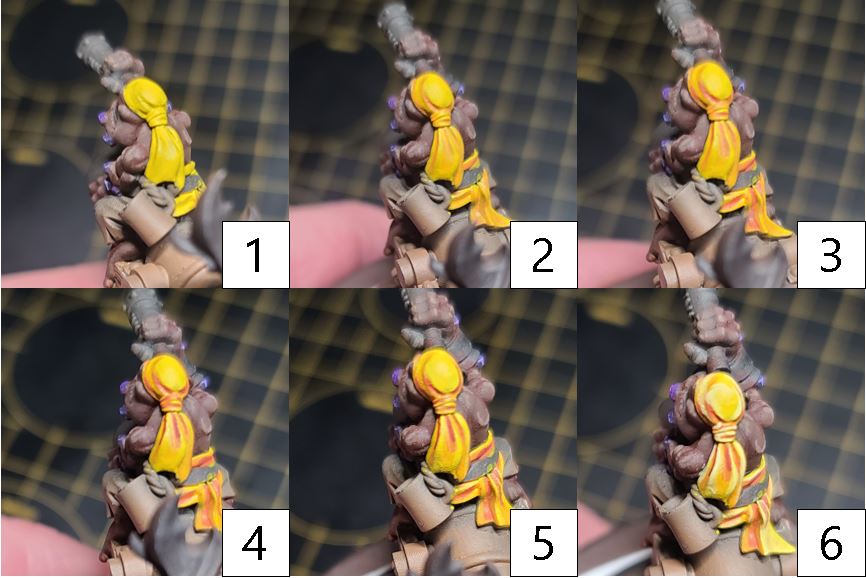
Step 1) For the headbands, lay down a solid basecoat of Cygnus Yellow. This can take a few layers over black primer as the yellow is quite opaque.
Step 2) For the first shade, mix Cygnus Yellow, Inferno Orange, and Bloodstone together in equal parts and blend this into the recesses of the area.
Step 3) For the second layer of shading, mix Bloodstone and Inferno Orange and blend this mixture into the deeper areas of the shadows.
Step 4) For the final shading, add a drop each of Sanguine Base and Umbral Umber to the previous step and blend this into the deepest areas of the shadows as well.
Step 5) For the first layer of highlights, mix Cygnus Yellow with a few drops of Menoth White Base.
Step 6) Finally, to bring all of this together and make the colors pop, add a few drops of Menoth White Highlight to the previous mixture for a final highlight to the area.
Rope
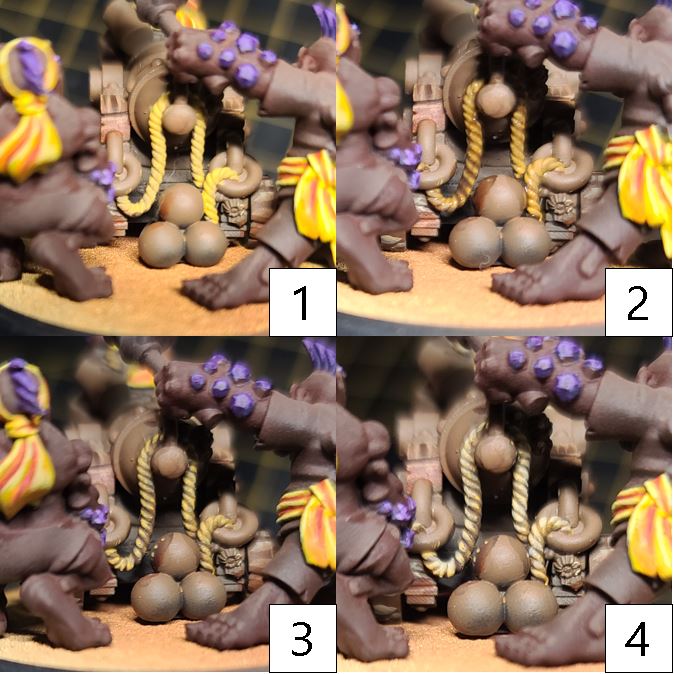
Step 1) For the ropes on the models, I start with a basecoat of Rucksack Tan.
Step 2) Next, I take Brown Ink and add water. With this thinned-out ink, I apply an even coat over the area and allow it to dry completely before continuing.
Step 3) With the ink dry, I apply Rucksack Tan to the upper raised areas. The ink from the previous step creates a perfect natural shade for the ropes, and the Rucksack Tan creates the perfect highlight.
Step 4) Finally, to finish the look on the ropes, I apply Menoth White Base as the last highlight to the areas.
Shirt
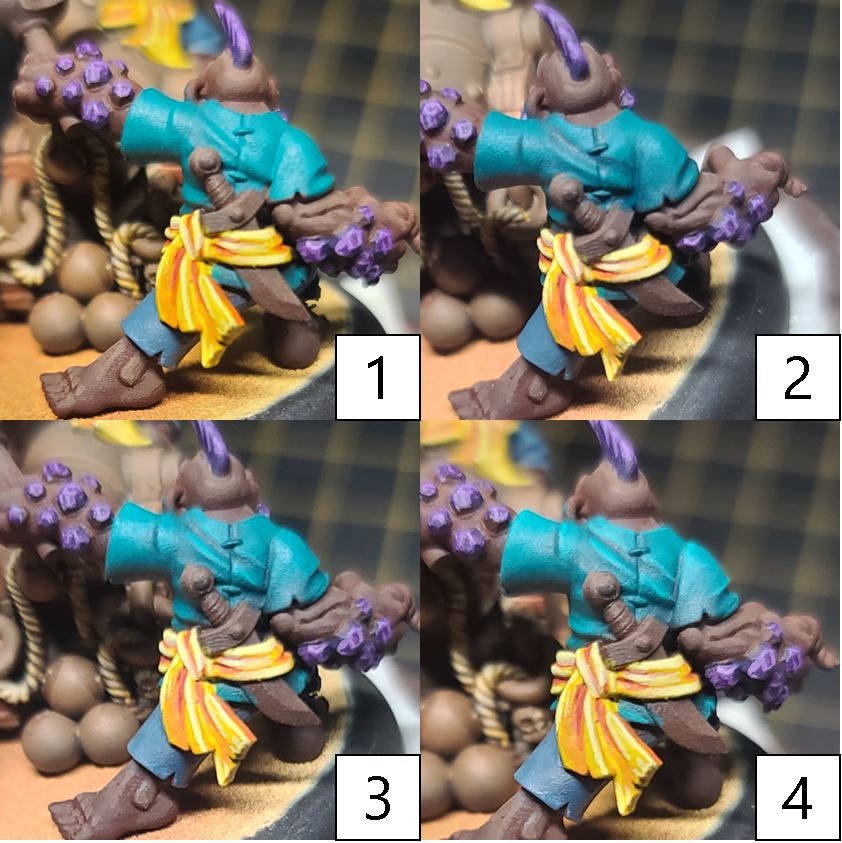
Step 1) It’s time to add some bright colors in the shirts. Start your teal areas off by mixing Eldritch with a drop of Cygnar Blue Base.
Step 2) For shading, mix Eldritch with Coal Black and a drop of Exile Blue. Blend this mixture into your shadows and recessed areas. Be careful with the Exile Blue, as it can quickly overtake the eldritch if you use too much in your mixture.
Step 3) For your first highlight, mix Eldritch with Arcane Blue. Apply this color to your raised areas.
Step 4) Finally, add a drop of Underbelly Blue to the previous mixture and apply to the highest edges for highlighting.
Silver Metals
Step 1) Moving on to the silver metals of the model, I start with a solid basecoat of Pig Iron.
Step 2) For my first layer of shading on the metal, I mix Brown Ink with Exile Blue and blend this into the shadows and recesses.
Step 3) For the final shade, I mix Cryx Bane Base, Green Ink, and Brown Ink together and apply this to the deepest shadows.
Step 4) Finally, after sealing the models with a matte sealant, I’ll return to the areas for a final glinting highlight of Quick Silver.
Gold Metals
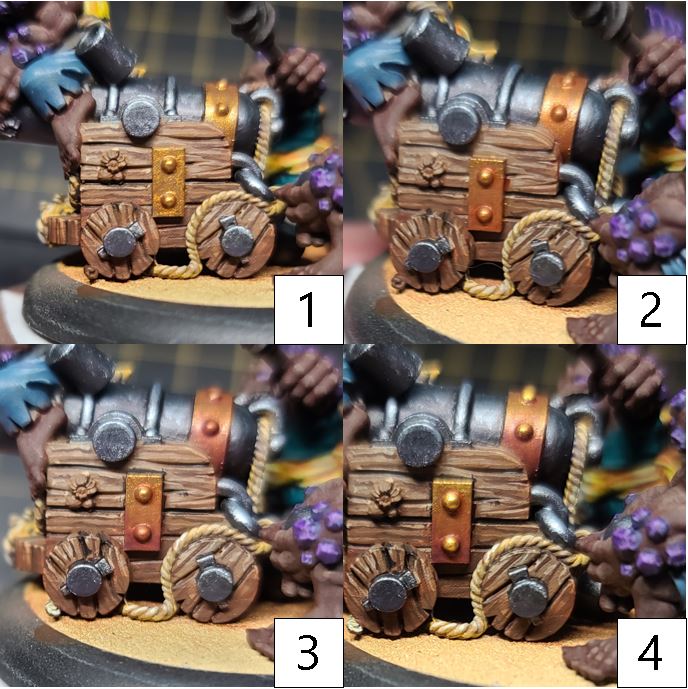
Step 1) Start your gold areas off with a basecoat of Rhulic Gold.
Step 2) Using two-brush blending, shade the previous step with a mixture of Rhulic Gold, Brown Ink, and Yellow Ink.
Step 3) Continue shading the areas with a mixture of Umbral Umber, Sanguine Base, and Brown Ink. Apply this mixture to the deepest shadows and recesses on the models.
Step 4) For highlights, apply Solid Gold to the highest edges and raised areas.
Step 5) Finally, after the models are sealed with a matte sealant, return to the areas with a mixture of Solid Gold and Cold Steel for a few hard-edged highlights to return that metallic look to the models.
Teeth and Fingernails
Step 1) For the teeth and the fingernails I apply Bloodstone as the basecoat.
Step 2) I continue to work up the colors by adding a highlight of Rucksack Tan. Take time to make sure you don’t fully cover up the previous step.
Step 3) As a final highlight, I apply Menoth White Base.
Fire
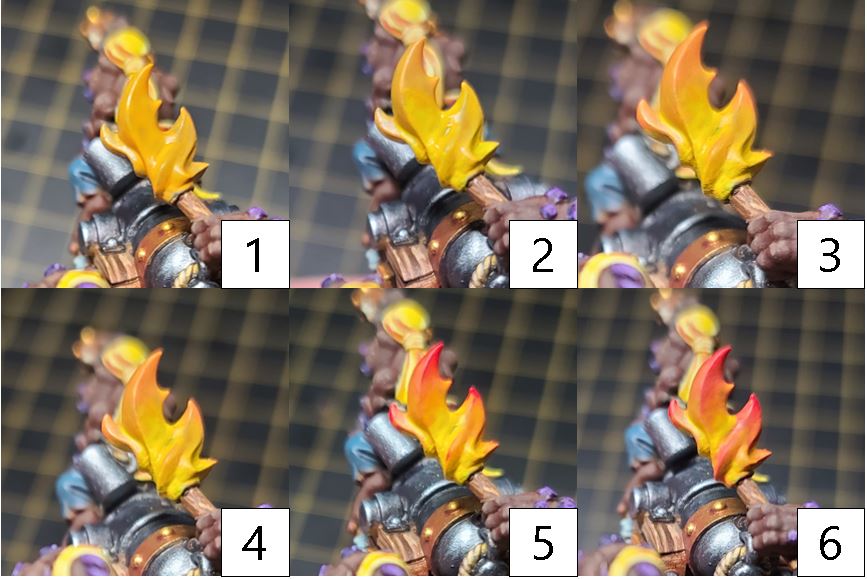
Step 1) For the fire effect, we will be working backward from the way we normally shade. Instead of the darkest areas in recesses, we will be tending the brighter colors first. (The reason for this is that fire burns brightest at the source of the flame and darker the farther away you get.) To start, basecoat the area in Ember Orange.
Step 2) Next for our reversed shade, work Cygnus Yellow in thin layers into the recesses of the model.
Step 3) Starting at the tips, work Khador Red Highlight from the highest areas back toward the recess.
Step 4) Using Khador Red Base, work another reverse highlight from the tips to the recesses. Again, since fire is brightest at the source, the farther from that source, the darker the flame.
Step 5) Finally, to smooth out any areas where the transition looks rough or choppy, mix Khador Red Highlight and Ember Orange to blend or smooth any areas together.
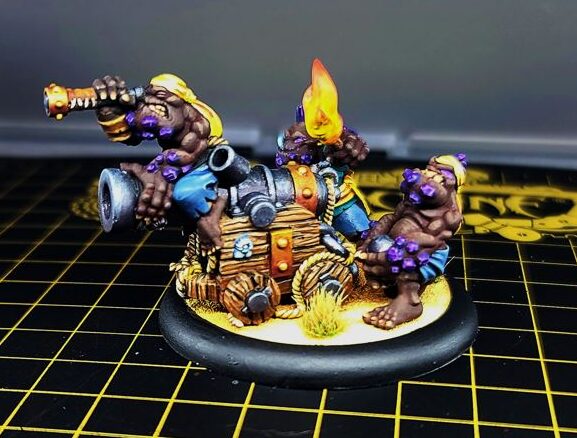
And with that, my cannon crews are ready to unleash a battery on my opponents! Time to flip the counter over to 6/100. Wow. Long way to go! So, time for me to paint, paint, paint! Until next time, hobbyists!