by Charles Foster III
Hello, hobbyists, and welcome back to the first Hobby Insider for 2024! I hope everyone had a great holiday break, got refreshed, and have those brushes ready to go.
A lot of you out there are probably like me: setting New Year’s painting resolutions. This year, I wanted to keep my goal simple, achievable, and not so overwhelming that it could cause painting fatigue. So…my goal for 2024 is to paint 100 miniatures in 365 days.
I know, I know, but Chuck, you may say, why not paint 365 in 365? Well, to be honest, I want to make sure that I have a good work/life balance in 2024. To achieve that, I’m shooting for one model every three days or so. This means that I can paint small models at a quick rate, and if I decide to do larger models (*cough,* say, Abyssal King) I can paint them at a rate I’m comfortable with that won’t feel like I’m in a rush. In my Insiders, I’ll post a counter in the article highlighting how many models I’ve managed to paint so far to date in order to help keep me on track to hit the goal.
All that being said, let’s get this party started! For this Insider, I’ll be working on clearing out some of my backlog of models by painting Prisoner 102822. So, grab some brushes, paint, and let’s go!
Colors Used

Skin Tones
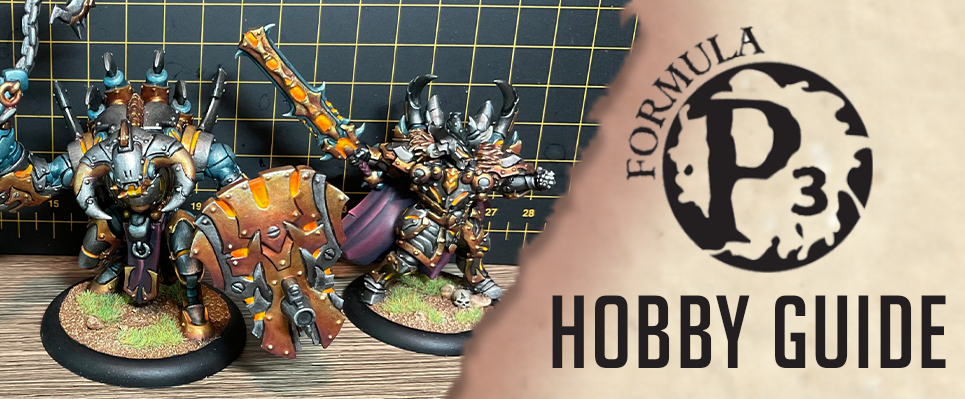
Step 1) For most of my humanoid models, I prefer to paint the faces and skin first. I’ll start by laying down a solid basecoat of Midlund Flesh.
Step 2) Next, I start shading the face by using a mixture of Skorne Red and Midlund Flesh.
Step 3) To balance out the skin tones, I use a second shade of Battledress Green with Midlund Flesh.
Step 4) for a final shade, I mix Battledress Green and Skorne Red together and use this to define the deepest shadows of the face.
Step 5) For highlights, I start with an even mixture of Midlund Flesh and Ryn Flesh.
Step 6) To finalize highlighting the features of the face, I use Ryn Flesh.
Red Cloak
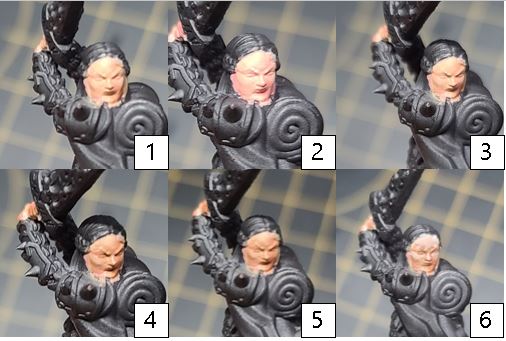
Step 1) With 102822’s skin tones complete, it’s time to tackle the red cloth. Start off with a solid basecoat of Khador Red Base. Make sure to build up a solid basecoat of multiple thin layers to get great, even coverage.
Step 2) To begin shading, start off with Sanguine Base, blending this into the shadows of the area.
Step 3) Continue to shade by mixing Sanguine Base with Exile Blue. Blend this into the deepest recesses of the area.
Step 4) Moving on to the highlights, start off with a mixture of Khador Red Highlight and Khador Red Base, blending this mixture over any raised areas and surfaces.
Step 5) Continue highlighting by mixing Khador Red Highlight and Menoth White Highlight. Blend this into the highest points and any raised surfaces. It is okay if this looks a little too bright and doesn’t quite match; the next step will bring it all together.
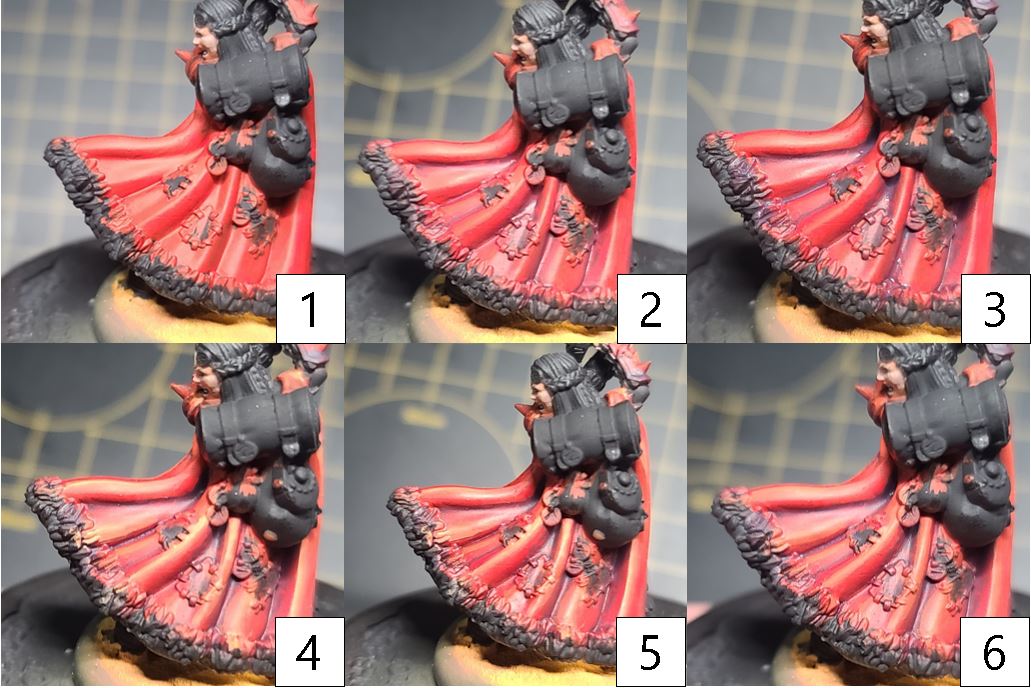
Step 6) To blend all of the colors together, thin out a small amount Red Ink with a lot of water. Typically, a good mix of 1 drop Red Ink to 14 drops of water works best. Take the thinned Red Ink and apply an even glaze across the miniature. Don’t let the ink pool up, as this step is about color shift and not a wash. Once the ink completely dries, repeat this step. Around 15 or 16 times gives that super-vibrant, well-transitioned red tone.
Silver Metals

Step 1) Next up, let’s get some silver on some metals. I start with a solid basecoat of Pig Iron.
Step 2) For shading, I mix Thamar Black, Brown Ink, and Blue Ink together and apply this as a thin wash to the area.
Step 3) Using Cold Steel, I apply my first layer of highlights, blending this color from the raised areas toward the shadows.
Step 4) Finally, after the model is sealed with matte sealant, I return for a final highlight of Quick Silver to the uppermost surfaces and raised areas.
Fur
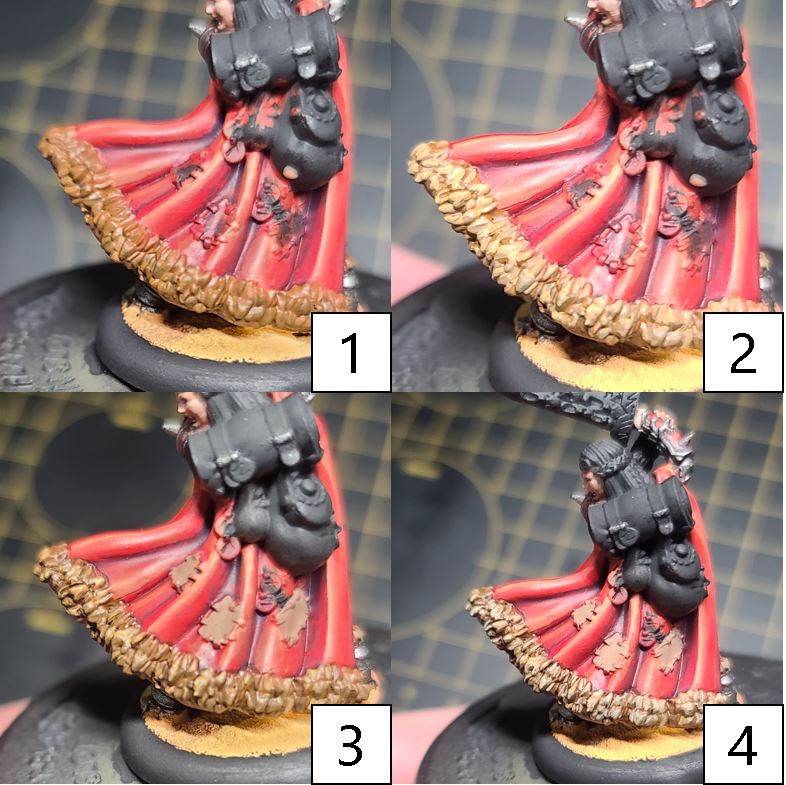
Step 1) Time to tackle all of the fur! Start your areas off with Bloodtracker Brown.
Step 2) Next, work up a little bit of highlights using Rucksack Tan.
Step 3) To blend it all together, thin out some Brown Ink with a little bit of water to create a wash and apply it to the whole area.
Step 4) Finally, to make the fur pop, add a highlight of Menoth White Base.
Brown Leather
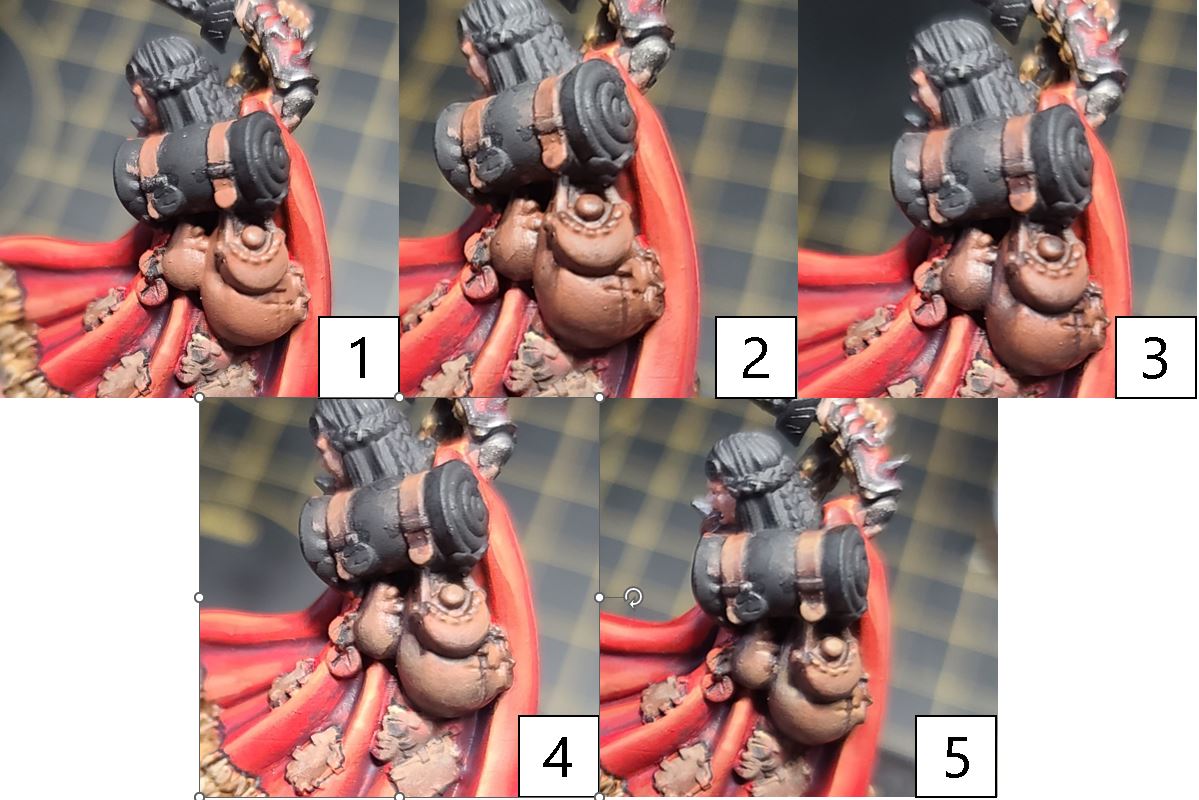
Step 1) With the fur complete, I’m ready to move on to the brown leather bag on the pack. I start off with a basecoat of Idrian Flesh.
Step 2) Next, I start my shading by blending Umbral Umber into the recesses of the area.
Step 3) To darken my shade and add more depth, I’ll mix Thamar Black and Brown Ink together and apply to the deepest areas.
Step 4) With my shading complete, I move on to my first highlight of Bootstrap Leather, blending this from the raised surfaces back toward the shaded areas.
Step 5) For my final highlight, I mix Bootstrap Leather and Rucksack Tan together and apply this mixture to the highest raised surfaces and hard edges.
Black Leather
Step 1) To break up the materials on the back a little, time to mix in a little black leather. Basecoat the area in Thamar Black.
Step 2) For the black leather, you want to work up your highlights instead of shading. Start the first highlight off with an even mixture of Coal Black, Exile Blue, and Thamar Black.
Step 3) Continue working the highlights up by adding Underbelly Blue to the previous mixture and applying this to the raised areas. When working with black highlights, less is more, meaning stark highlights in small areas draw the most attention without overpowering the darker areas.
Step 4) Finally, finish off the highlights by adding Frostbite to the previous mixture and applying a final highlight to the area.
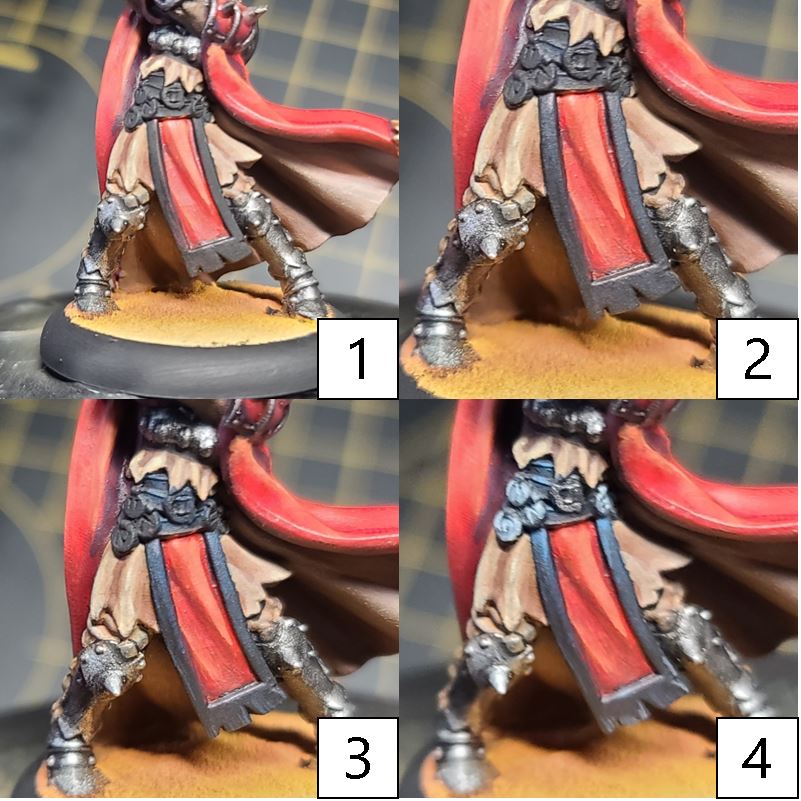
Tan Knapsack
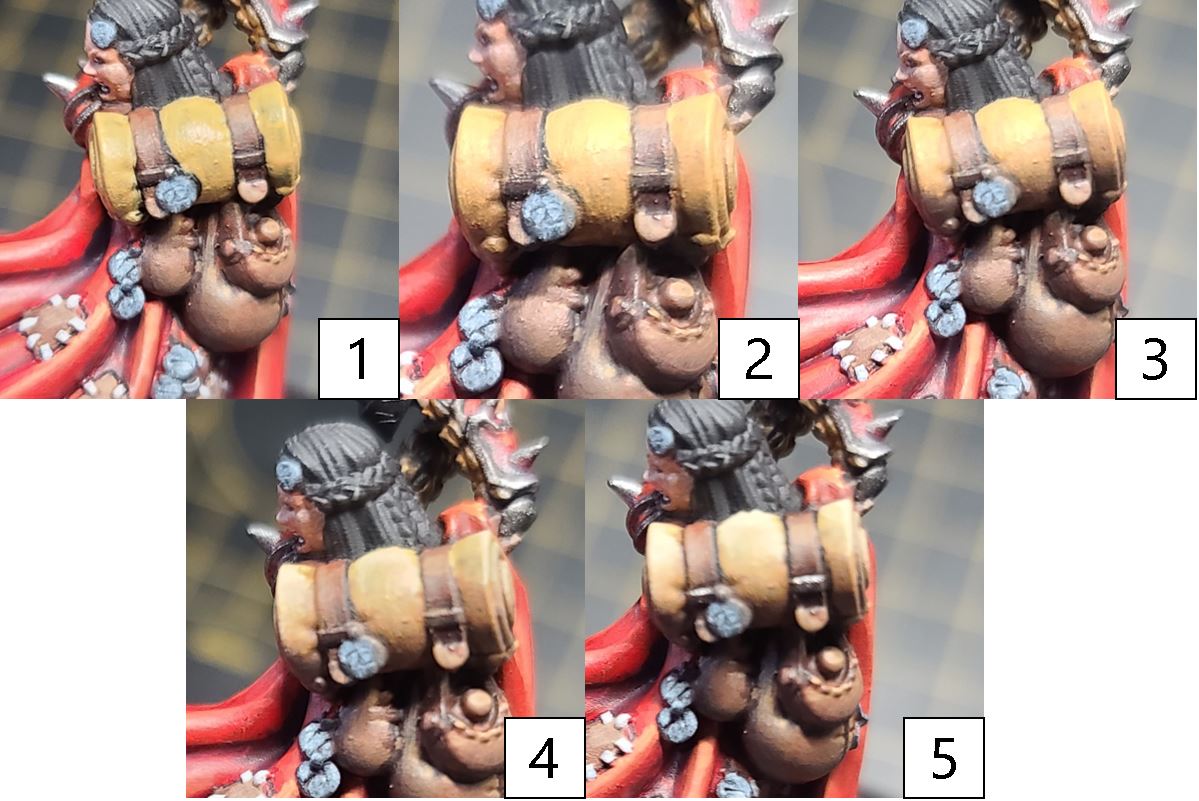
Step 1) With the leathers complete, let’s focus on the knapsack on the back. I start the area off with a solid base of Rucksack Tan.
Step 2) Next, I start my shading off with Gun Corps Brown, blending it into the recess of the area.
Step 3) To create some depth to the shadows, I’ll add a second shade of Battlefield Brown. I’ll blend this color into the darkest areas and use it to define some of the edges.
Step 4) For highlights, I start by mixing Rucksack Tan and Menoth White Base together and applying it to the raised surfaces.
Step 5) Finally, I add Menoth White Highlight to the previous mixture and apply this to the highest edges and raised surfaces.
Hair
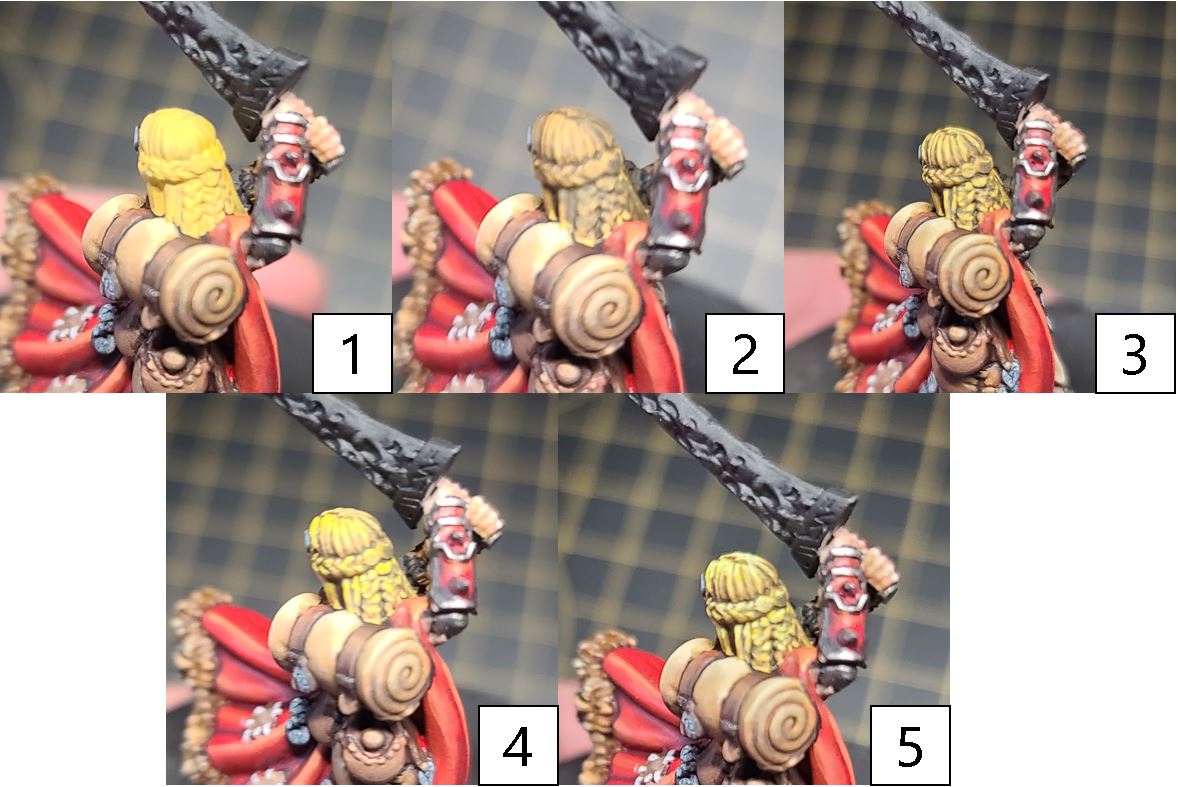
Step 1) For the hair, start by basecoating the area in Moldy Ochre.
Step 2) To shade the area, thin a small amount of Brown Ink with a little water and apply this mixture as a wash to the surface of the hair.
Step 3) For highlight, start by reclaiming some of the basecoat by picking out strands using the base color of Moldy Ochre. Take care to make sure that the previous steps remain showing through.
Step 4) For a second highlight, apply Cygnus Yellow to the raised surfaces and edges.
Step 5) Finally, add a small amount of Menoth White Base to the previous step and highlight the tips and highest raised edges of the hairs.
Glow
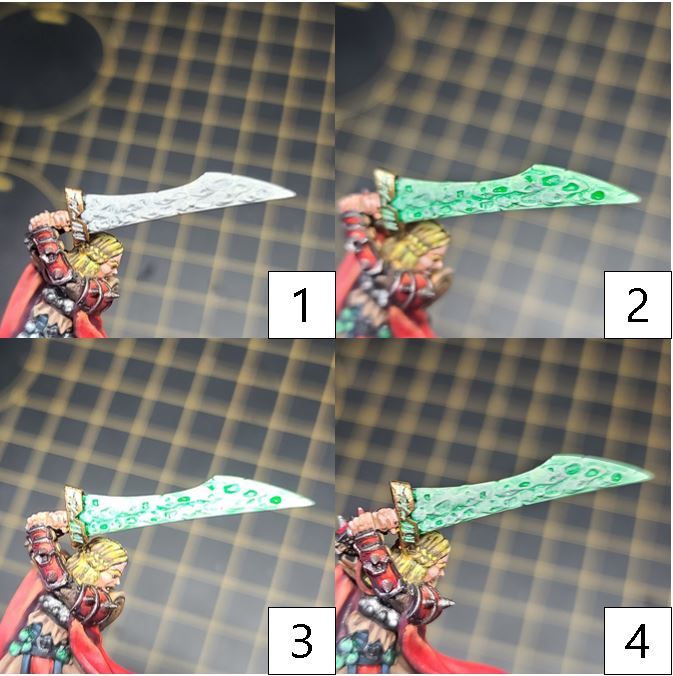
Step 1) Only thing left to do is add that glow! I start by thinning some Menoth White Highlight with a drop or two of water and applying this everywhere I want the greenish yellow glow to go.
Step 2) Next, I start with a 3:2 mix of Green Ink with Yellow Ink. Apply this as a wash over all of the previous step.
Step 3) Next, I return to the area and apply a highlight of Menoth White Highlight, but this time only to the raised surfaces and edges.
Step 4) For the final highlight of glow, I add more Yellow Ink to the mixture from Step 2. I apply this only to the raised surfaces of Step 3 and try not let it pool up in any of the recesses.
With that Prisoner 102822 is complete and ready for the tabletop.
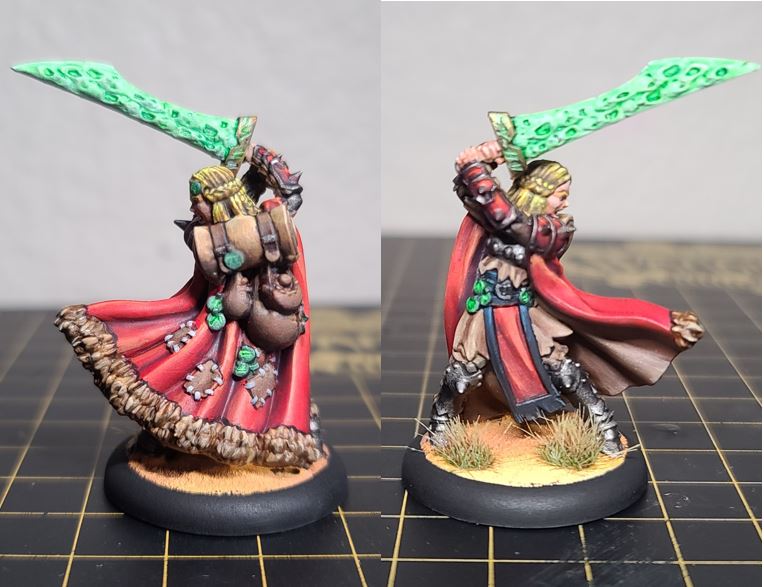
So, let’s start that New Year counter with a 001/100 completed!
AdeptiCon is coming up fast, and I’ve now set my eye on getting some cool stuff painted up for the tabletop. I can’t wait to share with you some cool paint schemes and get more models done on that New Year’s resolution!