Welcome back to another painting and hobby Insider. Last time, I walked you through how I painted my Alexia, Queen of the Damned. This time around, I’ll continue painting my MKIV mercenaries, focusing now on Maulgreth, The Charnel Plague. So, grab your brushes and paint and let’s go!
Colors used

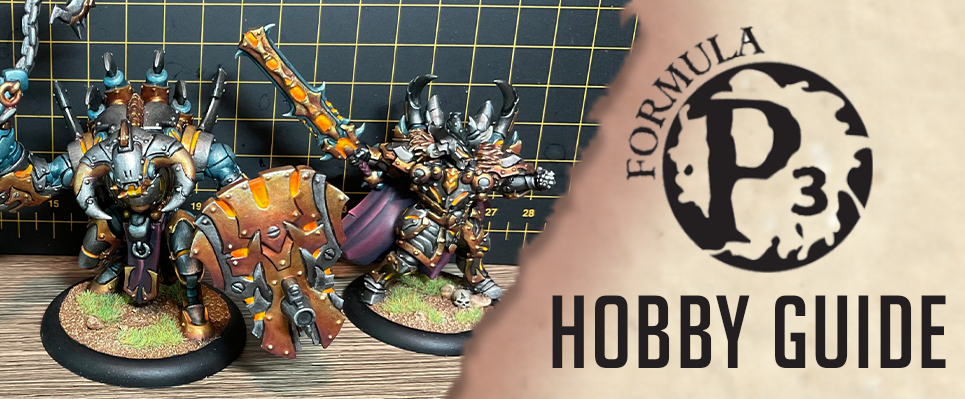
Silver Metals
Step 1) I decided the best way to get this project underway was to do the metals first, so I start off with the silver metals this time. I put on a solid basecoat of Boiler Black.
Step 2) Next, to create basic shading, I apply a wash of P3 Armor Wash.
Step 3) The Armor Wash ended up being a little heavier than I expected, so I return with Boiler Black to reclaim the color of the basecoat.
Step 4) Next, I start my highlights by picking out the raised areas with Cold Steel.
Step 5) Finally, after the model had been sealed with a matte sealant, I return with Quick Sliver to do the final hard-edged highlights.
Golds
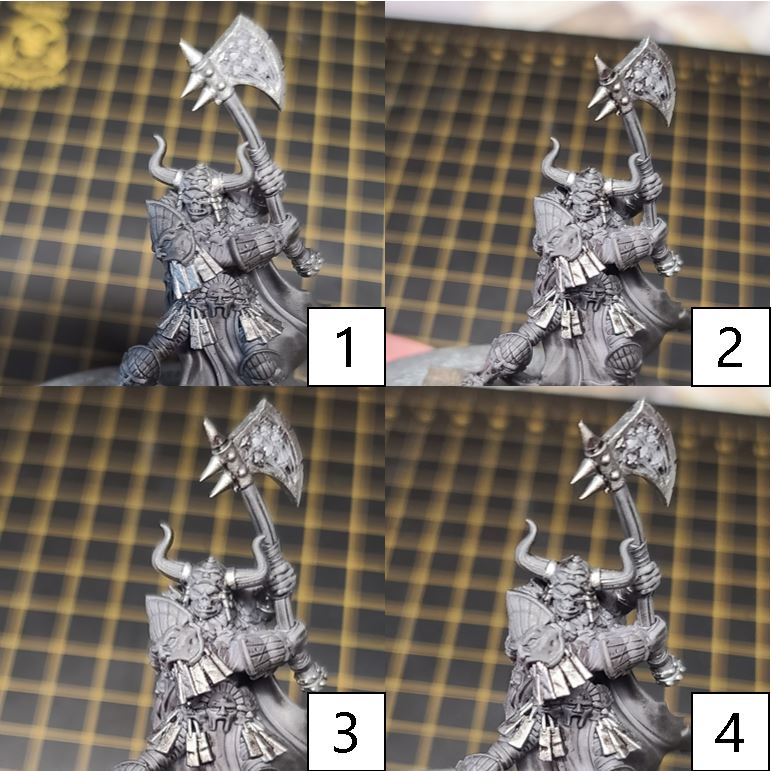
Step 1) Next, I move on to the golds on Maulgreth. I start with a solid basecoat of Rhulic Gold.
Step 2) To create a nice first shade, I mix 3 drops of Brown Ink, 2 drops of Yellow Ink, and 4 drops of Rhulic Gold, and I apply this first shade to the Rhulic Gold from the step above.
Step 3) To take the shade a little deeper, I mix equal parts Umbral Umber and Sanguine Base, and a drop of Brown Ink. I apply this color to the deepest areas.
Step 4) To start my highlights, I use Solid Gold and apply a nice blending to the higher areas.
Step 5) Finally, after the model had been sealed with a matte sealant, I return with an even mix of Solid Gold and Cold Steel as a final hard-edged highlight.
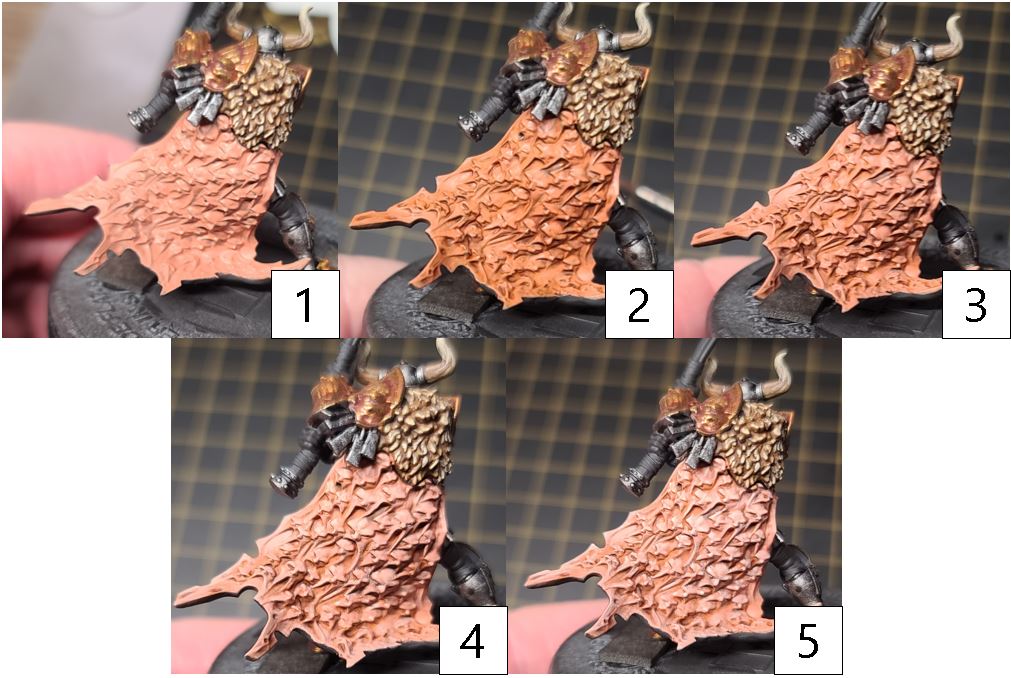
Fur Pelt and Horns
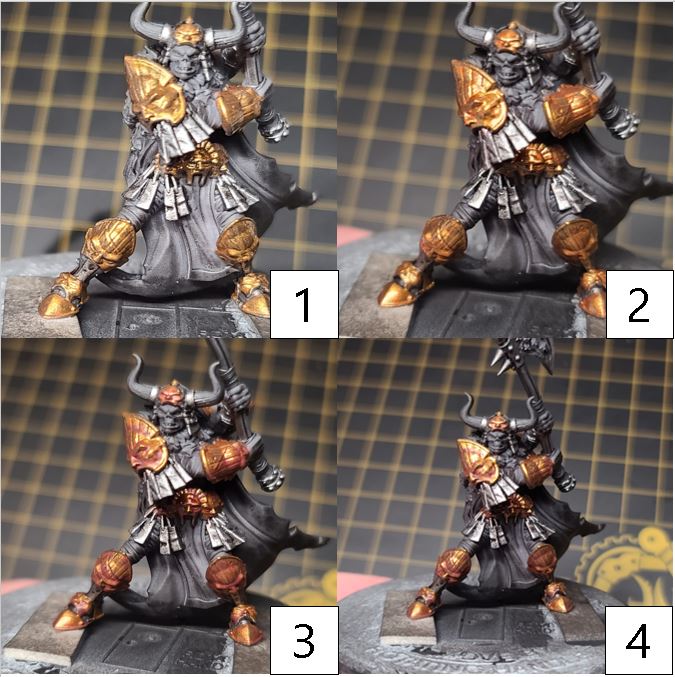
Step 1) With the silvers and golds done, it’s time to turn our attention to the fur pelt and horns on the helmet. For both of these areas, I use the same colors and process. Start by laying down a solid basecoat of Bloodtracker Brown.
Step 2) Next, add a layer of highlights using Rucksack Tan. Leave areas of the Bloodtracker Brown showing through.
Step 3) To blend the layers together, take Brown Ink and thin it out with a lot of water and apply this as a wash to the area. To get the best results, add a few thin coats to help build in the transitions and to smooth the look.
Step 4) Once the last wash has completely dried, apply a final highlight using Menoth White Base to the tips of the fur and the horns.
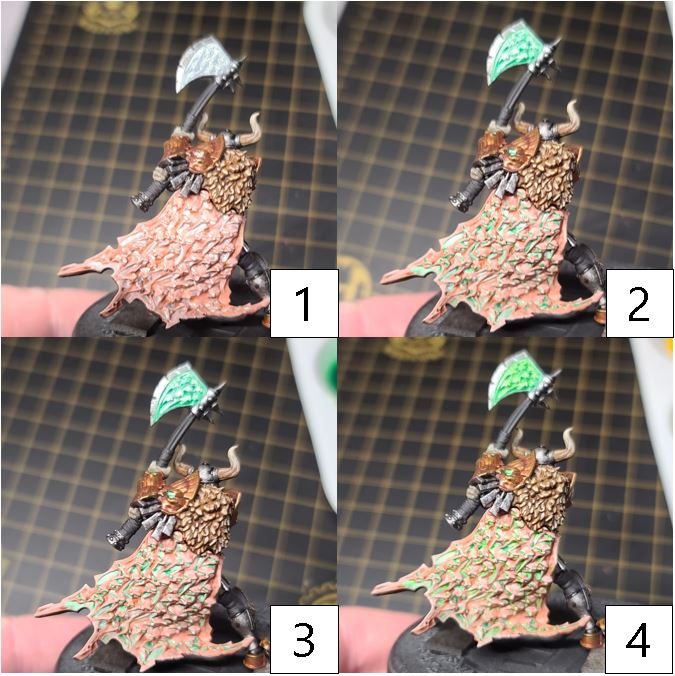
Skin Cloak
Step 1) With the fur cloak finished, I want to do something a little different for the faces on the back of Maulgreth’s cloak. I felt pretty sure this would look great as fleshy, glowing faces. (If you don’t want to pursue the process I’m after here and would rather just do the glowying cape, skip this and just follow the glow steps section for this area.) For my fleshy base, I start with a solid basecoat of Khardic Flesh.
Step 2) Next, I create a shade by applying a wash of Caspian Flesh Wash.
Step 3) The wash was a bit heavier than I would have preferred, so to smooth out the areas, I use the basecoat of Khardic Flesh to reclaim parts of the surface lost to the wash.
Step 4) I begin highlighting the area using a little bit of Midlund Flesh. I make sure to leave small areas of the previous step showing through.
Step 5) Finally, to finish off the flesh tones, I use Ryn Flesh on the highest raised edges and highlights.
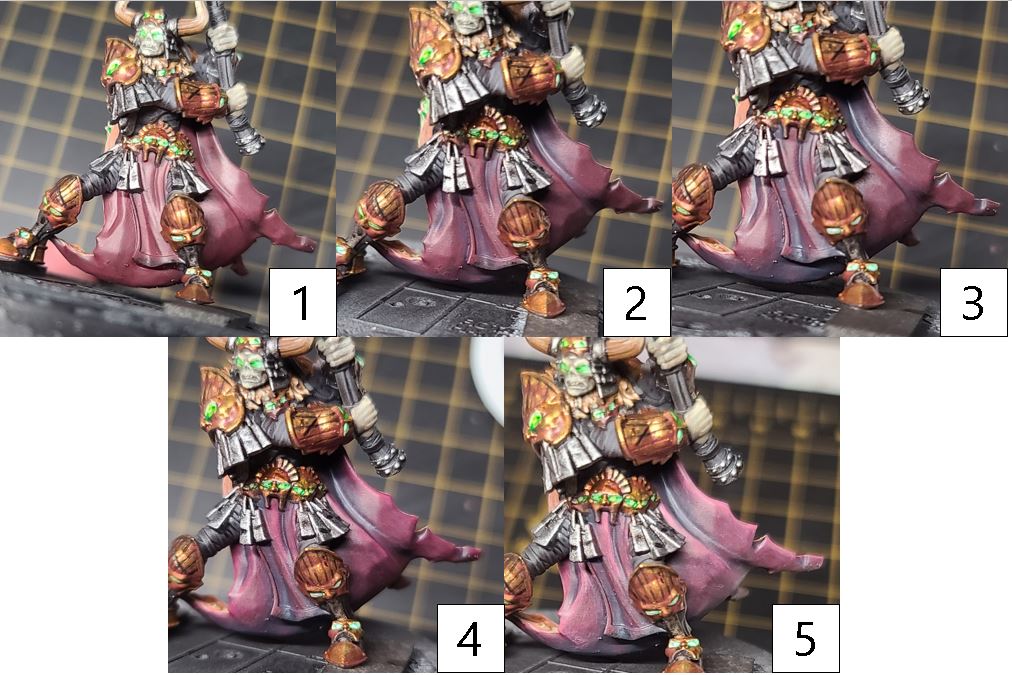
Bone Face

Step 1) With the back of the cloak done, I want to make sure I finished painting all of the areas I would like to add my necrotic glow to. Time to get that skull-like face painted up! To do this, I start with a nice basecoat of ’Jack Bone.
Step 2) I start by shading the area with a wash of Cryx Bane Highlight thinned out with a little water. I do my best to avoid any raised areas.
Step 3) Next, I apply a second layer of shading with a mixture of Gun Cops Brown and Thornwood Green, making sure to apply this in the deeper areas of shadow.
Step 4) For a final shade, I mix Battlefield Brown with Greatcoat Grey and apply this sparingly to the deepest areas. This color can overpower the look I’m going for, so I am very reserved as to where I put this.
Step 5) To highlight the bone, I mix Menoth White Highlight and ’Jack Bone together and apply this color to any raised edges or areas worth drawing attention to.
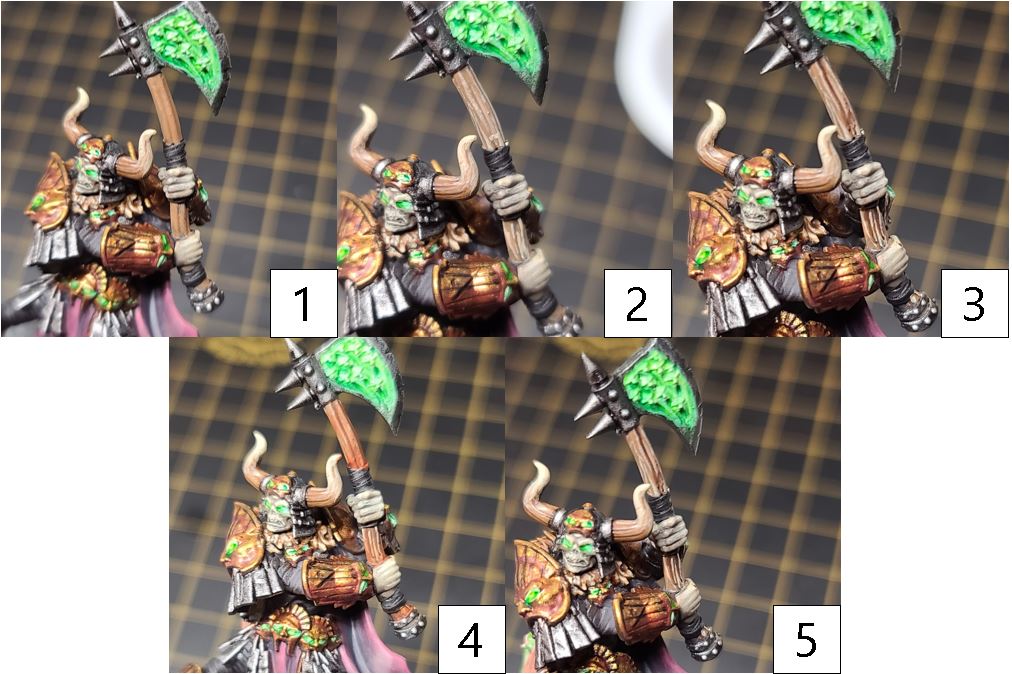
Necrotite Glow
Step 1) Thin down Menoth White Highlight with water, and apply it to the eye sockets, glowing runes, and anywhere else you want to see your necrotic glow.
Step 2) Next, mix two drops of Green Ink and four drops of Yellow Ink to get a Necrotite green color; use this to lightly glaze the runes. Be patient—make sure this doesn’t pool up in areas. It isn’t a wash, and we only want this to shift the color of the Menoth White Highlight, not drown it out.
Step 3) Once the previous step has completely dried, return to the area with Menoth White Highlight. Leave bits of the previous steps showing throughout.
Step 4) Finalize this glow by adding in a little more Yellow Ink to the mixture used in step 2 and apply this as a second glaze to finish the effect. (I typically add another two or three drops of Yellow Ink.)
Inner Cloak
Step 1) Next up is the inner cloak. Start by layering on a few thin coats of Sanguine Base.
Step 2) Next, add a few drops of Exile Blue to Sanguine Base and apply this mixture as the first layer of shading.
Step 3) For the final shade, add a drop or two of Coal Black to the previous mixture and apply this color into the deepest recesses as the darkest areas of the cloak.
Step 4) To start the highlights, use Sanguine Highlight in thin layers, building up the color slowly. Once you have a smooth transition, you’re good to move on to the next step.
Step 5) Mix Menoth White Base with an even amount of Sanguine Highlight to create a final highlight. Using the two-brush blending technique, blend out the highlights.
Woodgrain
Step 1) To finalize Maulgreth, we still need to add a little bit of paint to the wooden handle on the axe. Start by basecoating this axe handle with Gun Corps Brown.
Step 2) Next, using Menoth White Base, start to draw out the grain structures of the wood. Small lines with the occasional bump or two will break it up from looking too uniform.
Step 3) To create a little bit of depth to the wood look, use Umbral Umber to do the same as the previous step before following the lines of the Menoth Base White. Imagine making a wood sandwich with three layers stacked and repeating: Menoth White Base, Umbral Umber, and a layer of Gun Corps Brown.
Step 4) Mix Bloodstone, a drop of Yellow Ink, and Brown Ink in a 3:1:2 ratio. With this color, add a glaze across the woodgrain to make the colors pop. (I do a slight blending on each plank. I place the wash in the areas that will be the heaviest seen in shadow and try and blend up to where it will be the lightest.)
Step 5) To really bring the woodgrain to life, add a single drop—if not just a half-drop—of Blue Ink to the previous color. Using this mix, blend in one final layer of shade in the darkest areas.
And with that last step completed, Maulgreth, The Charnel Plague is ready to hit the tabletop in my MKIV armies! And with a name like that, he should be a real sight to see in battle.

Join me next time for another MKIV Mercenaries hobby and painting article when I’ll bring colorful freedom to Prisoner 102822. See you next time, painters!