Welcome back to another painting Insider. As promised, I’m back on the sauce and painting up something new! For this Insider, I’ll be diving into my paint scheme for my Dusk preview battlegroup box, focusing on Hazaroth, Narcissar of Ruin. So, grab your paint and your brushes, and let’s get it done!
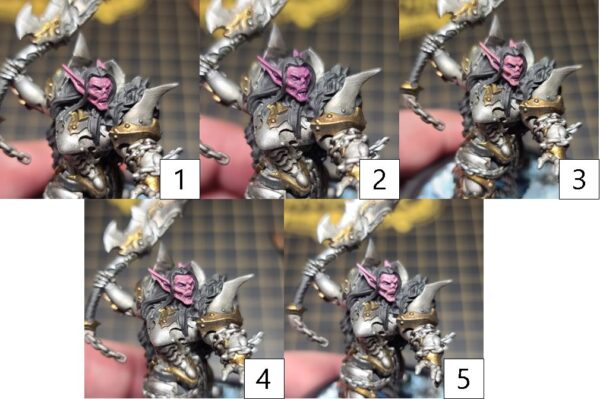
Blighted Steel

Step 1) Nothing fancy for prep on this one—just the normal black primer will do. I’ll start by drybrushing Pig Iron on all of the silver metal areas until I get a good solid coat.
Step 2) For my first shade, I’ll apply Cryx Bane Base to any of the recesses.
Step 3) Next, I mix Brown Ink, Green Ink, and Thamar Black in a 4:2:1 ratio, and then apply this color as a second shade to deepen the shadows to the metallic areas.
Step 4) I start my highlights using paint straight out of the pot Cold Steel.
Step 5) Finally, after the rest of the model is painted and sealed with a matte sealant, I return to the area and apply a final highlight of Quick Silver.
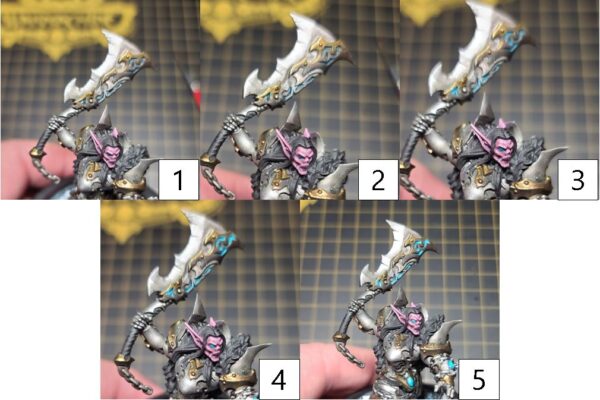
Blighted Gold
Step 1) I went back and forth for quite a while on which gold I should use. Should I make a colder gold or should I go with alittle more warmth and try and get red into the gold and use it as a stark contrast? In the end I decided to use a colder blighted gold. So, I start by basecoating the area using Blighted Gold.
Step 2) For the first shade, I make a 50:50 mix of Cryx Bane Base and Brown Ink and apply it into the area, creating shadows on the golds.
Step 3) I darken the shadows by adding a second shade. I mix a 3:1 ratio of Umbral Umber with Coal Black, focusing on the deepest areas.
Step 4) Next, I start my first layer of highlights on the gold using Brass Balls.
Step 5) Finally, just like the blighted steel, after the rest of the model is painted and protected with matte sealant, I add final highlights with a mix of 50:50 ratio of Brass Balls and Radiant Platinum.
Dark Blue Tabard
Step 1) To get that perfect dark blue cloth, start with a 50:50 mix Coal Black and Exile Blue for your basecoat.
Step 2) Next, use Umbral Umber as your first shade and apply it to where the shadows would form.
Step 3) To get that deep dark tone on the shadows, use a second shade of Thamar Black.
Step 4) To create the first highlight, add a few drops of Cygnar Blue Base into your base mixture and apply it as the first highlight.
Step 5) To take it one step further, add Underbelly Blue to the previous mixture to apply as a final highlight.
Purple Skin
Step 1) For the skin tones, mix Khardic Flesh with Beaten Purple in a 50:50 ratio and apply it as the basecoat.
Step 2) Next, take Piggy Purple Ink and thin it out with water in a 1:4 ratio of ink: water and apply as a glaze. Make sure to not let the color pool in the recesses of the area. We want a nice even coat to color shift the skin but not so much so as to overwhelm the area.
Step 3) After letting the ink dry completely, reuse the base mixture, and apply a layer to bring the skin back up. Make sure to leave the lower area slightly visible to create depth to the face.
Step 4) For the first highlight, add Midlund Flesh to the base mixture of Khardic Flesh and Beaten Purple. Apply this to any raised areas or higher points on fleshy areas.
Step 5) Finally, for the highest points on the face, I add Ryn Flesh to the previous step’s mixture and apply it as a final highlight.
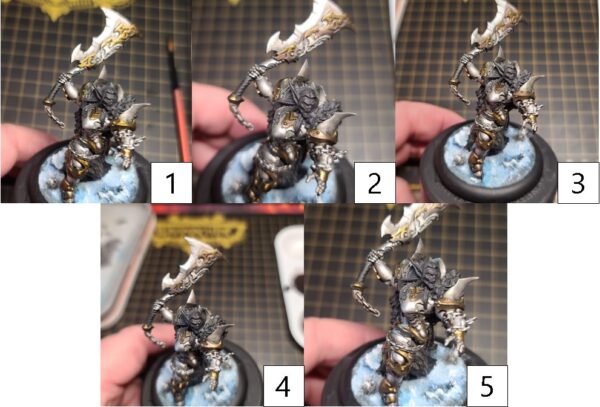
Blue Glow
Step 1) Time to add that frosty blue glow in. To start the glow, Iuse a basecoat of Coal Black.
Step 2) Begin by adding layers of Meredius Blue to the Coal Black and begin to work the highlights up.
Step 3) Next, use straight Meredius Blue to create another layer of highlight.
Step 4) for my fourth layer, I mix Arcane Blue in with the Meredius Blue to apply the next layer of highlight.
Step 5) Finally, mix in a little Menoth White Base to the mixture to create the highest highlight and apply to the tips of the glow.
White Hair
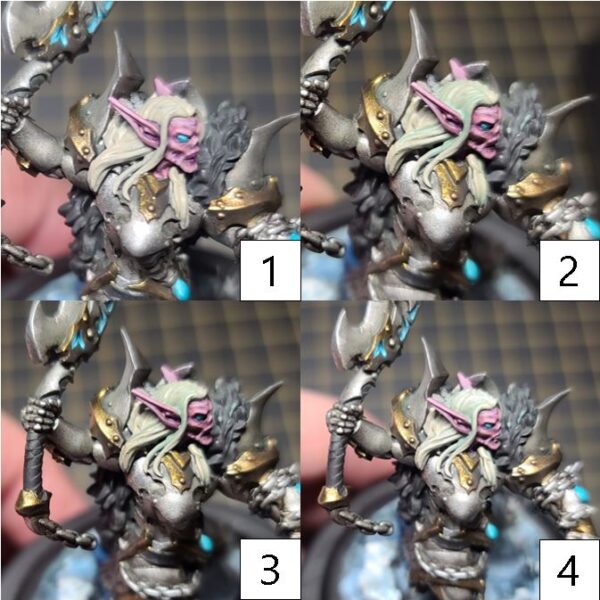
Step 1) A nice silver hair will really complement the model so far. Start with a solid basecoat of Menoth White Base mixed with Trollblood Highlight.
Step 2) For the shade, mix in a few drops of Turquoise Ink to the basecoat mixture and apply it as a shade to the hair. Since we are creating a wash, it’s okay if some of the mixture pools in the recesses.
Step 3) To really make the hair stand out, use a second shade of Bastion Grey to separate the strands of the hair and create depth.
Step 4) Finally, apply highlights to the ridges of the hair using a mixture of Menoth White Base, Trollblood Highlight, and Menoth White Highlight in a 1:1:1 ratio.
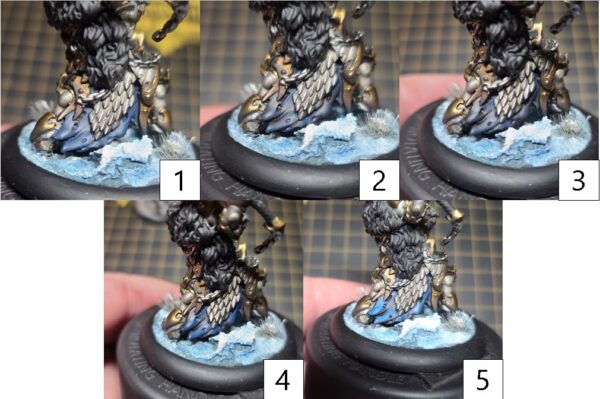
Fur Cloak
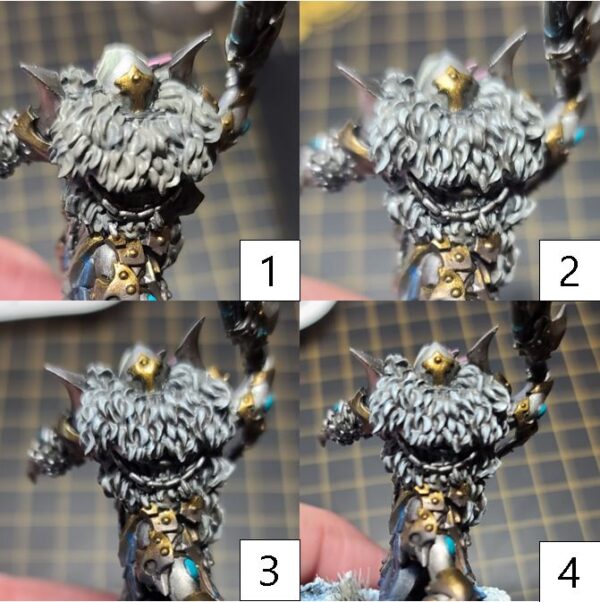
Step 1) Last but not least, it’s time to fill in the fur mane on Hazaroth’s back. I start off with a solid basecoat of Bastion Grey.
Step 2) Next, I add a wash by thinning out Ironhull Grey with water and apply to the area. If necessary, I’ll reclaim some of the basecoat by applying Bastion Grey over any space that might have become too saturated from the wash.
Step 3) For my highlights, I mix a small amount of Frostbite in Bastion Grey and start applying in a stippling pattern over the previous steps. If you are looking to save some time, you can also drybrush this color onto the area.
Step 4) Finally, I Mix Menoth White Highlight to a small amount of Frostbite and apply this color to the highest raised edges.
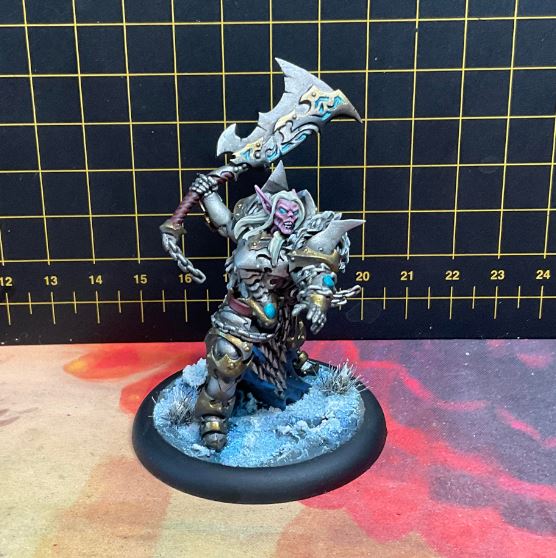
With the final steps complete Hazaroth is ready for the table.Now all that is left is to tackle some of his warjacks! Join me next time when I cover how I add some paint to the warjacks of this battlegroup and go over how I created my snowy bases for this army!