by Charles Foster III
Where do I even start? Do you have tips for beginners? Where did you learn to do that in the first place?
These are some of the frequent questions I’m asked about the painting Insiders I write. Now, I don’t consider myself a top-level painter; I’m not even a studio painter. In truth, I just like to paint, but I think I can answer these questions and maybe help a few newer painters find their legs. For now, let’s take a look at three fundamental techniques I use when painting my models.
Drybrushing
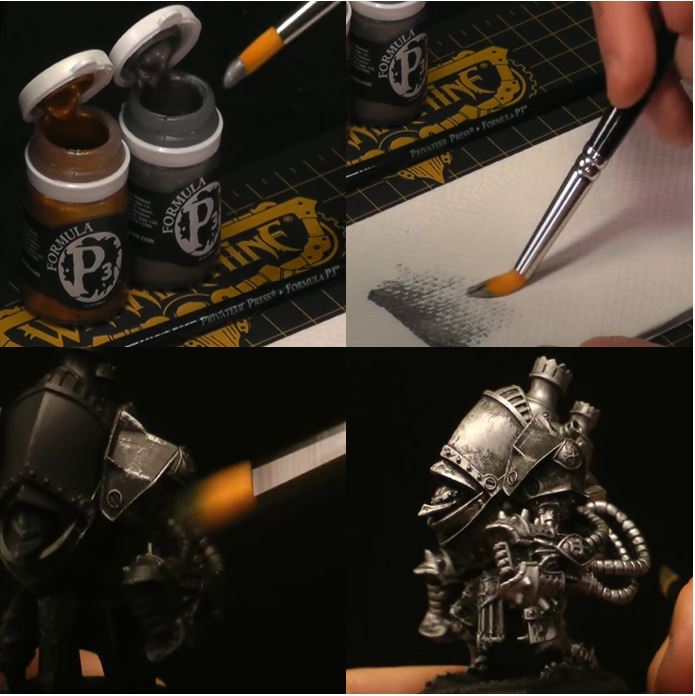
One of the most important skills to have in your kit as a painter is the knowledge of drybrushing. Drybrushing accentuates the details of the model and is a quick way to create highlights on raised surfaces. To drybrush, you’ll want a napkin or paper towel on hand while you paint.
Step 1) To begin, apply a small amount of the paint you would like to use to the tip of a dry brush.
Step 2) Remove any excess paint onto that paper towel or napkin. You’ll want to nearly remove the paint completely from the brush; in essence, you want to have the smallest amount of paint possible on the brush. In this technique, less is more.
Step 3) To add the paint to the model, apply brush strokes by going back and forth lightly over the area on the model you intend to paint.
Step 4) If you need more paint, simply add some to the tip of your brush and remove the excess on your napkin or paper towel again. While drybrushing, it’s important to not dip the brush into water to clean off excess paint. Keep the brush as dry as possible (hence the name drybrushing).
Special note: You don’t want to use a brand-new perfect artist brush for this. This technique is typically pretty hard on a brush, so older brushes or those specifically designed for drybrushing are recommended. Here is a link to a quick four-minute video done by former Privateer Press Hobby Manager Dallas Kemp on the basics of drybrushing:
Drybrushing: https://www.youtube.com/watch?v=i3yV_OTLurc
Basecoating

As odd as it might sound, a proper basecoat is another important skill you can learn to do well when painting a miniature. Having a great basecoat means you have the best possible foundation to build layers on, to apply two-brush blends and washes to, and to expand other techniques.
Step 1) Grab the paint you would like to basecoat an area with and remove some of the paint from the pot to either a wet pallet or another pallet of your choice.
Step 2) Using only water, thin the paint down slightly. You want the paint to be thin but not so much so that it functions as a liquid. We want to be able to build up layers to get a solid even coating over the area. If the paint is too thin or too wet, we may not have enough control to apply it evenly across the surface.
Step 3) Apply thin layers of your paint to the appropriate areas of the model. Take your time; allow each layer to fully dry before applying another layer. A normal basecoat can take two or more layers to get the solid coverage we’re looking for.
Step 4) Apply additional layers as needed until you have a nice smooth basecoat over the area of the model.
You can check out a great video on getting great basecoats at this link here:
Basecoating: https://www.youtube.com/watch?v=lk5IHu7E-MM&list=PLOHvZQUaO4kcgo1dYWeZ0Mzc0ZivXevnF&index=5
Two-Brush Blending
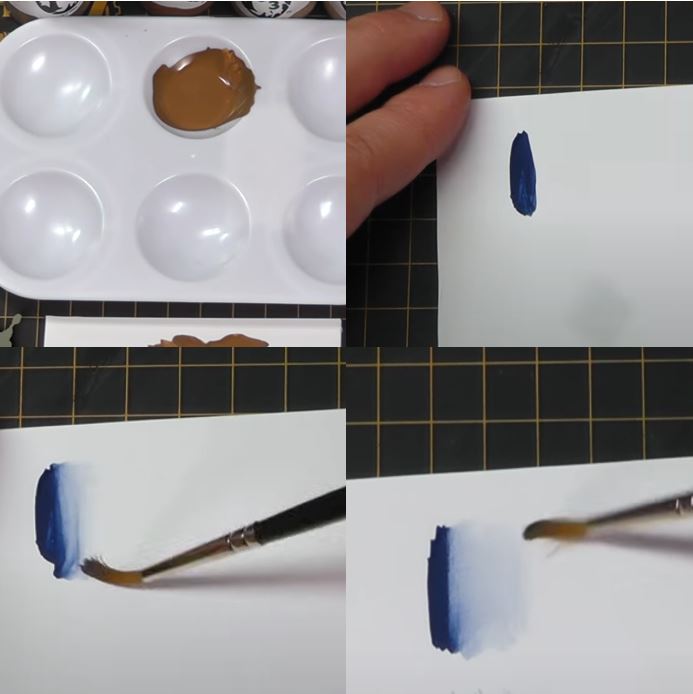
A common technique for many who have followed Privateer Press for a long time is that of two-brush blending. The concept of two-brush blending is simply applying paint with one brush (application brush) and using a second brush (blend brush) to blend it out in a smooth transition on the model. To execute this technique…
Step 1) Prep your paint by adding a little bit of water to loosen it; a drop or two usually does fine. Don’t add too much, as we don’t want the paint to be watery—we want it just enough to get the paint moving and still maintain control.
Step 2) Next, apply the paint to the appropriate area you wish to blend. For shadows, start in the darker areas and work back toward the lighter basecoat; for highlights, start at the highest points and work back toward the basecoated areas.
Step 3) Moisten your blending brush with a little bit of saliva (preferably your own). Go into the area with a back-and-forth motion to grab the edge of the applied paint. Create a small reservoir and pull the paint outward, generating a nice smooth transition.
This technique takes a bit of practice but is well worth the time to develop the skill. You can check out a great basic tutorial video here at this link:
Two-Brush Blending: https://www.youtube.com/watch?v=o7J9uHvdBXY
While these three techniques aren’t the only ones out there, I felt they had the greatest impact on me when I was starting out painting, struggling with how to get going. I would also recommend checking out these other helpful videos from the P3 Studio:
- Priming Models: https://www.youtube.com/watch?v=ixI9uSf2SGo
- Applying Washes: https://www.youtube.com/watch?v=EPpwlom90jM
- Airbrush Basics: https://www.youtube.com/watch?v=237aodAKq-I
- Brush Care: https://www.youtube.com/watch?v=B0DWAJhQTh4
For those of you tuning in for my normal step-by-step painting guides, not to worry: starting next week, I’ll be back on the sauce and stroking my ego to show you how I paint up my Dusk preview battle box. As always, if there are topics you would like me to cover or you just have feedback in general, you’re very welcome to message me at my email address charles@privateerpress.com. Until next time!