by Charles Foster III
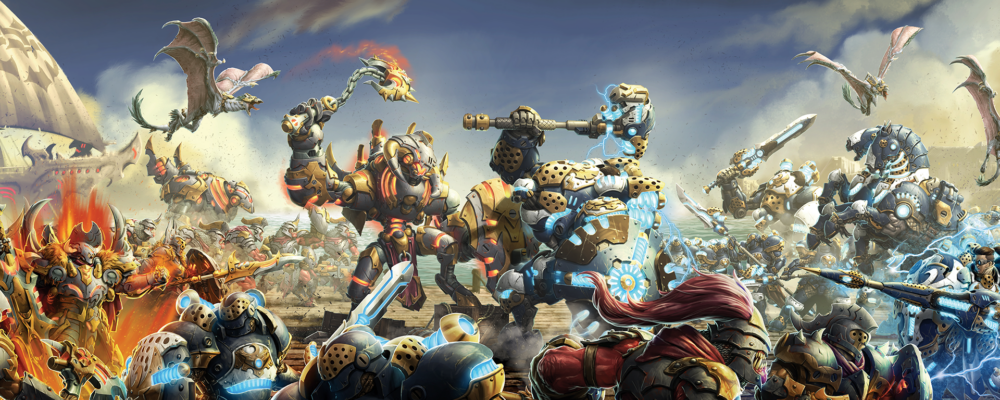
Welcome back to another painting Insider! I’m still hard at work getting my Legacy Prime Army ready for Warfaire Weekend. In last time’s Insider, we launched a poll to see what everyone thought I should paint next, and here are the results:
The votes are in—and up next are some Powder Monkeys. While I don’t have the final FA allowance for Prime confirmed, I do have three copies that need painted and likely used in Unlimited Arena games later on. For now, we will paint all three. Time to grab some paint, some brushes and get to it.
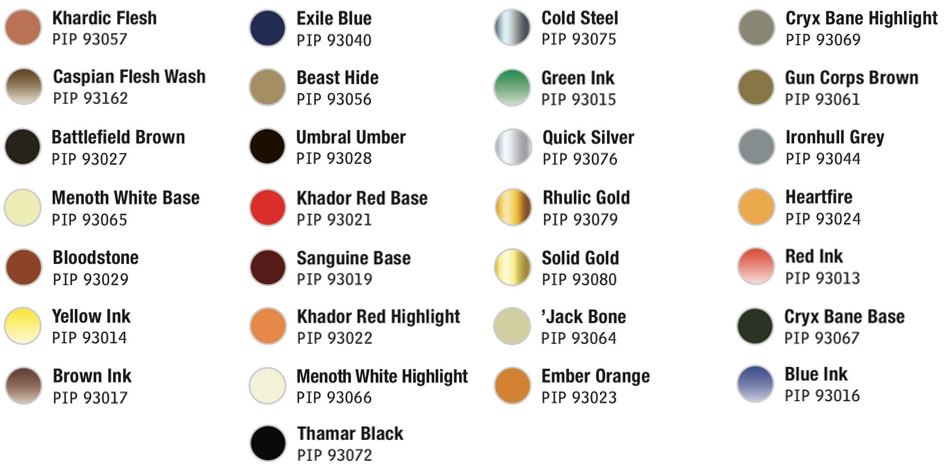
Colors Used
Face/Hands/Feet

Step 1) I follow my routine of painting the face first. I start with a basecoat of Khardic Flesh on the face, hands, and feet.
Step 2) To create a nice shade for the previous step, I thin out some Caspian Flesh Wash with a little water and apply it to the area.
Step 3) I want a little bit darker of a shade to go with the previous step and pick out the deepest areas by shading with Battlefield Brown.
Step 4) I want to recover some of the color lost to shading, so I start my highlights using Khardic Flesh.
Step 5) For my final highlights, I mix Khardic Flesh with Beast Hide and apply this color to the highest raised areas and edges.
Fur

Step 1) Next up, tackling the fur. Start the basecoat with Battlefield Brown.
Step 2) Start the shading by adding a wash of Brown Ink over the previous layer.
Step 3) Deepen the shadows a bit by blending in an additional shade of Umbral Umber.
Step 4) Next, start to reclaim some of the lost tone by applying a first highlight of Battlefield Brown.
Step 5) For your second highlight, mix an even part of Battlefield Brown and Beast Hide and apply this to the area.
Step 6) Finally, pick out a few of the raised areas with a little Beast Hide to finish off the fur.
Bandana

Step 1) I start the bandana off by basecoating Khador Red Base over the area.
Step 2) Next up, I take a little Sanguine Base and blend in the first shade.
Step 3) To darken this shade, I take Sanguine Base and mix in a few drops of Exile Blue. Blend this into the area to create the heaviest of shadows.
Step 4) I start my highlight by mixing mix Khador Red Base and Khador Red Highlight a 50/50 mix is a great starting point.
Step 5) I continue my highlights by mixing Khador Red Highlight and Menoth White Highlight together and applying my next highlight to the area. It’s okay if this looks bright and a little bit off. When we add the next step, it will blend all of the colors together.
Step 6) Glaze the entire area with multiple layers of Red Ink thinned out to about 16:1 with water: Red Ink. Be patient in this step and make sure that you get a nice even coat over the area. Don’t let the ink rest in the recesses like a wash normally would, as it will take away the overall effect. Special note: Make sure to wait until each layer is fully dried before adding another layer. Patience is key in this step. If you need to speed up the process, a hair dryer is always a great way to go.
Barrel/Torch Stick

Step 1) Time to get this woodgrain painted. Start your wood colors off by basecoating any woodgrain areas in Gun Corps Brown.
Step 2) Next, using Menoth White Base, start to draw out the grain structures of the wood. Small lines with the occasional bump or two will break it up from looking too uniform.
Step 3) To create a little bit of depth to the wood look, I use some Umbral Umber to do the same as the in the previous step, following the lines of the Menoth White Base.
Step 4) To bring some vibrancy to the wood colors, mix Bloodstone, a drop of Yellow Ink, and some Brown Ink in a 3:1:2 ratio. With this color, blend a glaze across the woodgrain to make the colors pop. I put the wash in the areas that will be the heaviest seen in shadow and try and blend to where it will be the lightest.
Step 5) I repeat the previous step again but only going half of the distance from what I did before.
Step 6) To really bring the woodgrain to the level I’m looking for, I’m going to add a single drop—if not just a half-drop—of Blue Ink to the previous color. Using this mix, I blend in one final layer of shade to the darkest areas.
Step 7) To finish off the wood effect, I mix a little bit of Thamar Black into the mix. Using this dark color, I go over all the Exile Blue lines to darken them down to a black color and really bring the wooden planks to life. Hold onto this wash, as we will be using it later in painting this model.
Silver Metals

Step 1) To tackle the silvers of the cannon barrel, I basecoat the area using Cold Steel.
Step 2) I shade my basecoat with a mix of Brown Ink and Exile Blue and apply it to the recesses.
Step 3) For my second layer of shading on the silvers, I mix of Green Ink and Brown Ink with a small dot of Cryx Bane Base added. This will add depth to the shadows.
Step 4) After the model is sealed, I’ll return to this area and apply final highlights of Quick Silver on the raised edges.
Gold/Brass

Step 1) Start your golds off with a nice with a solid basecoat using multiple thin layers of Rhulic Gold.
Step 2) To create a nice tone for your golds, start by glazing the area using a mixture of Brown Ink, Yellow Ink, and Rhulic Gold. Apply this as your first layer of shading.
Step 3) To darken the shadows, mix Umbral Umber, Sanguine Base, and Brown Ink together. Apply this to the areas that will be the darkest of shadows.
Step 4) Use Solid Gold to start highlighting the area. Focus on areas where light could be reflecting and the highest raised areas.
Step 5) Finally, after the model is sealed with a matte sealant, return to the area to apply your final highlight by mixing Solid Gold and Cold Steel together. Use this color to identify the extreme highlights.
Label

Step 1) Now for the labels on the barrels. I start off by basecoating the parchment area with a solid coat of ’Jack Bone.
Step 2) Paint any freehand script and designs you want to include using a mixture of Umbral Umber and Thamar Black.
Step 3) I apply my first shade by combining Mixing Medium, Ember Orange, and Cryx Bane Highlight.
Step 4) To deepen the shadows of the paper, I add a second shade by mixing Gun Corps Brown and Ironhull Grey with a lot of Mixing Medium. Careful not to over-apply this color.
Step 5) Finally, I finish off with a highlight of Menoth White Highlight, ’Jack Bone, and Mixing Medium.
Step 6) To finish up the script, I touch up any places where it was overly covered by the layers with some thinned out Umbral Umber and Thamar Black mixed together.
Fire

Step 1) Time to finish off the model by adding some fire. Apply a basecoat of Menoth White Base to the area of the flames.
Step 2) Thin out some Heartfire with a little bit of water and give the whole area a wash of Heartfire. Try not to go heavy with the wash and instead go with a few thin coats, letting each layer dry fully in between.
Step 3) Hotter flames appear as lighter colors, so have the colors darken from base to tip. With this in mind, paint the upper part of the flames with a mix of Ember Orange and Khador Red Highlight.
Step 4) Apply a mixture of Umbral Umber and Sanguine Base to the tips of the flames in thin, diluted layers.
Step 5) Add Thamar Black to the previous mixture and apply the resulting color to the extreme tips of the flame as a final layer.

There we have it: three awesome-looking monkeys for my Privateer Prime Legacy Army. I’m getting so pumped up to see everyone at Warfaire Weekend. Only a few more weeks to go—so, no time to take a powder! I’d better get to painting the rest of the models!
Be sure to book now for Warfaire Weekend, Nov 4–7, and the Privateer Crew will see you there!
Until next time, fellow painters!