by Charles Foster III
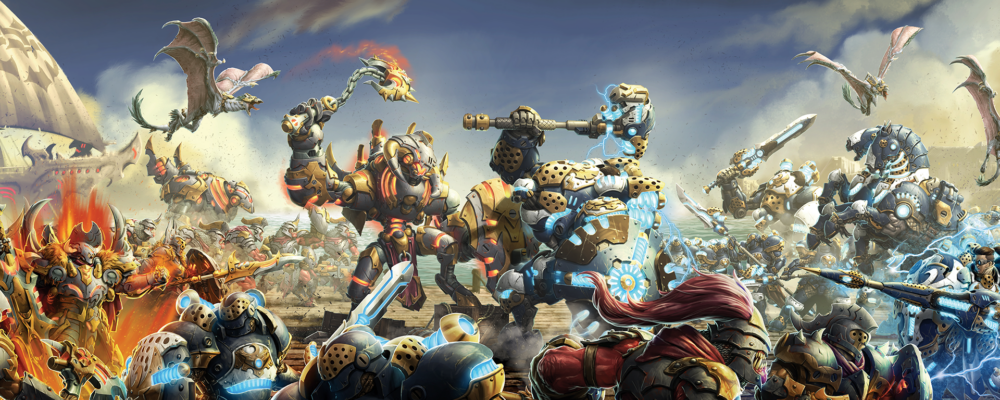
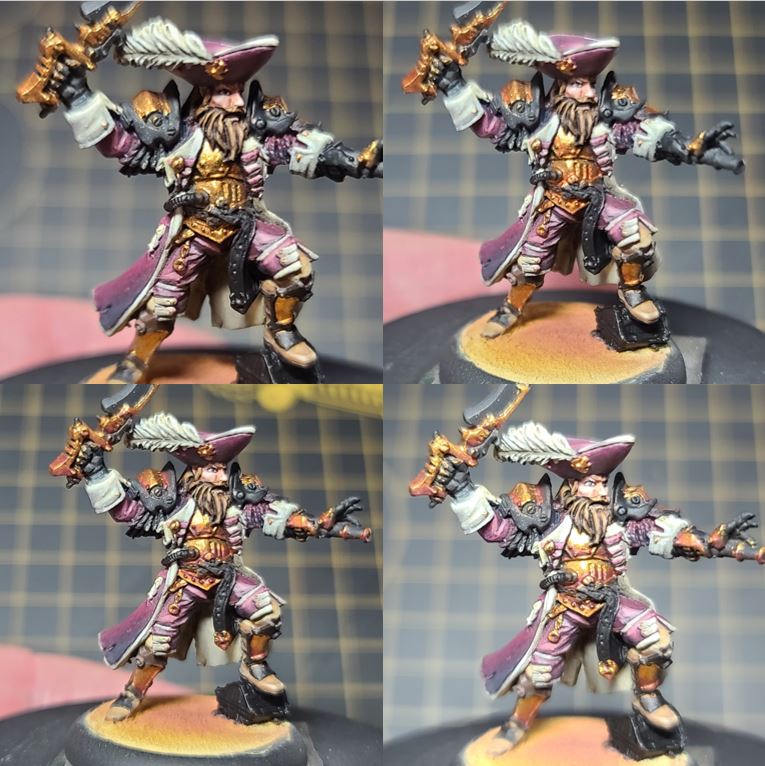
Greetings, Painters! Last time, I was able to finish off my first Prime Legacy warcaster in my Talion army with Fiona the Black. Getting this army ready for Warfaire Weekend has me so pumped up about painting and playing some games of MKIV WARMACHINE! Now it’s time to tackle my second warcaster for this Prime Legacy army by painting up Captain Bartolo Montador. So, let’s batten down the hatches on this next warcaster as we hoist the colors high!
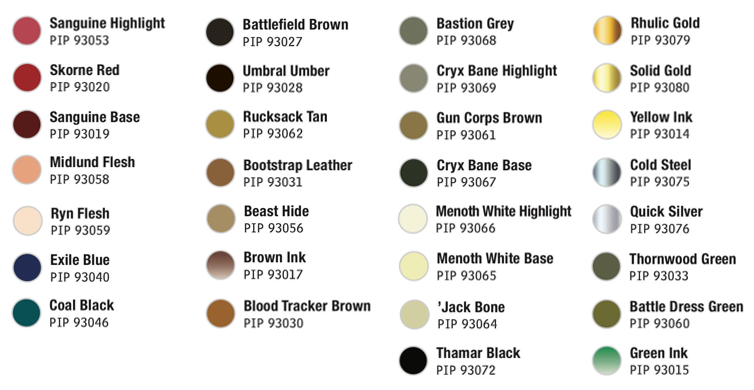
Colors Used
Face

- Step 1) I really like doing the faces of my miniatures first, and to keep this tradition going, I start off with tackling the flesh tones. I start off with a nice basecoat of Midlund Flesh. I use a few thin coats to make sure I don’t have any patchiness and that I get a nice, even layer.
- Step 2) Next, I shade the face using a mixture of Skorne Red and Midlund Flesh. A 50/50 mix will do just fine.
- Step 3) To balance out the red from the previous step, I use a 50/50 mix of Battledress Green and Midlund Flesh to apply a second layer of shading.
- Step 4) For my final shade, I mix Battledress Green with Skorne Red and use this color to define the lines of the face.
- Step 5) Next, I start my highlights by making a 50/50 mix of Midlund Flesh and Ryn Flesh to apply highlights to the cheekbones, forehead, nose, upper lip, and eyelids.
- Step 6) Finally, to really bring the face to life, I apply Ryn Flesh to the raised areas in order to define the lines of the face.
Beard/Hair
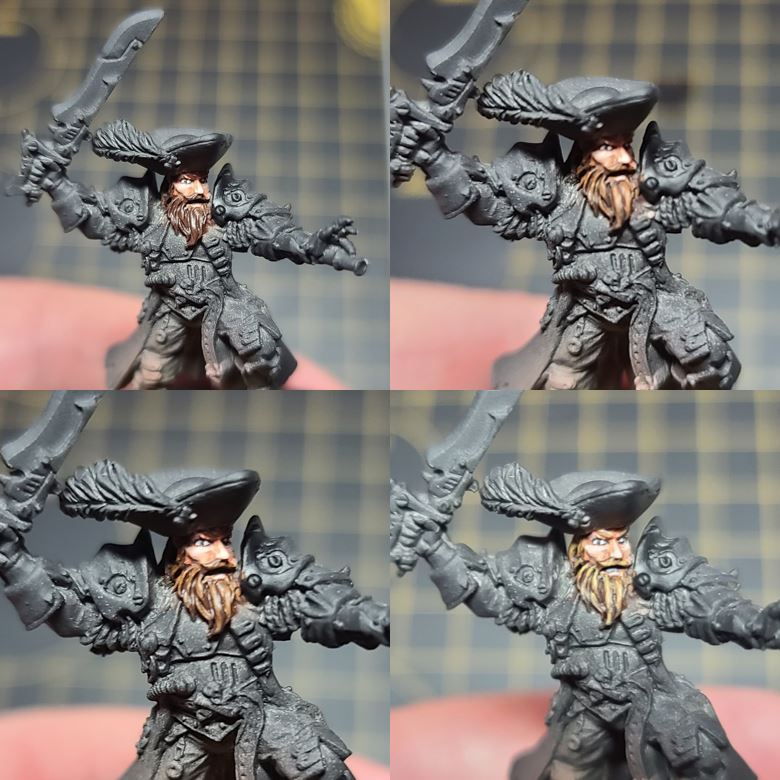
- Step 1) Using the original paint scheme from the studio model, let’s go ahead and give him some light brown hair. Start by basecoating the areas with some Umbral Umber.
- Step 2) Next, build up the layers using Bloodtracker Brown. Take your time and be sure to leave some of the basecoat from the previous layer showing through.
- Step 3) For the third layer, apply a wash over the area, using Brown Ink thinned out with a little water.
- Step 4) Finally, to get that little bit of golden brown in the color, add a final highlight of Rucksack Tan to the upper raised areas.
Reds

- Step 1) Now that we have some personality done in his face, let’s get the reds on Bartolo going. Apply Sanguine Base to the area until you have a solid basecoat.
- Step 2) Add a bit of Exile Blue to the Sanguine Base and apply this mixture for your first layer of shading.
- Step 3) Next, to create some additional depth, add a few small dabs of Coal Black to the previous mixture to create a colorful black. Use this for the final layer of shading.
- Step 4) Apply your first highlight by blending in Sanguine Highlight to the raised areas.
- Step 5) Finally, using an edging technique, apply a final highlight of 50/50 Sanguine Highlight mixed with Menoth White Base. Apply this to the highest raised areas and anywhere you would like to show lighting on the red cloth.
Feathers/Whites
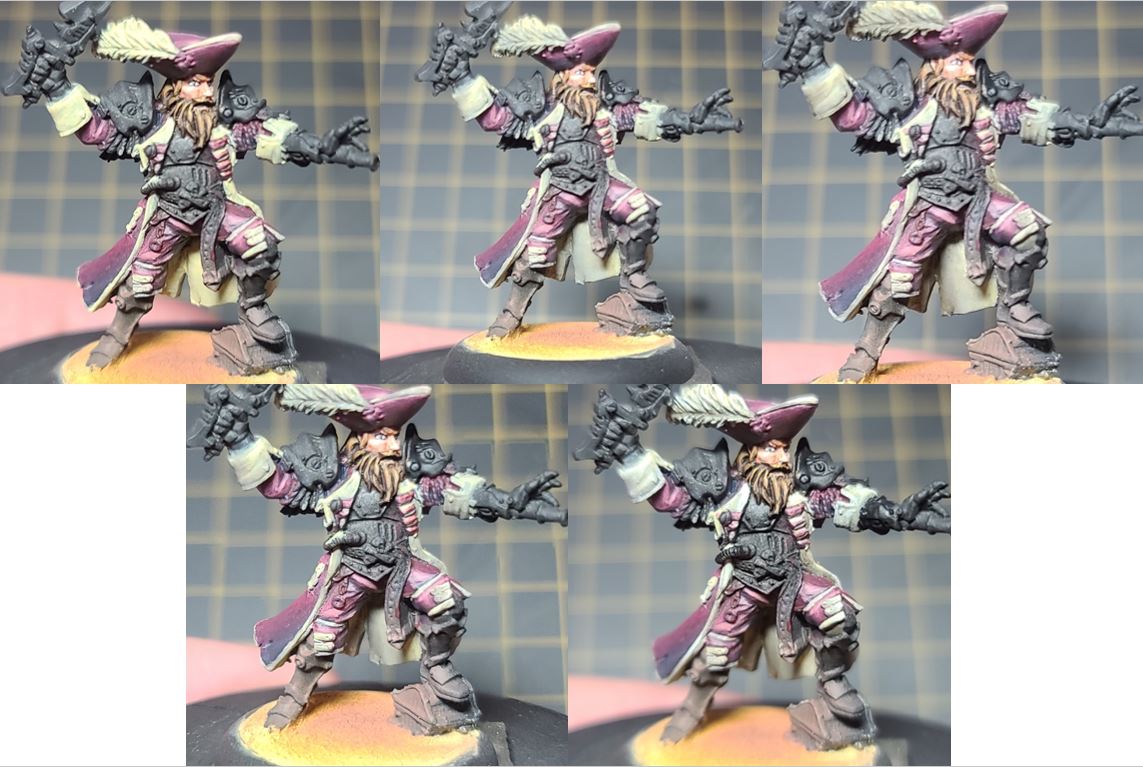
- Step 1) There are ton of areas all over the model to paint white, from the feathers to the overcoat. I start off by basecoating the areas in Menoth White Base. Definitely take your time to get an even coat with no patchiness.
- Step 2) To create my first layer of shading, I thin out Cryx Bane Highlight with P3 Mixing Medium. I then use this to shade the base color.
- Step 3) Next, I apply a second shade using Bastion Grey to define the darkest areas.
- Step 4) For my final shade, I add Thornwood Green sparingly to the deepest recesses. Be cautious not to go overboard with this color.
- Step 5) For my highlights, I’ll use Menoth White Highlight mixed with Menoth White Base, blending a smooth transition as I go. I allow each layer to dry completely before adding a little more Menoth White Highlight to the mix and applying another highlight until I get the color I’m looking for.
Tan
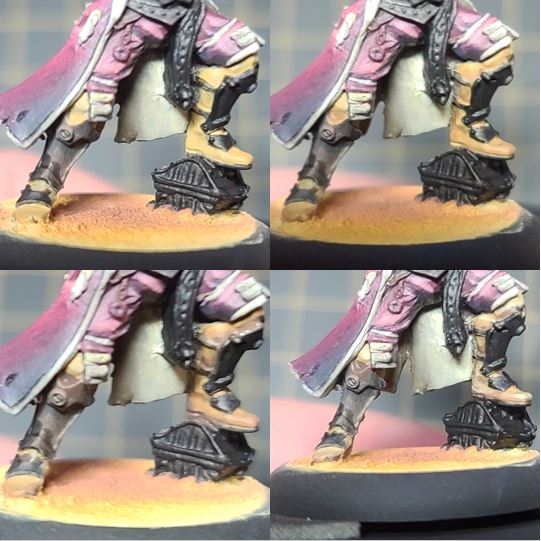
- Step 1) This model is really starting to come together. Next up is the tan found on Bart’s boots. I start the tan color with a basecoat of Rucksack Tan.
- Step 2) For the first shade, I begin by shading the area using Gun Corps Brown.
- Step 3) Add a second layer of shading using Battlefield Brown to really define the shadows.
- Step 4) For highlighting, I start by mixing Rucksack Tan with a little Menoth White Base.
- Step 5) Lastly, I add some Menoth White Highlight to the previous mixture for the final highlights. Apply this to any upper or raised areas to define the colors of the tan.
Golds
- Step 1) Start your golds off with a solid basecoat using multiple layers of Rhulic Gold.
- Step 2) To create a nice tone for your golds, Mix Brown Ink and Yellow Ink together with Rhulic Gold and apply this as your first layer of shading.
- Step 3) To create some darker areas, mix a final layer of shading using a mixture of Umbral Umber, Sanguine Base, and Brown Ink.
- Step 4) Using Solid Gold, start highlighting the areas of the gold. Focus on areas where light would be reflected as well as the highest raised areas.
- Step 5) Finally after the model is sealed with a matte sealant, return to the area to apply your final highlight by mixing Solid Gold and Cold Steel together. Use this color to identify the extreme highlights.
Silvers
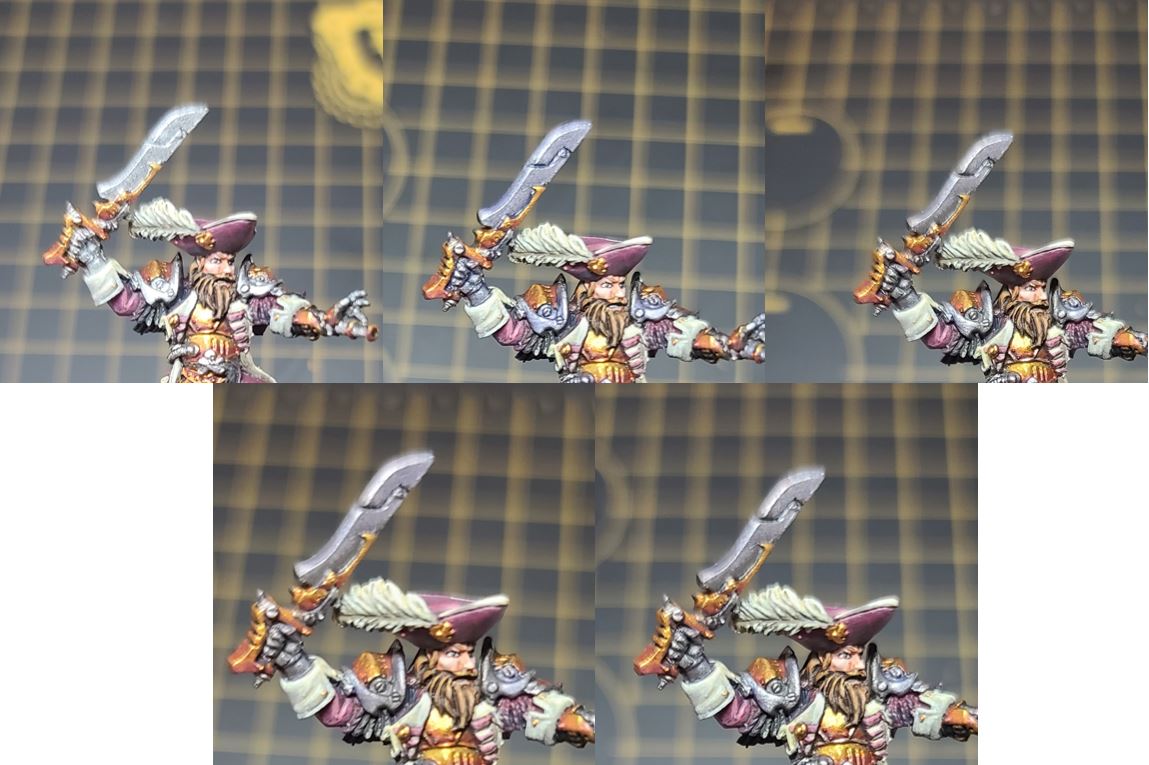
- Step 1) To tackle the silvers on Bart, I basecoat the area using Cold Steel.
- Step 2) For my first shade, I mix Brown Ink with Exile Blue and apply it to the recesses.
- Step 3) For my second layer of shading on the silvers, I use a mixture of Green Ink and Brown Ink with a small dot of Cryx Bane Base added. This will add some depth to the shadows.
- Step 4) After the model is sealed, I’ll return to this area and apply some final highlights of Quick Silver on the raised edges.
Leather
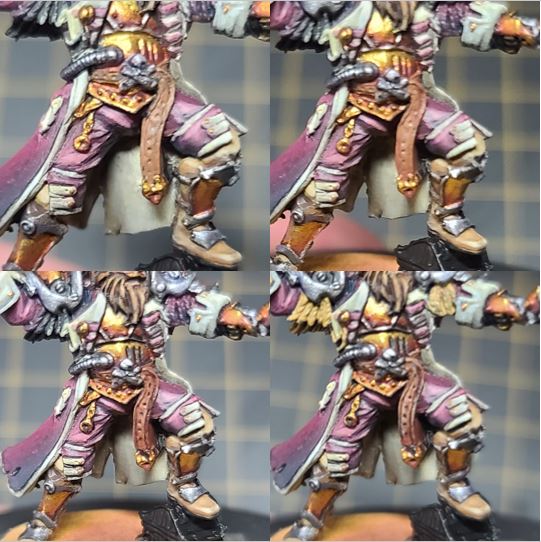
- Step 1) Time to tackle Bart’s leather belt. Start off with a nice basecoat on the leather strap with Bootstrap Leather.
- Step 2) Next, mix Brown Ink with Bootstrap Leather and apply this as a wash for your first layer of shading.
- Step 3) For your final shade, use Brown Ink with a small amount of Thamar Black. Apply this to the darkest areas.
- Step 4) Begin your highlights with a mix of Bootstrap Leather and Beast Hide. Be sure to not to cover up any of the areas just shaded.
- Step 5) Finally, to bring it all together, add ’Jack Bone to the previous mix and use this to add line highlights to the edges of the straps.
Tassels

- Step 1) Finally, time to tackle the tassels. I start off by basecoating the areas in Rucksack Tan.
- Step 2) Next, I’ll add a layer using Menoth White Base.
- Step 3) Once the previous step is completely dry, I’ll thin down Brown Ink with a little water and apply it as a wash over the previous two steps.
- Step 3) I’ll start my highlights by using Menoth White Base again, taking special care to leave a little of the shaded Menoth White Base from the previous step showing through.
- Step 5) Finally, I’ll add my final highlight using Menoth White Highlight.
There you have it: Captain Bartolo Montador is ready sail ’round the Scharde Islands and lay siege to anyone in his way. Bring it on, Orgoth 😉!

Join me next time when I expand my army some more with some warjacks! Until then…