Time is flying. It seems like yesterday I was just building the booth at Gen Con, and now I look up and it’s less than 75 days until Warfaire Weekend. For those of you who haven’t been before, Warfaire Weekend is an incredible gathering for gaming that occurs in St. Louis, Missouri, each year. It’s hosted by a dedicated team who are passionate about all things gaming. This year, it will be held November 4–6; you can get all of the details and register over at https://warfaireweekend.com. It’s going to be a crazy good time. Privateer staff will be there playing as many games as we can get in and, of course, having ourselves a little MKIV prerelease party. This is definitely an event that you won’t want to miss, as we send off MKIII in style and welcome in MKIV with class. As we get closer, keep an eye out for some Insiders revealing some of the cool stuff that will be available in the store and the prizes that will be on the Iron Arena wall.
To get in these great games, I need a painted MKIV army of at least 50 points. Orgoth has looked amazing since day one, and I simply cannot wait any longer to put an alternate paint scheme on my miniatures: 75 days at 50 points, no problem, totally doable. Almost too easy. However, I’m glutton for punishment, and to service this, I think two armies at 50 points would properly represent the challenge. More on that a little bit later, but for now it’s time to jump in and get an alternate scheme painted up for my Orgoth.
For years, I’ve wanted to take the dark dingy armor and bright necrotic glow to a Faction that normally doesn’t get it. I’ve toyed with some dark Convergence of Cyriss ideas for a while, but I’ve never pulled the trigger—and now I’m happy I didn’t. The aesthetics of the Orgoth are begging to receive a near-Cryxian color pallet…with dark dingy worn armor and bright green glows! So, let’s go!
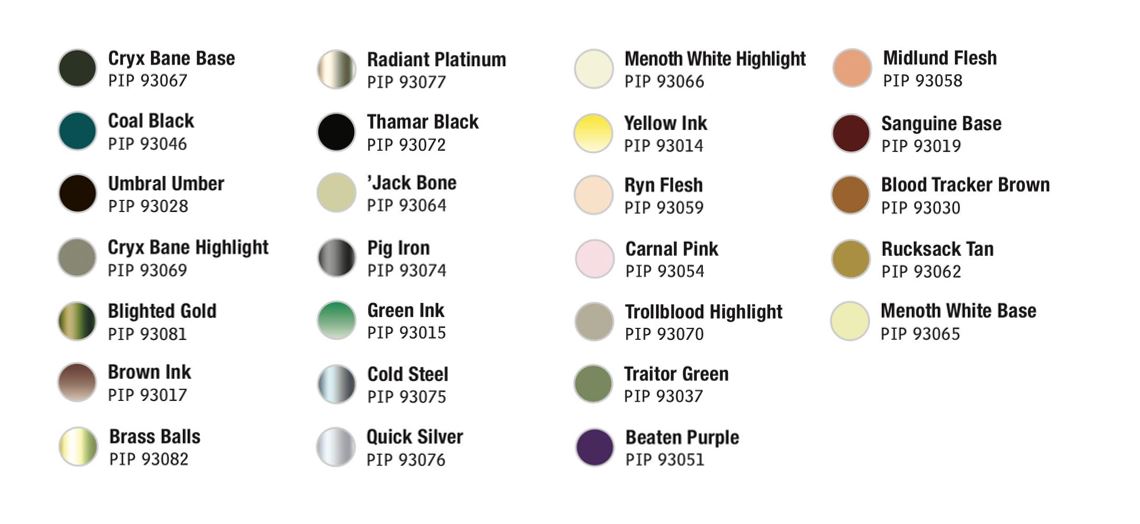
Colors Used
Armor Plates

Step 1) I feel like the best area to start working is on the dark armor of the model. I’ll save a little bit of time by airbrushing on my basecoat of Cryx Bane Highlight.
Step 2) Next, I’ll work on the initial shading of the armor by shading with Cryx Bane Base. I take this color all the way through the armor to almost the top of the Cryx Bane Highlight, leaving the smallest amount of the color of the basecoat showing through.
Step 3) I mix a little Coal Black and Umbral Umber for my next shade. I tend to be heavier on the Umbral Umber when mixing up this color.
Step 4) I make one final shade by mixing Umbral Umber and Thamar Black in 2:3 ratio and apply this color to the darkest areas.
Step 5) To highlight the armor, I mix Cryx Bane Highlight with Cryx Bane Base, applying only to the highest edges.
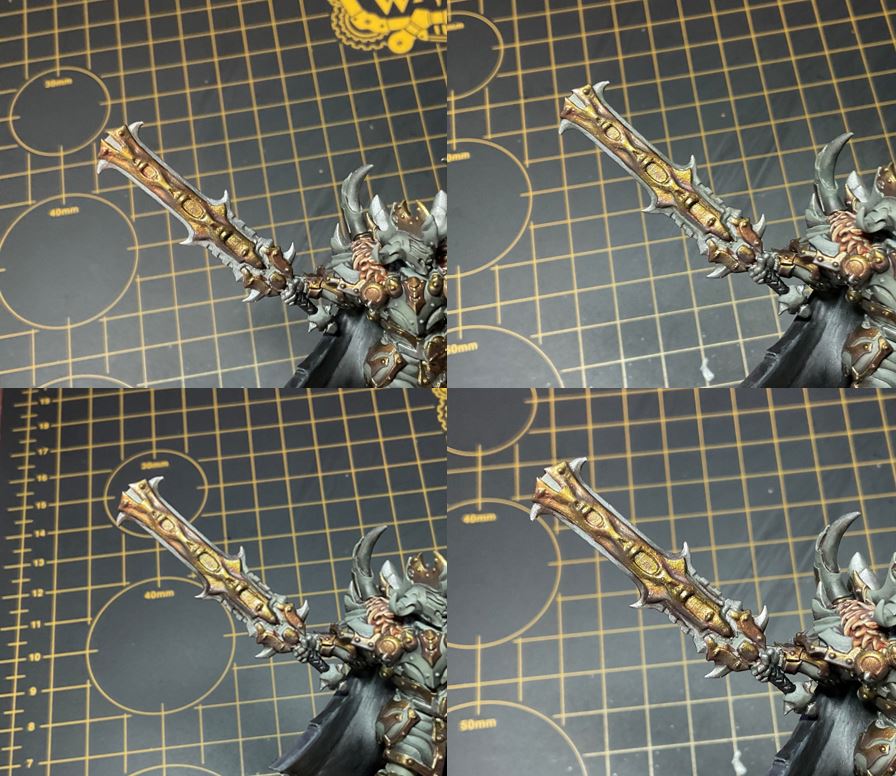
Blighted Gold

Step 1) Next up: the dingy gold. Take Blighted Gold and lay down a nice solid basecoat on your model.
Step 2) Using a 1:6 ratio of Cryx Bane Base to Brown Ink, apply your first shade to the gold area.
Step 3) To really get the dark color of the blighted gold, apply a second shade of Umbral Umber and Coal Black in a 2:1 ratio to your model.
Step 4) Start the highlights on your model with a layer of Brass Balls.
Step 5) Finally, after you seal your model with a matte sealant, return to the gold and put a final highlight on the highest edges and where the light would hit using Brass Balls mixed with Radiant Platinum.
Black Cloak

Step 1) Next, I want to want to work on the black cloak. I start with a solid black basecoat in Thamar Black. It’s always best to lay down a nice smooth fresh black layer, even if you are using black primer.
Step 2) I mix Coal Black and Umbral Umber together and apply the first layer of highlights. I blend this layer only to the top half of each area, leaving the bottom half in pure black shadow.
Step 3) I add Cryx Bane Highlight to the mixture from the previous step and apply additional highlights. I use thin layers apply them as a glaze to build the color up slowly across the areas, making a smooth transition of color. The key here is to take your time and make sure each layer has time to dry before moving on to the next. To speed up this process, I strongly suggest the use of a hair dryer.
Step 4) For the final highlight, I add ’Jack Bone to the previous mixture and apply this to the edges and anywhere else I want extreme highlights.
Blighted Steel
Step 1) With the black cloak finished, let’s start on our blighted steel. Start this with multiple layers of Pig Iron until you achieve a solid basecoat.
Step 2) Start shading the metal using some thinned out Cryx Bane Base to give it a slightly green tinge.
Step 3) You want to add a second shade by mixing Brown Ink with half as much Green Ink and a small dot of Thamar Black. Apply this mixture to the deep shadows of the metallic areas.
Step 4) Next, you can use Cold Steel to apply your first highlights to the metallic areas.
Step 5) Once the rest of the model is painted and sealed with matte sealant, you will need to return to this area for some final highlights with Quick Silver.
Fur Pelt

Step 1) Next up, it’s time to tackle the fur pelt. Start off with a solid basecoat of Bloodtracker Brown.
Step 2) Add a first layer of highlights using Rucksack Tan.
Step 3) To blend the layers together, take Brown Ink, thin it out with a lot of water, and apply this as a wash to the area.
Step 4) Once the wash has completely dried, apply a final highlight using Menoth White Base to the tips of the fur.
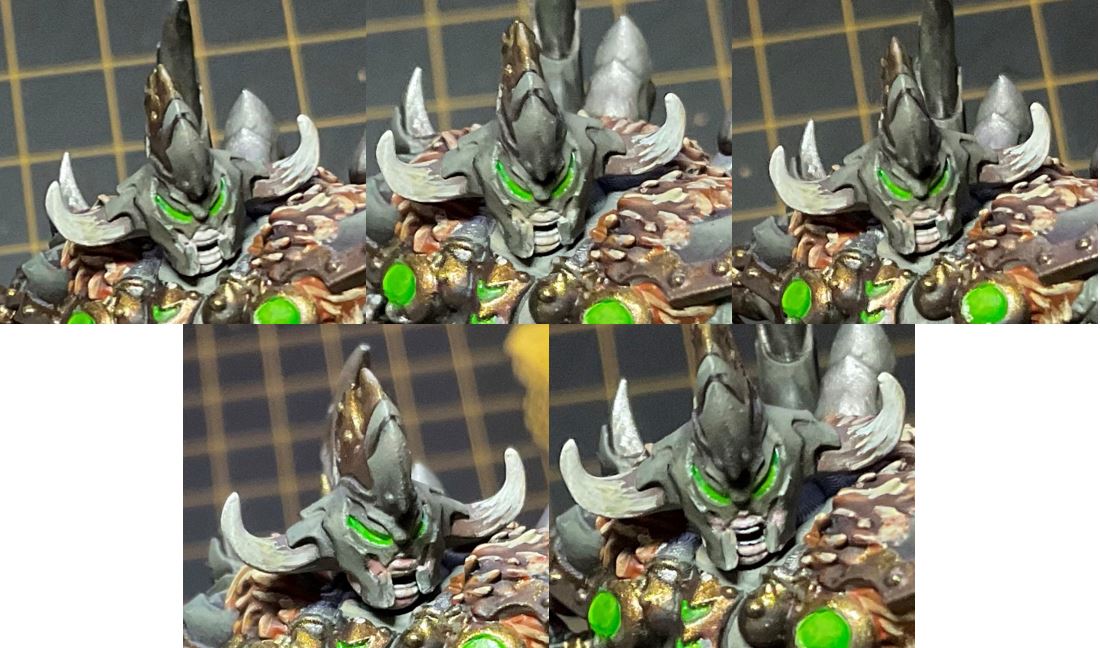
Necrotite Glow
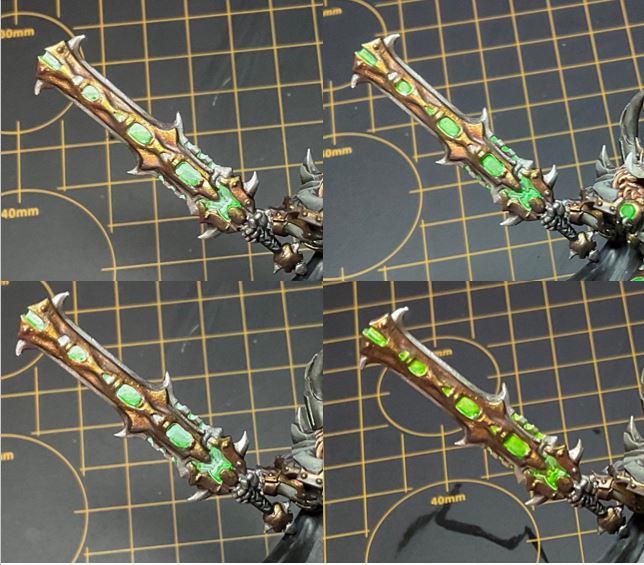
Step 1) Now is the moment I have been waiting for: time to make it all come together with some necrotic glow. Thin down some Menoth White Highlight with water and apply it to the eye sockets, glowing runes, and anywhere else you want to see your necrotic glow. (The key to a good glow is to take your time and build up a few thing layers patiently in this area.)
Step 2) Next, mix Green Ink and Yellow Ink to get a necrotite green color. Use this to lightly glaze the runes. Be patient—be sure not to let any of this pool up in areas. This isn’t a wash, and we want this to shift the color of the Menoth White Highlight, not drown it out.
Step 3) Once the previous step has completely dried, return to the area with Menoth White Highlight and apply highlights to simulate the glow. Again, patience is the key to making this look the best, and thin layers building up the white slowly is best.
Step 4) Finalize this glow look by adding in a little more Yellow Ink to the ink mixture used in step 2 and apply this as a second glaze to finish the effect.
Pallid Flesh
While Horruskh, The Thousand Wraths doesn’t have a lot of flesh color showing (and who wants to see that anyway?), I want to establish what the skin tones of my army will be as we get closer to the launch of the Starter Box. There is a lot of skin showing on the trooper models, and it will be good to establish the colors now so that I know exactly how I want them to look when I can get my hands on them to paint. I think a nice pale skin from the Satyxis will be a good contrast to all of the darkness of the rest of the model.
Step 1) I start with a basecoat on the face with a mixture of Ryn Flesh, Carnal Pink, and Trollblood Highlight.
Step 2) I add a small amount of Traitor Green to the basecoat color and apply as shading to the flesh areas.
Step 3) Next, I add in Beaten Purple to the mix and use this to apply more shading to the face.
Step 4) For a final shade, I use a mixture of Beaten Purple, Traitor Green, and Midlund Flesh. I apply this to the deepest areas.
Step 5) To start my highlights, I mix Ryn Flesh, Carnal Pink, and Menoth White Highlight together for the highlight.
Step 6) While the skin is looking great, it seems a little too bright, and I want to shift it to something that complements all the colors of the rest of the model. As an optional step, I apply a glaze of Beaten Purple mixed with Sanguine Base, Cryx Bane Base, and Mixing Medium to simulate a more blighted appearance.
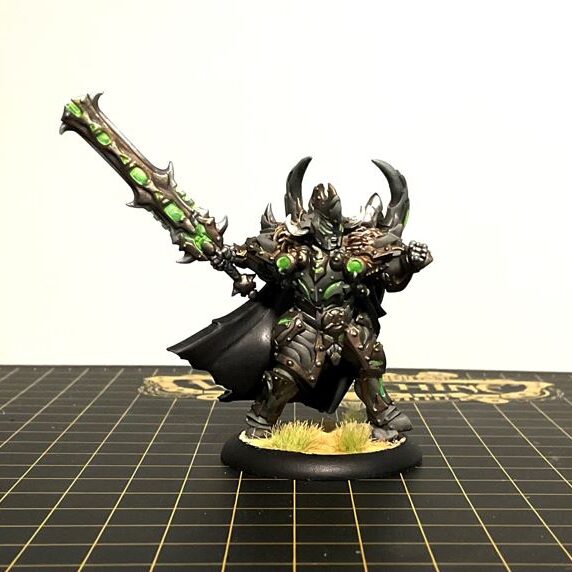
And with that, my Horruskh, The Thousand Wraths is ready for the tabletop. I’m so pumped for this paint scheme! Let the countdown to Warfaire Weekend begin!
I’ll be checking in periodically as I get my hands on some of the new Orgoth models and get them ready for the tabletop. As mentioned before, I’m a slight glutton for punishment, however, when it comes to painting. I’m definitely going to need a 50-point legacy army to join my Orgoth for Warfaire Weekend. In order to help pass the time while waiting for more Orgoth models, I’ll be starting in on my MKIV Prime army. Pirates have been on my to-do list for way too long. It seems only fitting for Privateer to bring the pirates. So, join me next time as I raise the colors high and start my MKIV legacy army of the Talion Charter.