
by Charles Foster III
I’m back with another Privateer Insider, painting up alternate schemes on Riot Quest models. We’re getting closer and closer to that halfway mark of making an alternate scheme for each model in the game that has been released so far. This week, I’m tackling the master of disaster, the goblin of destruction, Gubbin! Coming up with an alternate scheme for this one stumped me for a bit, until I was playing some throwback games over the weekend. Of course: Mega Man! What better way to paint up the goblin bomber than by making him into the blue bomber himself? Time to grab some paint, crank that Mega Man 2 Dr. Wily’s Castle music to 11, and get to it.
Colors Used
Skin Tone
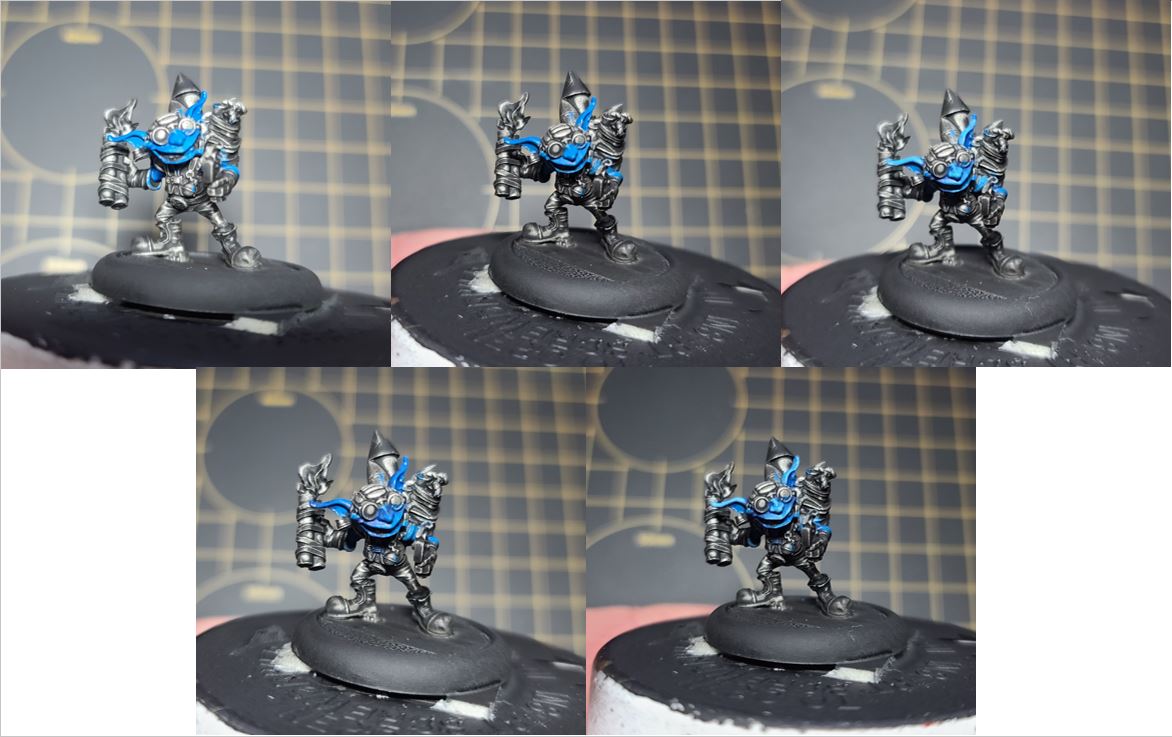
Step 1) Start off with an even solid basecoat of Cygnar Blue Highlight.
Step 2) For the first shade, I use Cygnar Blue Base and apply it to the shadows.
Step 3) To darken up the shadows on the skin color, I apply a second shade of Exile Blue.
Step 4) I next mix Cygnar Blue Base and Frostbite in a 50:50 mix and apply this as the first highlight.
Step 5) Finally, for the highest areas I use Frostbite on its own to create a final highlight.
Ears
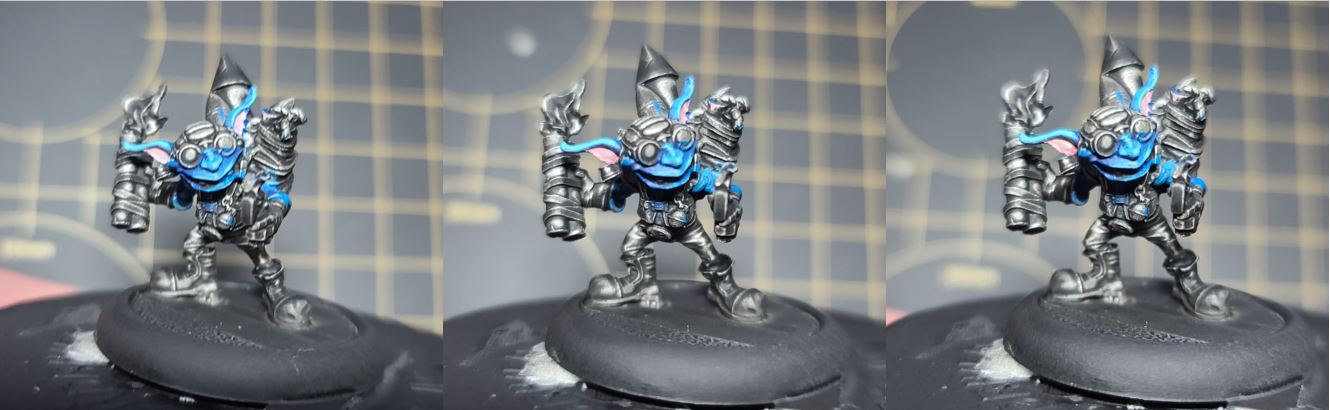
Step 1) To get some definition in the skin tones, I want to pick out the inner areas of the ear. I start by mixing Carnal Pink and Ryn Flesh together for a nice basecoat.
Step 2) I add a little Sanguine Base to the previous mixture and apply shading to the area.
Step 3) Finally, I water down a little Ryn Flesh and apply to the highest areas as a highlight.
Pants
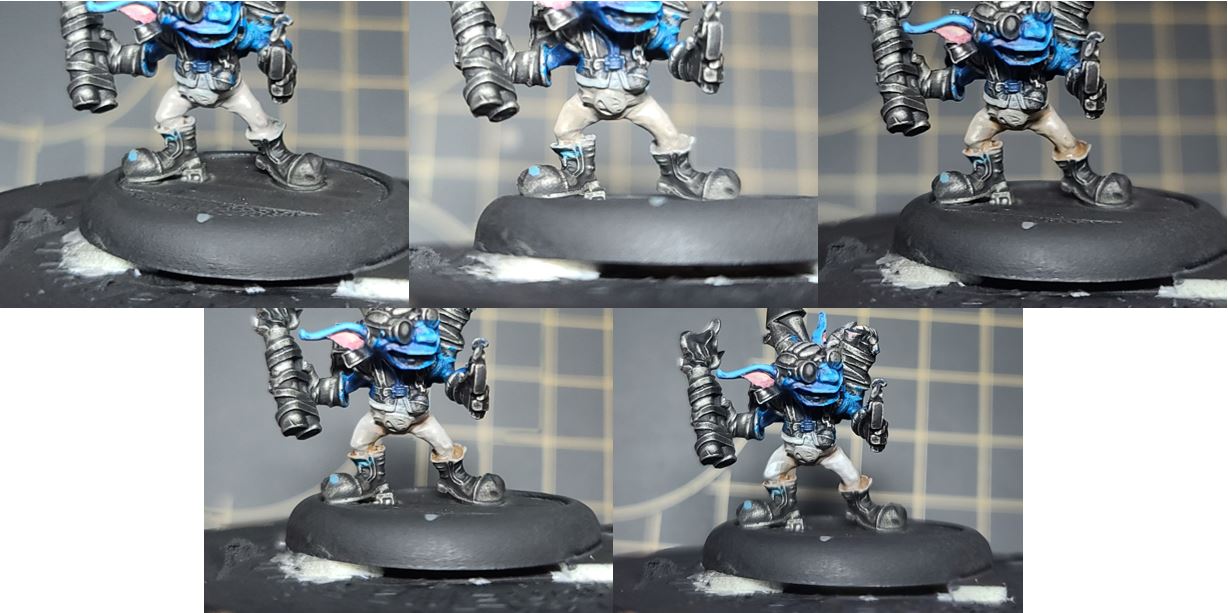
Step 1) Apply a solid basecoat using Trollblood Highlight.
Step 2) Using Bastion Grey, apply our first shade.
Step 3) To create a little more depth in our shading, create a glaze by mixing Bloodtracker Brown and water. Apply this very lightly, as too much can overrun the area.
Step 4) Highlight the pants by mixing Trollblood Highlight and Menoth White Highlight in a 50:50 mix.
Step 5) Apply a final highlight with thinned-out Menoth White Highlight.
Shades of Leather
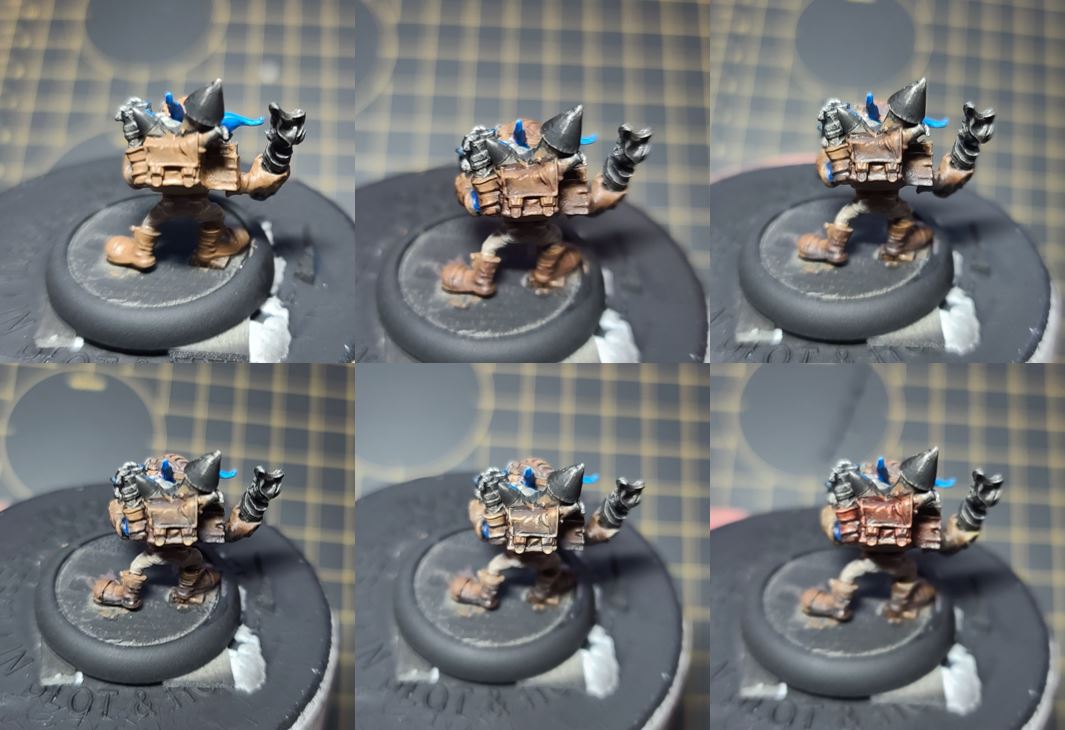
Step 1) There are a lot of leather areas on this model—backpacks, shoes, gloves, helmet, etc. So, to break up the colors slightly, we’re going to need a few different styles of leather to, bring definition to the model. The easiest way to do so is by adding different shades through glazes at the end of the process. Let’s go ahead and start by basecoating all of the areas in Gun Corps Brown.
Step 2) Shade the area using a little two-brush blending with Battlefield Brown to create some shadows.
Step 3) Next, add a second shade by adding Exile Blue to the Battlefield Brown from the previous step. Careful not to go overboard when mixing because Exile Blue can easily overpower the Battlefield Brown and shift the color tone to a heavy blue.
Step 4) For a final shade, add a few drops of Thamar Black to the previous mixture and pick out any cuts or areas of separation to define the leather areas.
Step 5) If you manage to go overboard (like I did) in the shading steps, simply use a little water to thin out some Gun Corps Brown and then go back over your areas to reclaim some of that upper color.
Step 6) Start your highlights by mixing Rucksack Tan and Gun Corps Brown in a 2:3 ratio and apply as the first highlight.
Step 7) For the last highlight, use Hammerfall Khaki and pick out the highest raised edges.
Step 8) You can leave these areas as they are, or if you want to create some difference in colors, you can shift their tone by thinning out some glazes using Brown Ink or Battledress Green. Simply thin with water and apply in even coats without letting too much of the paint build up in an area. Let each layer completely dry before applying the next coat.
Goggle Lenses

Step 1) I start by making sure that the lenses get an even coat of Thamar Black.
Step 2) Next, leave some of the outsides area Thamar Black and use a little Exile Blue to begin working up the colors on the glass.
Step 3) Mix in a little Cygnar Blue Base to the Exile Blue to work the goggles up in color. This may take a few layers and some patience, but it will be worth it in the end.
Step 4) Mix in some Cygnar Blue Highlight and work on the brighter areas, being sure to leave some of the Thamar Black in the upper right-hand corner.
Step 5) To create that reflective look, add a tiny drop of Morrow White to the upper area of the lens.
Dynamite and Fireworks
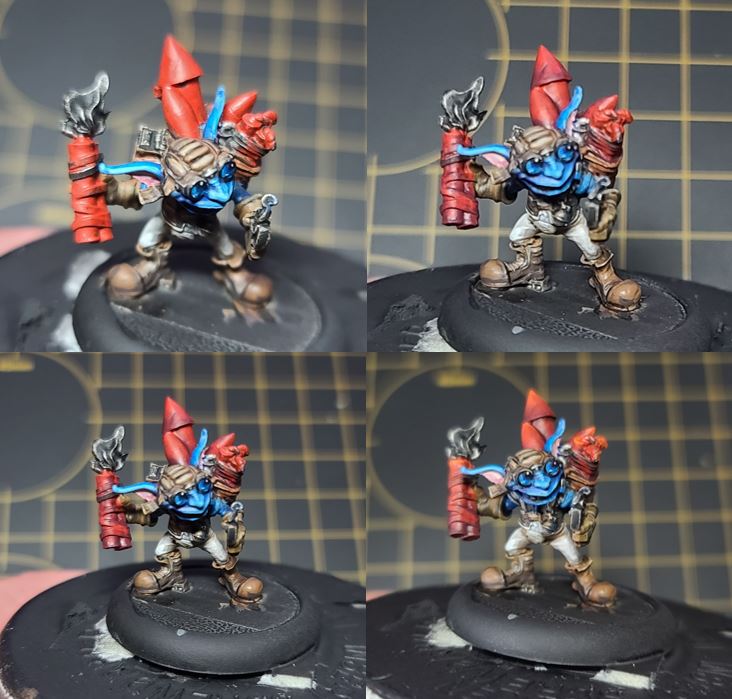
Step 1) I’m going for the cartoon-style of dynamite and rockets, so to start this look off, let’s lay down our basecoat using Skorne Red.
Step 2) To get a good-looking shade on this area, apply a little Sanguine Base.
Step 3) Darken the shadows by mixing Sanguine Base with Battlefield Brown in a 50:50 mix and apply to the darkest areas.
Step 4) Start your highlights by applying Khador Red Base.
Step 5) Finally, on the highest edges, apply a final highlight using Khador Red Highlight.
Silver Metals
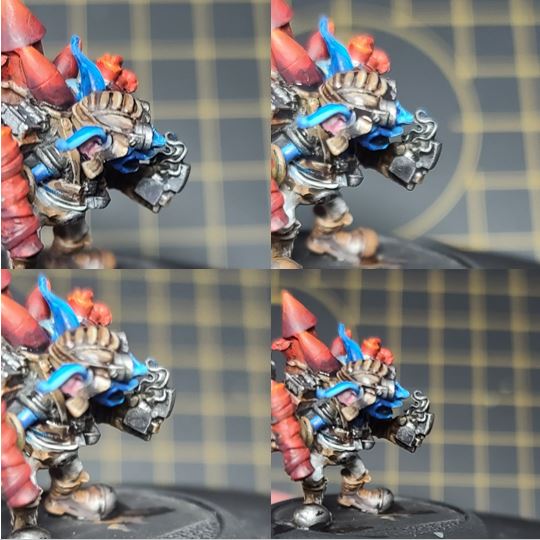
Step 1) Time to tackle the metals of Gubbin. Lay down an even thin basecoat of Pig Iron.
Step 2) Create some shade by making a wash using Greatcoat Grey, Armor Wash, and a little water. Apply this color as the first shade.
Step 3) To create some depth in the shadows, mix Exile Blue with Umbral Umber in a 50:50 ratio. Use this color on the darkest areas.
Step 4) To highlight these areas, use some Cold Steel.
Step 5) Finally, after the model has been sealed with matte varnish or Dullcote, use Quick Silver to put down a little highlight and reclaim some of the brightness.
Fire

Step 1) Start by getting a nice basecoat of Ember Orange.
Step 2) Next, let’s take a little Cygnus Yellow and apply this to the hottest areas of the fire or closest to the center. As fire, cools it darkens in color. For the most part, it will feel like we’re painting in reverse for fire: brightest at the center and then shading out.
Step 3) Take some Khador Red Highlight and apply it as the first layer of highlight.
Step 4) To smooth the transition of colors, let’s mix Khador Red Highlight and Khador Red Base in a 50:50 mixture and apply this color as the second highlight.
Step 5) Next, take some Khador Red Base by itself and apply it as the third layer highlight.
Step 6) To get that fade-to-smoke look on the fire, we want to add another highlight of Sanguine Base.
Step 7) Finally, mix a little Sanguine Base with Thamar Black and apply to the farthest areas from the flame to show off that fire turning to smoke.
Teeth
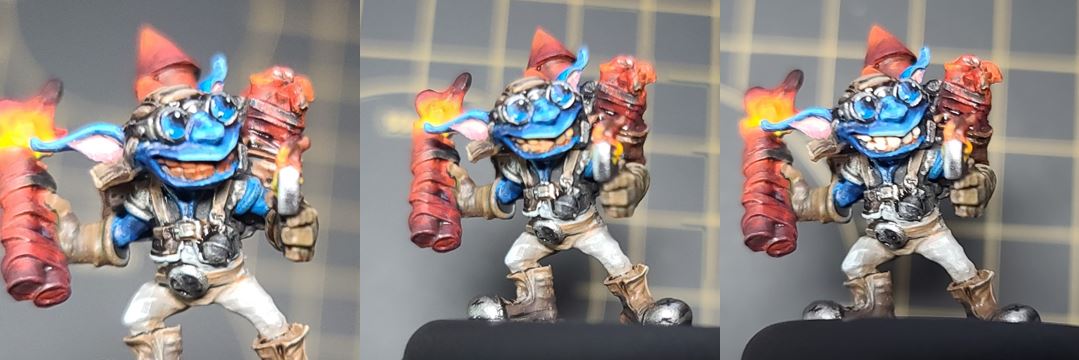
Step 1) To get the pearly whites of the mad goblin, I start with a basecoat of Bloodstone.
Step 2) Next, I create some definition by adding a highlight of Rucksack Tan.
Step 3) To polish the teeth, I lay down a layer of Menoth White Base.
Step 4) Finally, I pick out the highest areas/corners with a little dot of Menoth White Highlight.
Shirt

Step 1) I think that a workshop-style shirt will do our goblin the best. To get the look I want, I start with some Rucksack Tan as my basecoat.
Step 2) I begin shading the color using a little Gun Corps Brown.
Step 3) Next, I darken the area by applying a second shade of Battlefield Brown.
Step 4) To highlight the shirt, I mix Rucksack Tan with some Menoth White Base. I apply this color as my first highlight to the shirt.
Step 5) Finally, on the highest areas, I apply a highlight by mixing a few drops of Menoth White Highlight to the previous step.
Basing
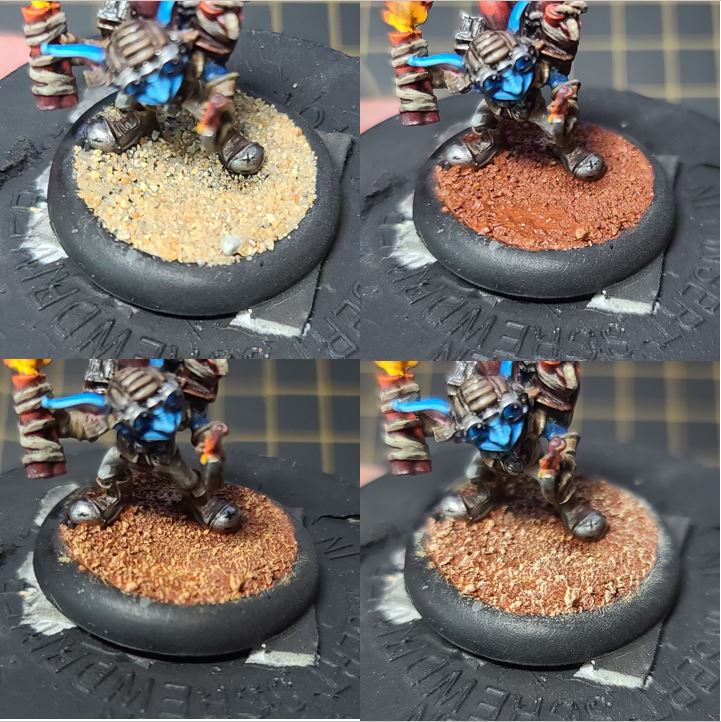
Step 1) Only one thing left to do, drop some basing on. Add in sand and ballast with Elmer’s white glue and let it dry completely.
Step 2) Water down a bit of Bloodstone and apply across the base material to let it soak in. In most cases, I use a hair dryer to help this process along.
Step 3) Once it’s dry, I drybrush on a little bit of Rucksack Tan.
Step 4) For the final highlight, drybrush on a thin coat of Menoth White Base.
Step 5) Glue on some static grass.
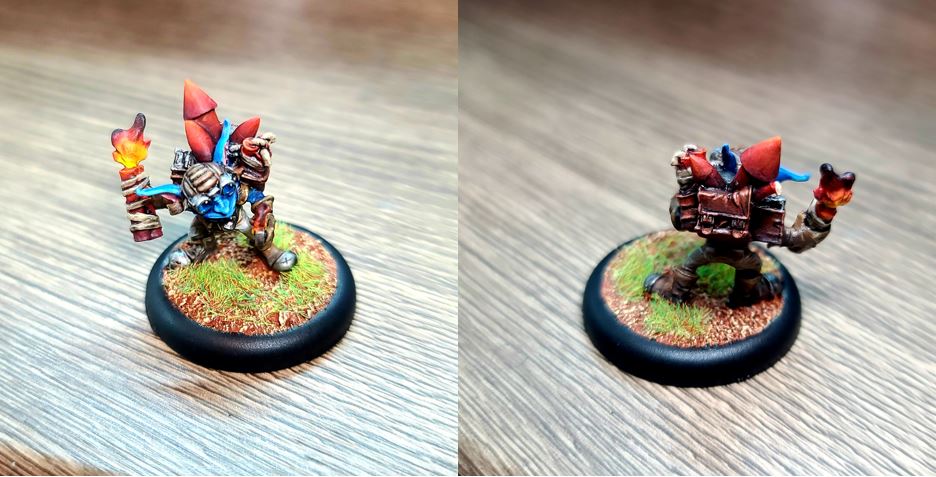
With the basing complete, our blue bomber is ready blow up the table. I can already hear the models running in terror from a Catastrophic Explosion detonating all around Gubbin. Join me next time when we add another alternate paint scheme to the collection!