by Charles Foster III
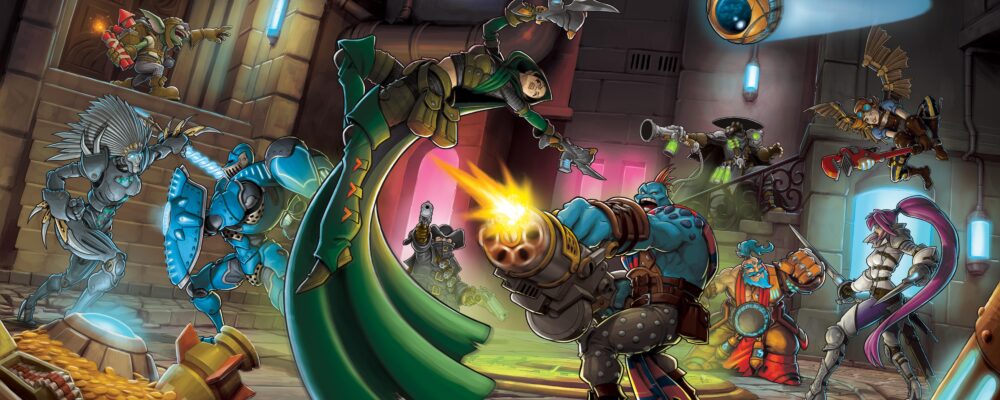
Happy New Year, everyone! What better way to start off 2022 than with another installation of painting Riot Quest models? For this week’s Insider, we’re heading on to our third painted model, Chuck Dogwood. With so many models still to go, there’s no time to waste, so let’s grab a brush and get our paint on!
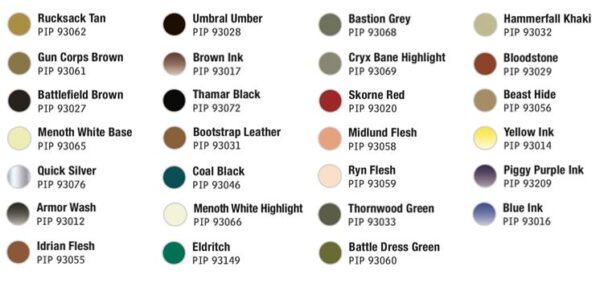
Colors Used
Preparation
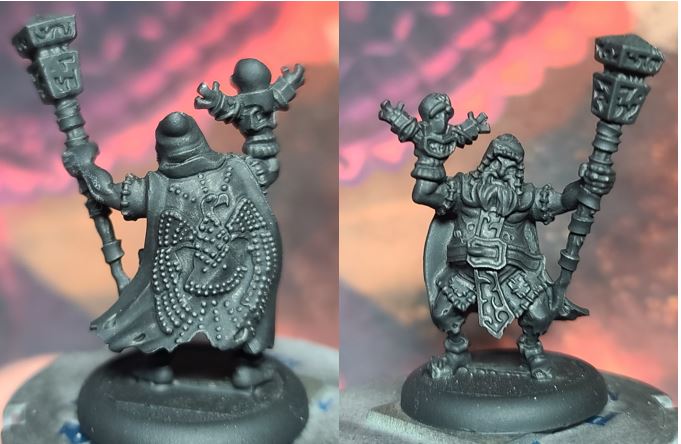
Nothing crazy for preparation on this model, simply a good coat of Black Primer.
Tan Cloak
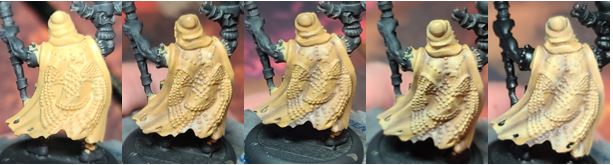
Step 1) I start by basing the cloak area in Rucksack Tan.
Step 2) Next, I add in my first shading layer using some Gun Corps Brown.
Step 3) To deepen this shade, I use a little Battlefield Brown, making sure to get into the deeper areas.
Step 4) Finally, to highlight this color, I use an even mix of Rucksack Tan and Menoth White Base. You can take this highlight one step further, if you like, by mixing in more Menoth White Base to bring a bit more highlight to the model.
White Metals

Step 1) Now is a great time to add some silver colors to the model. For my namesake Chuck, I will be doing the bird image on the back, the flask on his hip, his belt buckle, and the filigree on the front. I start this by putting on a coat of Pig Iron in two thin layers.
Step 2) Because most of these areas will get a lot of attention later on, I decide to simply use some P3 Armor Wash to create some shade. After this step, it’s okay to move on, as we will do the final highlight to the white metals after painting the rest of the model and sealing it using Testors Dullcote.
Step 3) Once you’ve sealed the model, be sure to return to your silvers and add a few hard-edge highlights using Quick Silver.
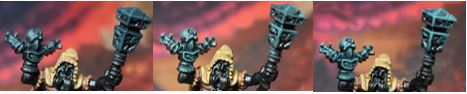
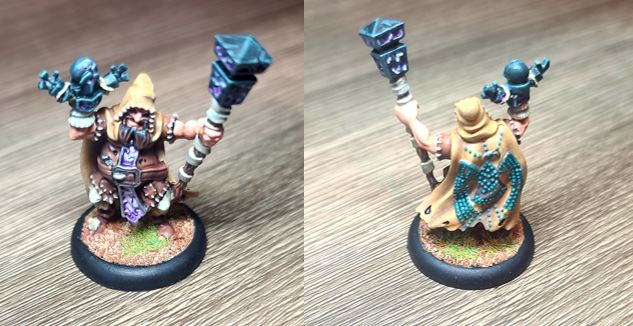
Logo Colors
![]()
Step 1) Time to add some color to the logo on the back of Chuck’s cloak. I start off by hitting each of the raised areas with a little Coal Black.
Step 2) To create highlights, I use a mix of 50/50 Coal Black and Eldritch. I apply it straight over the top of the Coal Black while making sure to leave a little bit showing.
Step 3) Finally, to really pop the colors out, I put a small dot of Eldritch on the highest areas.
Dark Leather Shirt
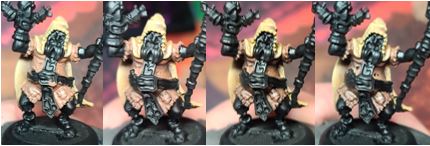
Step 1) I think for Chuck, a dark leather shirt would be a great look to go with the Rucksack Tan cloak. I start this area with a basecoat of Idrian Flesh.
Step 2) To add some shade, I blend in Umbral Umber.
Step 3) To really create that look of well-worn out leather, I use a mixture of Brown Ink and a small amount of Thamar Black for additional shading. A simple mix of 3:1 mix of Brown Ink: Thamar Black will get the look we’re after.
Step 4) To create a good contrast to the leather, I start my highlight off with Bootstrap Leather.
Step 5) Apply a final highlight using a mixture of Bootstrap Leather and Rucksack Tan. A simple 1:1 ratio will work fine.
Coal Black Rocks
Step 1) Time to rock and roll! Err…you know what I mean. Start the rocks off by drybrushing them with Coal Black. Make sure you have a solid basecoat of Thamar Black underneath to allow for some great coverage and a defined look.
Step 2) To really make the color jump out, add a highlight by dry brushing a 50/50 mix of Coal Black with Menoth Base White.
Step 3) Add a Menoth White Highlight to the mix and put a little on the highest edges to finish off this step.
Sock

Step 1) Only way to make it a sock puppet is to paint a sock. I use a little Menoth White Base to create a solid basecoat—definitely take the time to use a couple of thin layers of paint to ensure a smooth, solid basecoat with absolutely no patchiness.
Step 2) I start with a thin shade of the area with Cryx Bane Highlight.
Step 3) I think it needs a bit more shade in a few areas, so I apply some additional shading using Bastion Grey.
Step 4) To finish off this area, I use a little Menoth White Highlight to add a more detail back into the model.
Skin Tones

Step 1) Time to get some skin in the game. Start with a basecoat mixture 50/50 mix Midlund Flesh and Ryn Flesh.
Step 2) For the initial shading, use Midlund Flesh mixed with Battledress Green and some mixing medium for translucency. Use this as the initial shading. Don’t worry if this looks a little off; the colors will make much more sense when we add the next shade.
Step 3) To really get the skin tone I’m looking for, I mix some Midlund Flesh, Skorne Red, and a few drops of mixing medium for the final shading. This rosy color will balance out the green from the pervious layer.
Step 4) To finish off the skin tones, I add a highlight with a 50/50 mix of Ryn Flesh and Mixing Medium to help keep the transitions smooth.
Purple Glows
Step 1) Next up, let’s get some purple into the model. Start by thinning some Menoth White Highlight with water and then letting it flow into the recesses of the model.
Step 2) Once the previous layer is completely dry, thin out Piggy Purple Ink with some water and lay it down like a glaze. Repeat steps 1 and 2 until you get the desired look you’re after.
Step 3) To cap the color off, use some Menoth White Highlight and put the final highlight by creating a few hard edges to really bring out the color we want.
Leather Areas

Step 1) For Chuck’s shoes and belt, I decided to go with a pretty standard leather color. Start by adding a solid basecoat of Bootstrap Leather.
Step 2) Next, mix in a small amount of Brown Ink with the Bootstrap Leather to make a nice brown wash.
Step 3) To really define this color, take a bit of Thamar Black and mix a few drops of Brown Ink in. I tried for a 1:3 ratio of Thamar Black: Brown Ink. Apply this as a final shade.
Step 4) Add a highlight by mixing a 1:1 ratio of Bootstrap Leather and Beast Hide.
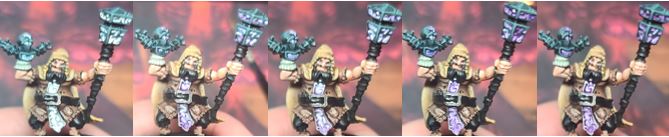
Woodgrain

Step 1) Lay down a nice even basecoat of Gun Corps Brown.
Step 2) Using Menoth White Base, go in and paint texture lines.
Step 3) To add in definition, I go back and add some lines with some Umbral Umber. Make sure not to go over any of the areas of Menoth White Base and to leave some areas of Gun Corps Brown showing.
Step 4) Mix Bloodstone, a drop of Yellow Ink, and some Brown Ink in a 3:1:2 ratio. With this color, we add a glaze across the woodgrain to make the colors pop.
Step 5) To bring the woodgrain to the level I’m looking for, I’m going to add a single drop—if not just a half-drop—of Blue Ink to the previous color. Be careful when adding the Blue Ink; P3 Blue Ink has strong pigments and can quickly overpower the previous color. Once mixed, apply a final shade to the deepest recesses in order to finish the wood effect.
Patch/Pants Parchment

Step 1) There are a few areas we can hit at the same time. I basecoat the parchment around the staff, the patch on the right foot, and Chuck’s pants in Menoth White Base. Use a couple of thin layers of paint to ensure a smooth, solid basecoat with no patchiness.
Step 2) Thinly shade the areas with Cryx Bane Highlight.
Step 3) Apply additional shading using Bastion Grey like we did with the sock.
Step 4) Add some Thornwood Green sparingly to the deepest recess as a final shading. Careful when using this color, as it can easily overpower the other shades.
Step 5) Apply a strong highlight of Menoth White Highlight, blending it for a smooth transition. Some painters may prefer to apply this highlight in multiple layers, mixing it with Menoth White Base to achieve the blending.
Stitches

Step 1) For the stitches all over the model, I put down a base color of Hammerfall Khaki.
Step 2) To make these areas stand out a bit more, I use some Menoth White Highlight to brighten up the stitch work.
Vines

Step 1) There are a few vines on the little puppet that Chuck carries. To make this detail stand out, I use a little Rucksack Tan for a base color.
Step 2) I finish this color by adding a quick highlight of Menoth White Base.
Basing
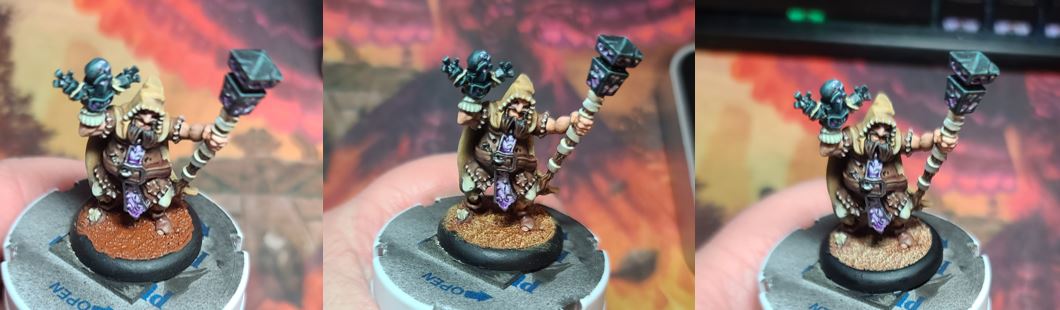
Step 1) Add in sand and ballast with Elmer’s white glue and let it dry completely.
Step 2) Water down a bit of Bloodstone and apply it across the base material to let it soak in.
Step 3) Once it’s dry, I drybrush on a little bit of Rucksack Tan.
Step 4) I drybrush on one final highlight of Menoth White Base.
Step 5) Glue on some static grass.
And there you have it. Put a check mark on another completed model for the Riot Quest collection!
As promised, a return to the polls for the next model. Jumping into the fight this week is Captain Crawtooth vs Boss MacHorn. Let me hear your voice! Vote to see which one will get the paint brush next.
