by Charles Foster III
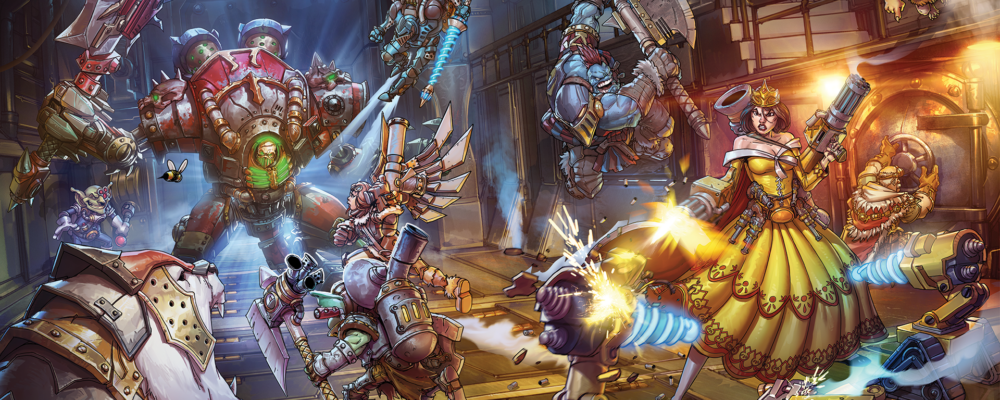
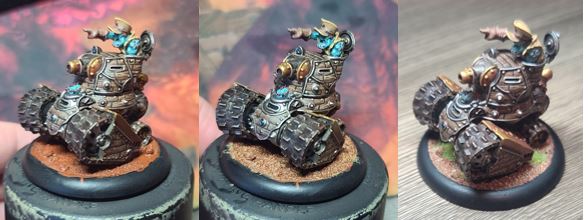
Welcome to another painting Insider, where we will be tackling the next miniature on our quest to paint the entire Riot Quest line in alternate paint schemes. For this edition, we’ll create a unique-looking Ledfoot & Tredz.
I struggled for a while to come up with a good alternate scheme for this one. I saw that a while back, Jordan and Tanner did a P3 Get Your Paint On video with Ledfoot & Tredz in red. Looking at the card art, they’re shown in a green tank, so both of those colors are out. It was late on Wednesday last week while playing some retro video games that I was struck by inspiration. If you have ever played through the entirety of Super Mario 3, you know that in Stage 8, the first level is a Tank level in which Mario must defeat a scrolling level of tanks. The unusual part of this encounter is that all the tanks are completely made of wood.
Oh yeah! We’re going for it! We are going to woodgrain out our Ledfoot &Tredz!
Prep Your Model
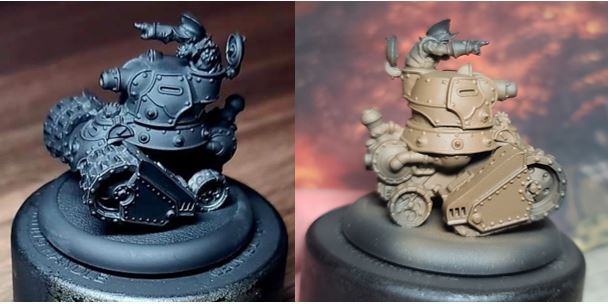
Step 1) I have primed the model using a black primer.
Step 2) To speed up the painting on this, I’ve laid down a quick core layer of Gun Corps Brown using an airbrush. This layer can be applied using a normal brush as well. Make sure to do the whole model, as it will help with the yellow metals and tank tracks later on.
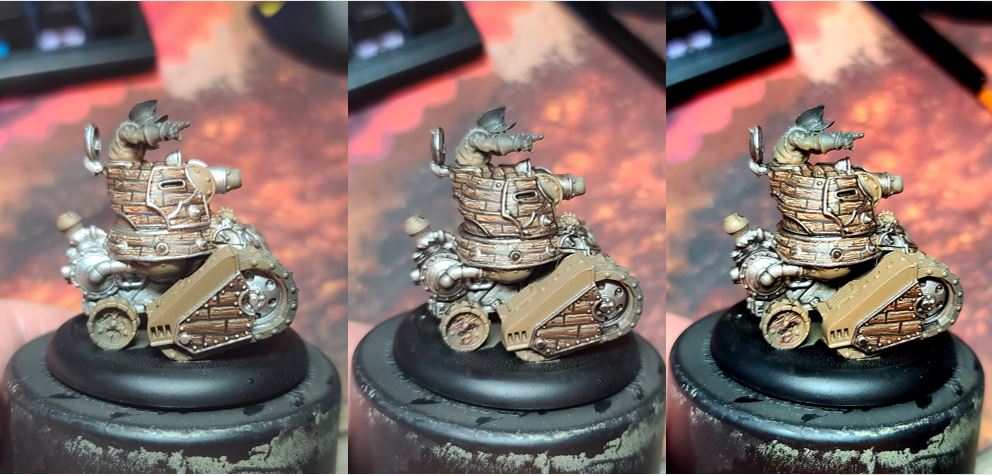
Woodgrain
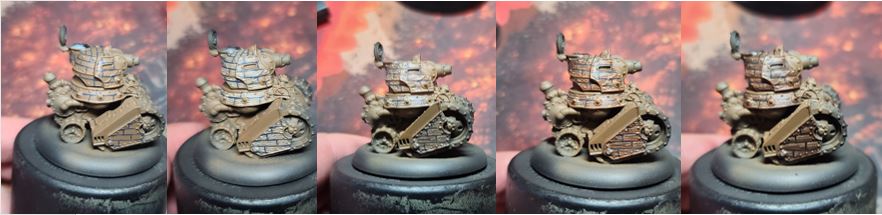
Step 1) I start by using Exile Blue to draw out where I think the wood panels should go. While I lucked out and came up with a spacing that looked great on my first try, if you don’t like the way yours is looking, feel free to use some Gun Corps Brown and go over your blue lines to start again.
Step 2) Next, using some Menoth Base White, I start to draw out the grain structures of the wood. Small lines with the occasional bump or two keep it from looking too uniform.
Step 3) To create a bit of depth to the wood look, I use some Umbral Umber the same way as the previous step, following the lines of the Menoth Base White. Imagine we’re making a wood sandwich— three layers stacking on top and repeating: Menoth Base White, Umbral Umber, and a layer of Gun Corps Brown. Repeat this process in each of the areas you’ve marked out with the Exile Blue. Take care not to go over any of the Exile Blue, as we will use that later to really define the space.
Step 4) Mix Bloodstone, a drop of Yellow Ink, and some Brown Ink in a 3:1:2 ratio. With this color, we add a glaze across the woodgrain to make the colors pop. I do a slight blending on each wooden plank. I place the wash in the areas that will be the heaviest in shadow and blend up to where it will be the lightest.
Step 5) I repeat the previous step one more time but only going half of the distance.
Step 6) To really bring the woodgrain to the level I’m looking for, I’m going to add a single drop—or even just a half-drop—of Blue Ink to the previous color. Using this mix, I blend in one final layer of shade in the darkest areas.
Step 7) To finish off the wood effect, I mix a little bit of Thamar Black into the mix. Using this dark color, I go over all the Exile Blue lines to darken them down to a black color and really bring the wooden planks to life. Hold onto this wash—we will use it again later.
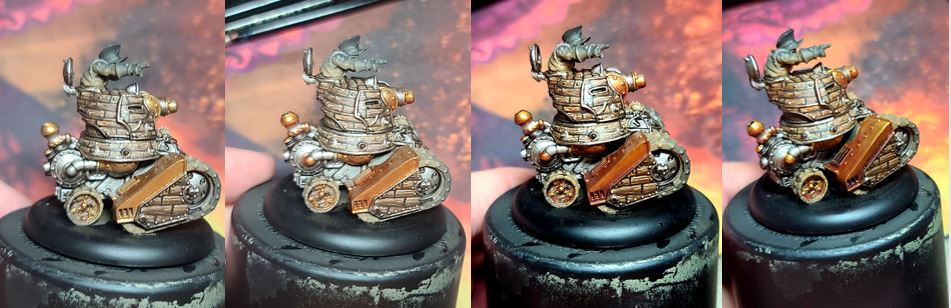
White Metals
Step 1) Start off with a nice basecoat of Pig Iron. I usually do two thin coats to make sure I get solid area coverage. Take your time on this step; there are a lot of areas on the model that will have metal right next to where we just painted the woodgrain.
Step 2) To give some shading and provide depth to the metal we just painted, let’s use that wash we created in Step 7 of the Woodgrain to wash our metals.
Step 3) Reclaim some of the area that darkened from the wash with a quick highlight of Cold Steel. Be sure to focus on any raised edges and rivets.
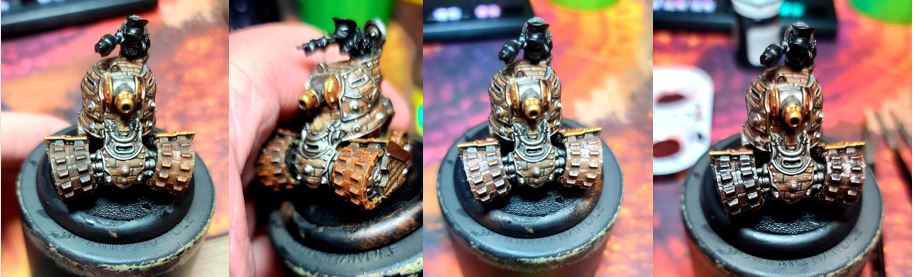
Yellow Metals
Step 1) Lay down a solid basecoat using multiple layers of Rhulic Gold. Patience is the key here; the Gun Corps Brown basecoat we did on the model will really help here.
Step 2) Now we need to make our first shade. So, combine Brown Ink, Yellow Ink, and Rhulic Gold. (A good mixture would be to use a 3:1:1 ratio.) Shade your yellow metals with this color.
Step 3) To really get this color to work, add a final layer of shading using a mixture of Umbral Umber, Sanguine Base, and a small amount of Brown Ink in a simple 1:1:1 ratio. Apply this color to the deepest areas and blend it back up to give your gold color a unique look.
Step 4) To highlight this color, I use Solid Gold.
Rusty Tank Tracks
Step 1) If you haven’t already laid down a solid layer of Gun Corps Brown, now is the time do so!
Step 2) I make a dirty wash by mixing Brown Ink and Armor Wash together. Add plenty of water to this mix before covering the tank tracks and rear wheels.
Step 3) Once the previous layer has dried, I start the rust look by drybrushing some Bloodstone over the previous color.
Step 4) Next, I drybrush some Pig Iron over the previous layer.
Step 5) To finish the tank tracks off, I use the wash from step two above and thin out more of the Armor Wash and Brown Ink mixture with more water. Then, I apply this to create a final wash to this area of the model.
Ledfoot & Tredz Skin

Step 1) I basecoat the whelps by mixing Trollblood Base and Frostbite.
Step 2) To add some shading to said whelps, I mix Meredius Blue and Thornwood Green together in an even mixture.
Step 3) I highlight these areas using an even mixture of Trollblood Highlight and Morrow White.
Step 4) For the hair and growths on the shoulders and chin, I start with Battlefield Brown.
Step 5) Next, I add a layer of Bloodstone, making sure to let a little bit of the Battlefield Brown show through from underneath.
Step 6) For the final highlight, I add a bit of Amethyst Rose to the tips of the hair and the edges of the growths.
Tan Clothes
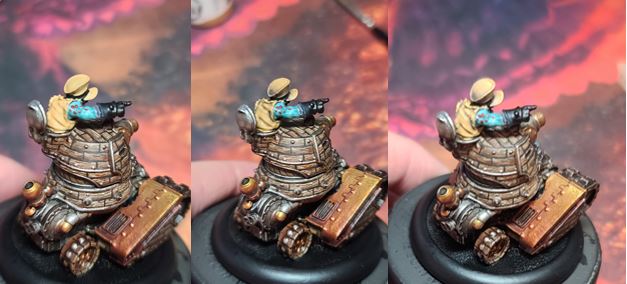
Step 1) I start by basing these areas in Rucksack Tan.
Step 2) Next, I add in my first shading layer by blending some Gun Corps Brown.
Step 3) To add more depth to the shade, I go with Battlefield Brown on the deepest areas.
Step 4) To highlight this color, I use an even mix of Rucksack Tan and Menoth White Base.
Leather Areas

Step 1) Start by painting a solid basecoat of Bootstrap Leather.
Step 2) Mix in a small amount of Brown Ink with the Bootstrap Leather to make a nice brown wash. Apply this on the lower areas of the ammo. I left a little Bootstrap Leather showing through the wash to separate the shade and highlights later.
Step 3) To really make the leather pop, take a little bit of Thamar Black and mix in a few drops of Brown Ink. I used a 1:3 ratio of Thamar Black: Brown Ink.
Step 4) Add a highlight by mixing a 1:1 ratio of Bootstrap Leather and Beast Hide.
Basing
Step 1) Add in sand and ballast with Elmer’s white glue and let it dry completely.
Step 2) Water down a bit of Bloodstone and apply it across the base material to let it soak in.
Step 3) Once it’s dry, I drybrush on a little bit of Rucksack Tan.
Step 4) Next, I drybrush on one final highlight of Menoth White Base.
Step 5) Glue on some static grass.
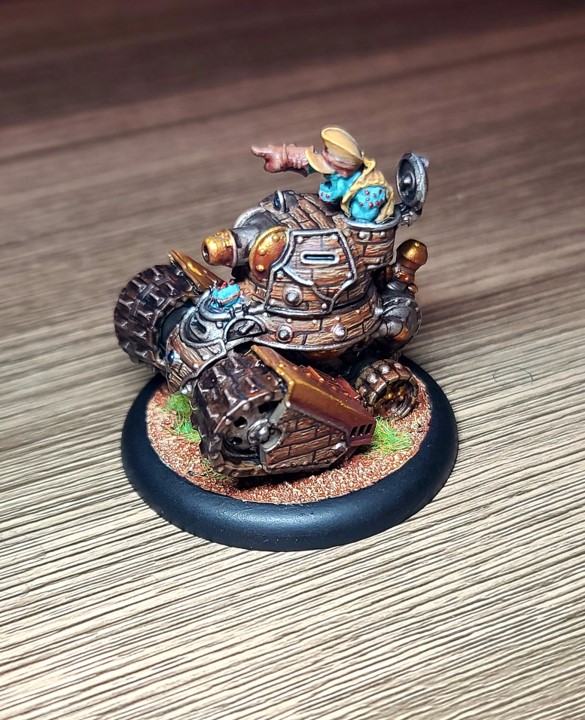
With that final step completed, Ledfoot & Tredz is ready for some tabletop action. I’m pretty stoked with how this turned out—I’m a little sad that the camera on my phone struggles to show the depth in the yellows and whites. But I’m sure you will be able to see it in your own models!
Well, every Dogwood has its day, so join me next time as we add a little alternate color to Chuck Dogwood! We will bring back the poll in the next Insider to determine the next two Riot Quest models after Chuck Dogwood that will face off in a readers’ choice poll. See you next time, Painters!