by Erik Swinson
Painting the Earth Knight
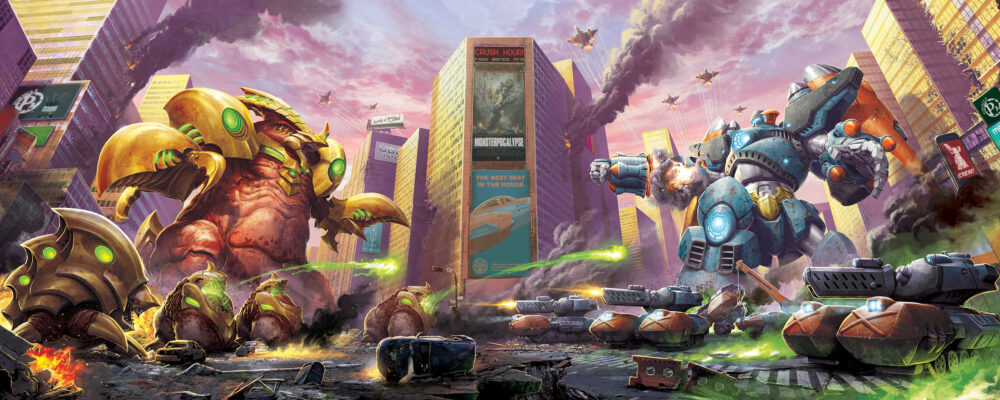
When I was approached to paint the Earth Knight, I was given two simple directions: it is a salvaged G.U.A.R.D. Laser Knight, and the Green Fury doesn’t have the money to repaint it.
So, in my head, my direction was pretty clear: make it look like a giant hunk of junk. I knew I would be weathering the heck out of it while maintaining the cartoonish look of Monsterpocalypse.
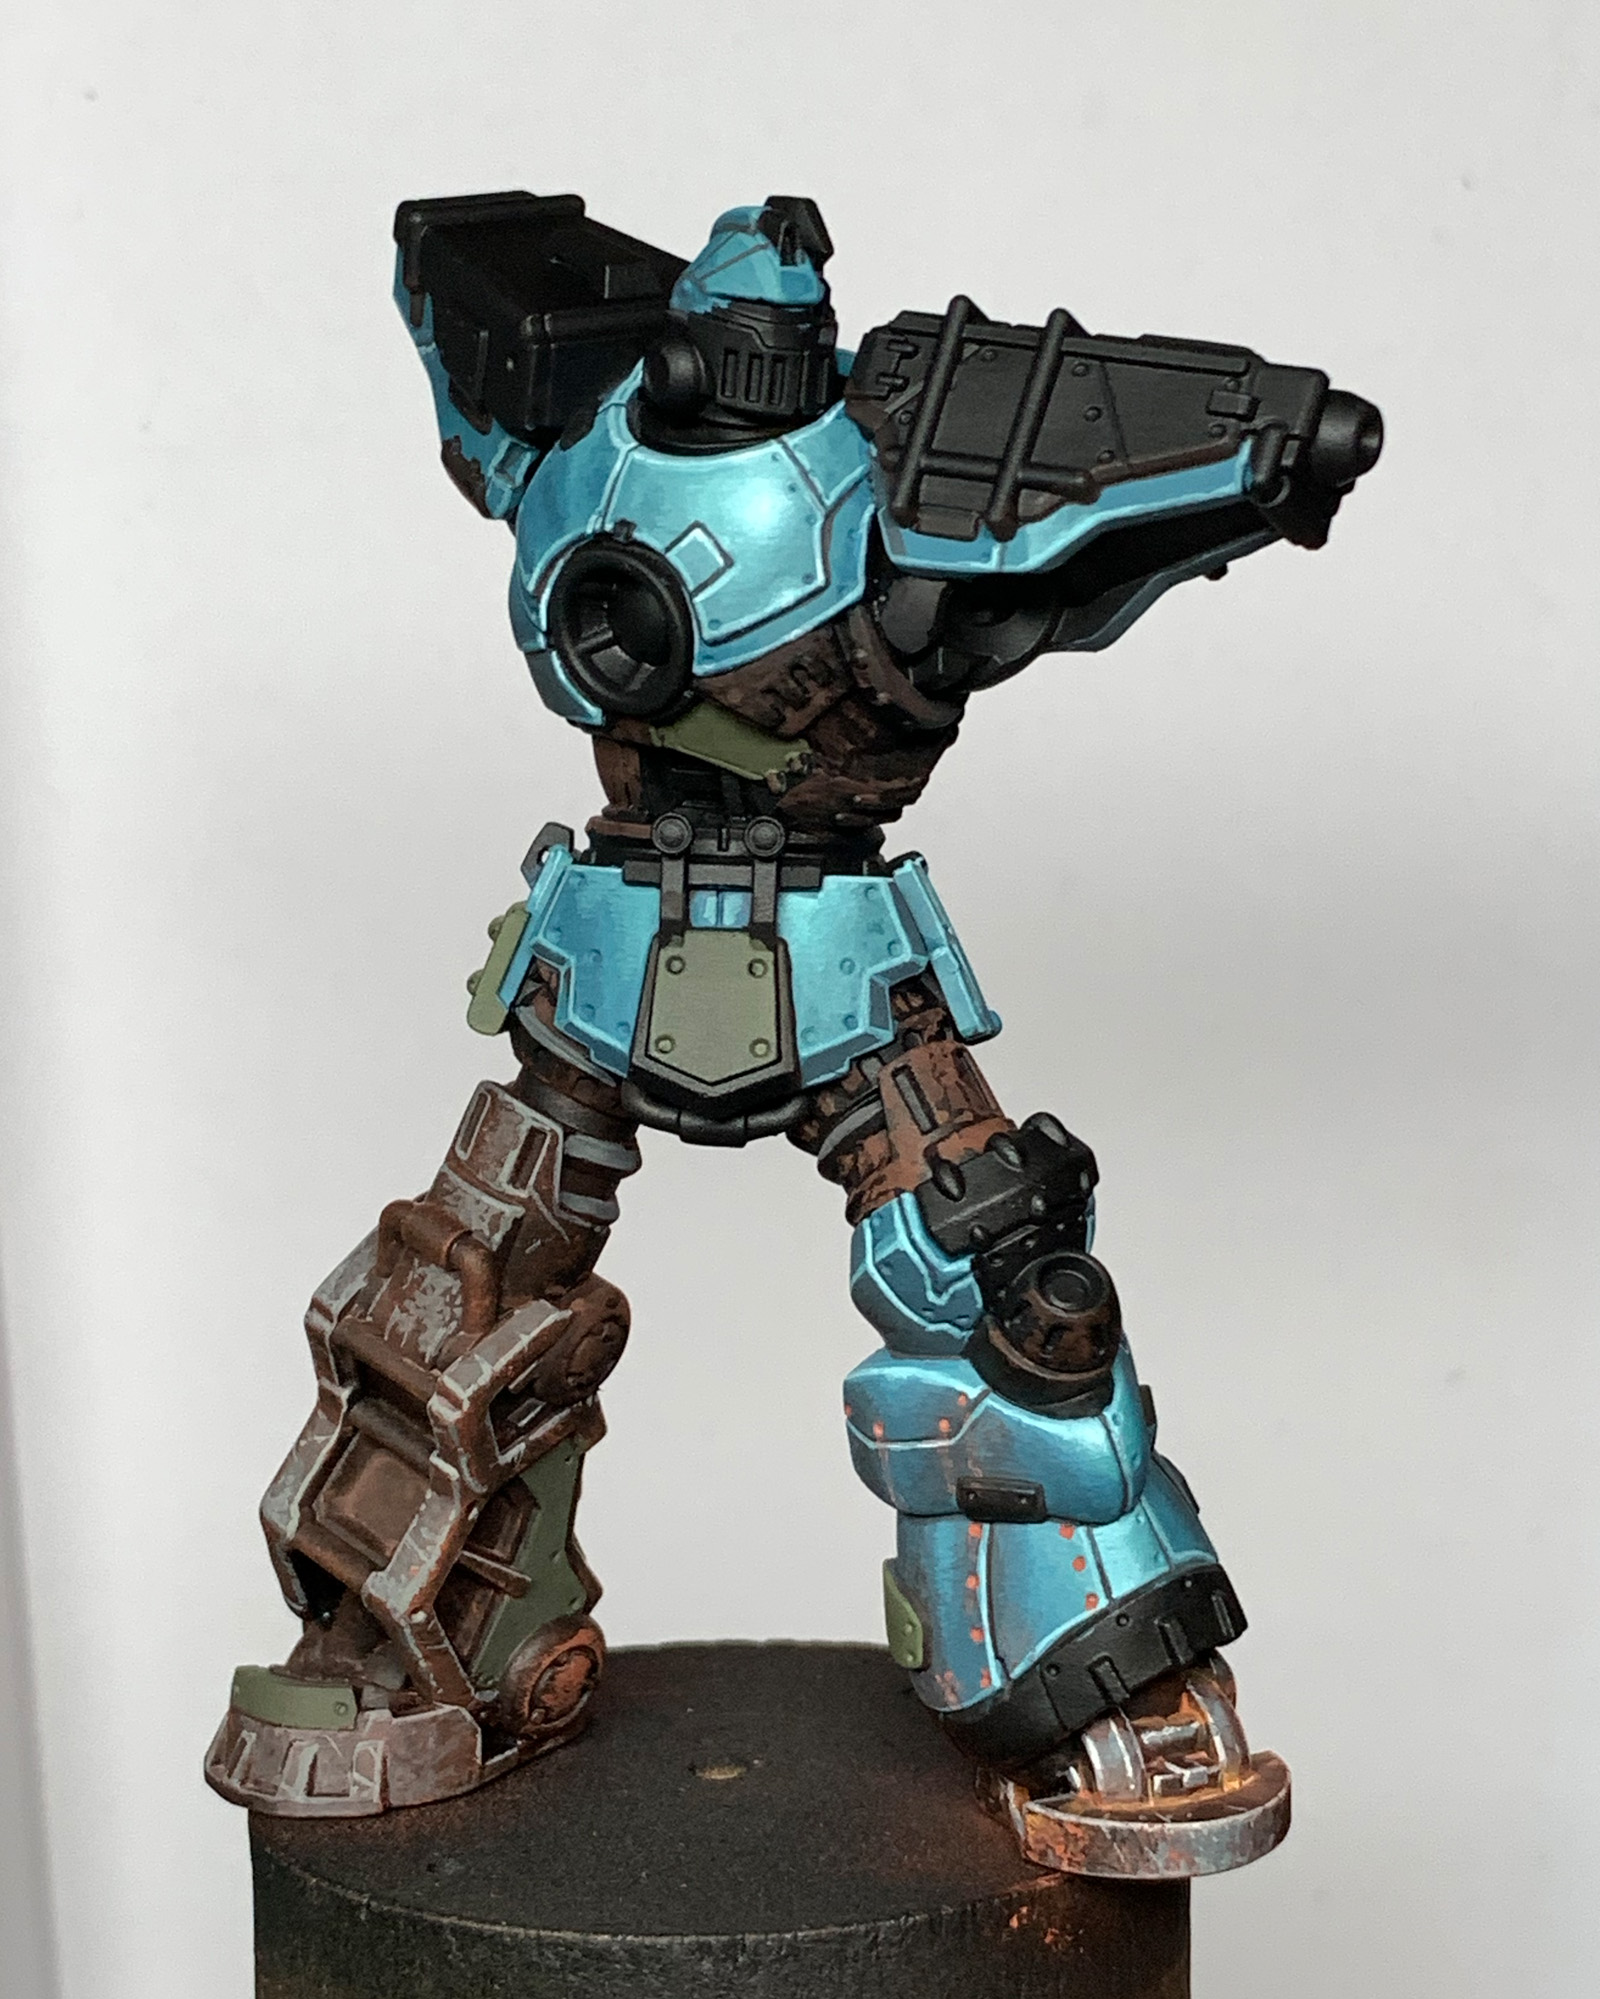
I start with the teal armor of the G.U.A.R.D. mechs. When painting NMM (non-metallic metal, a technique used to simulate the look of a metallic surface while using standard paints), I like to sketch out all of my reflections before going back and refining it. As you can see in the picture below, I have not blended at all.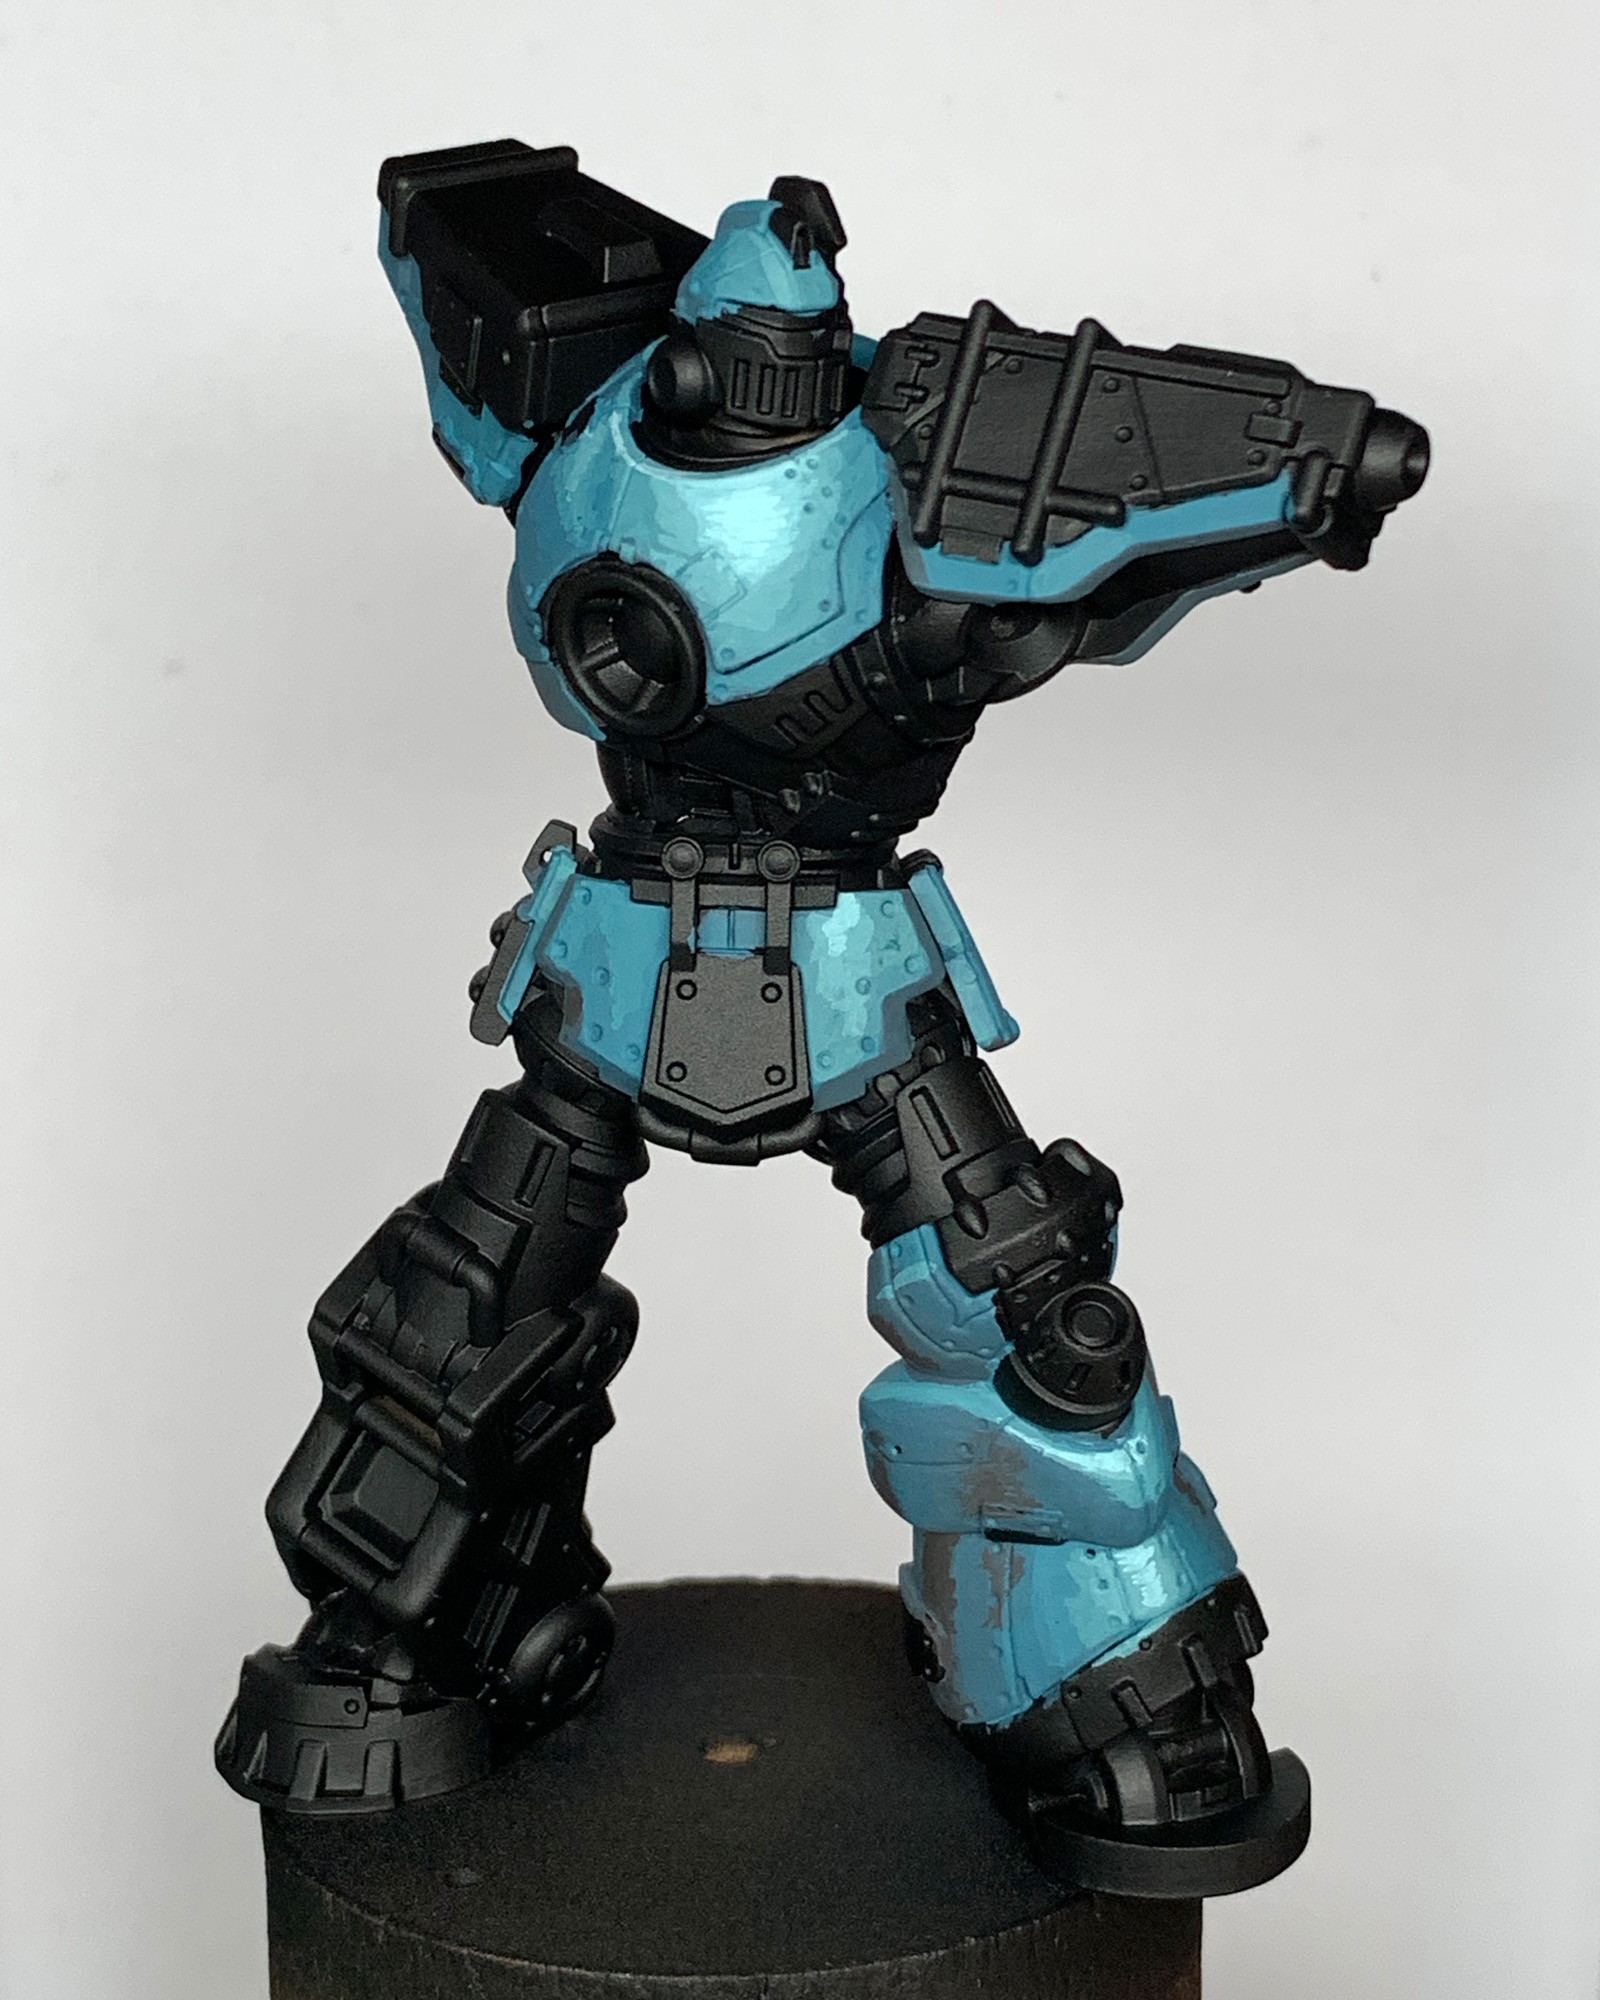
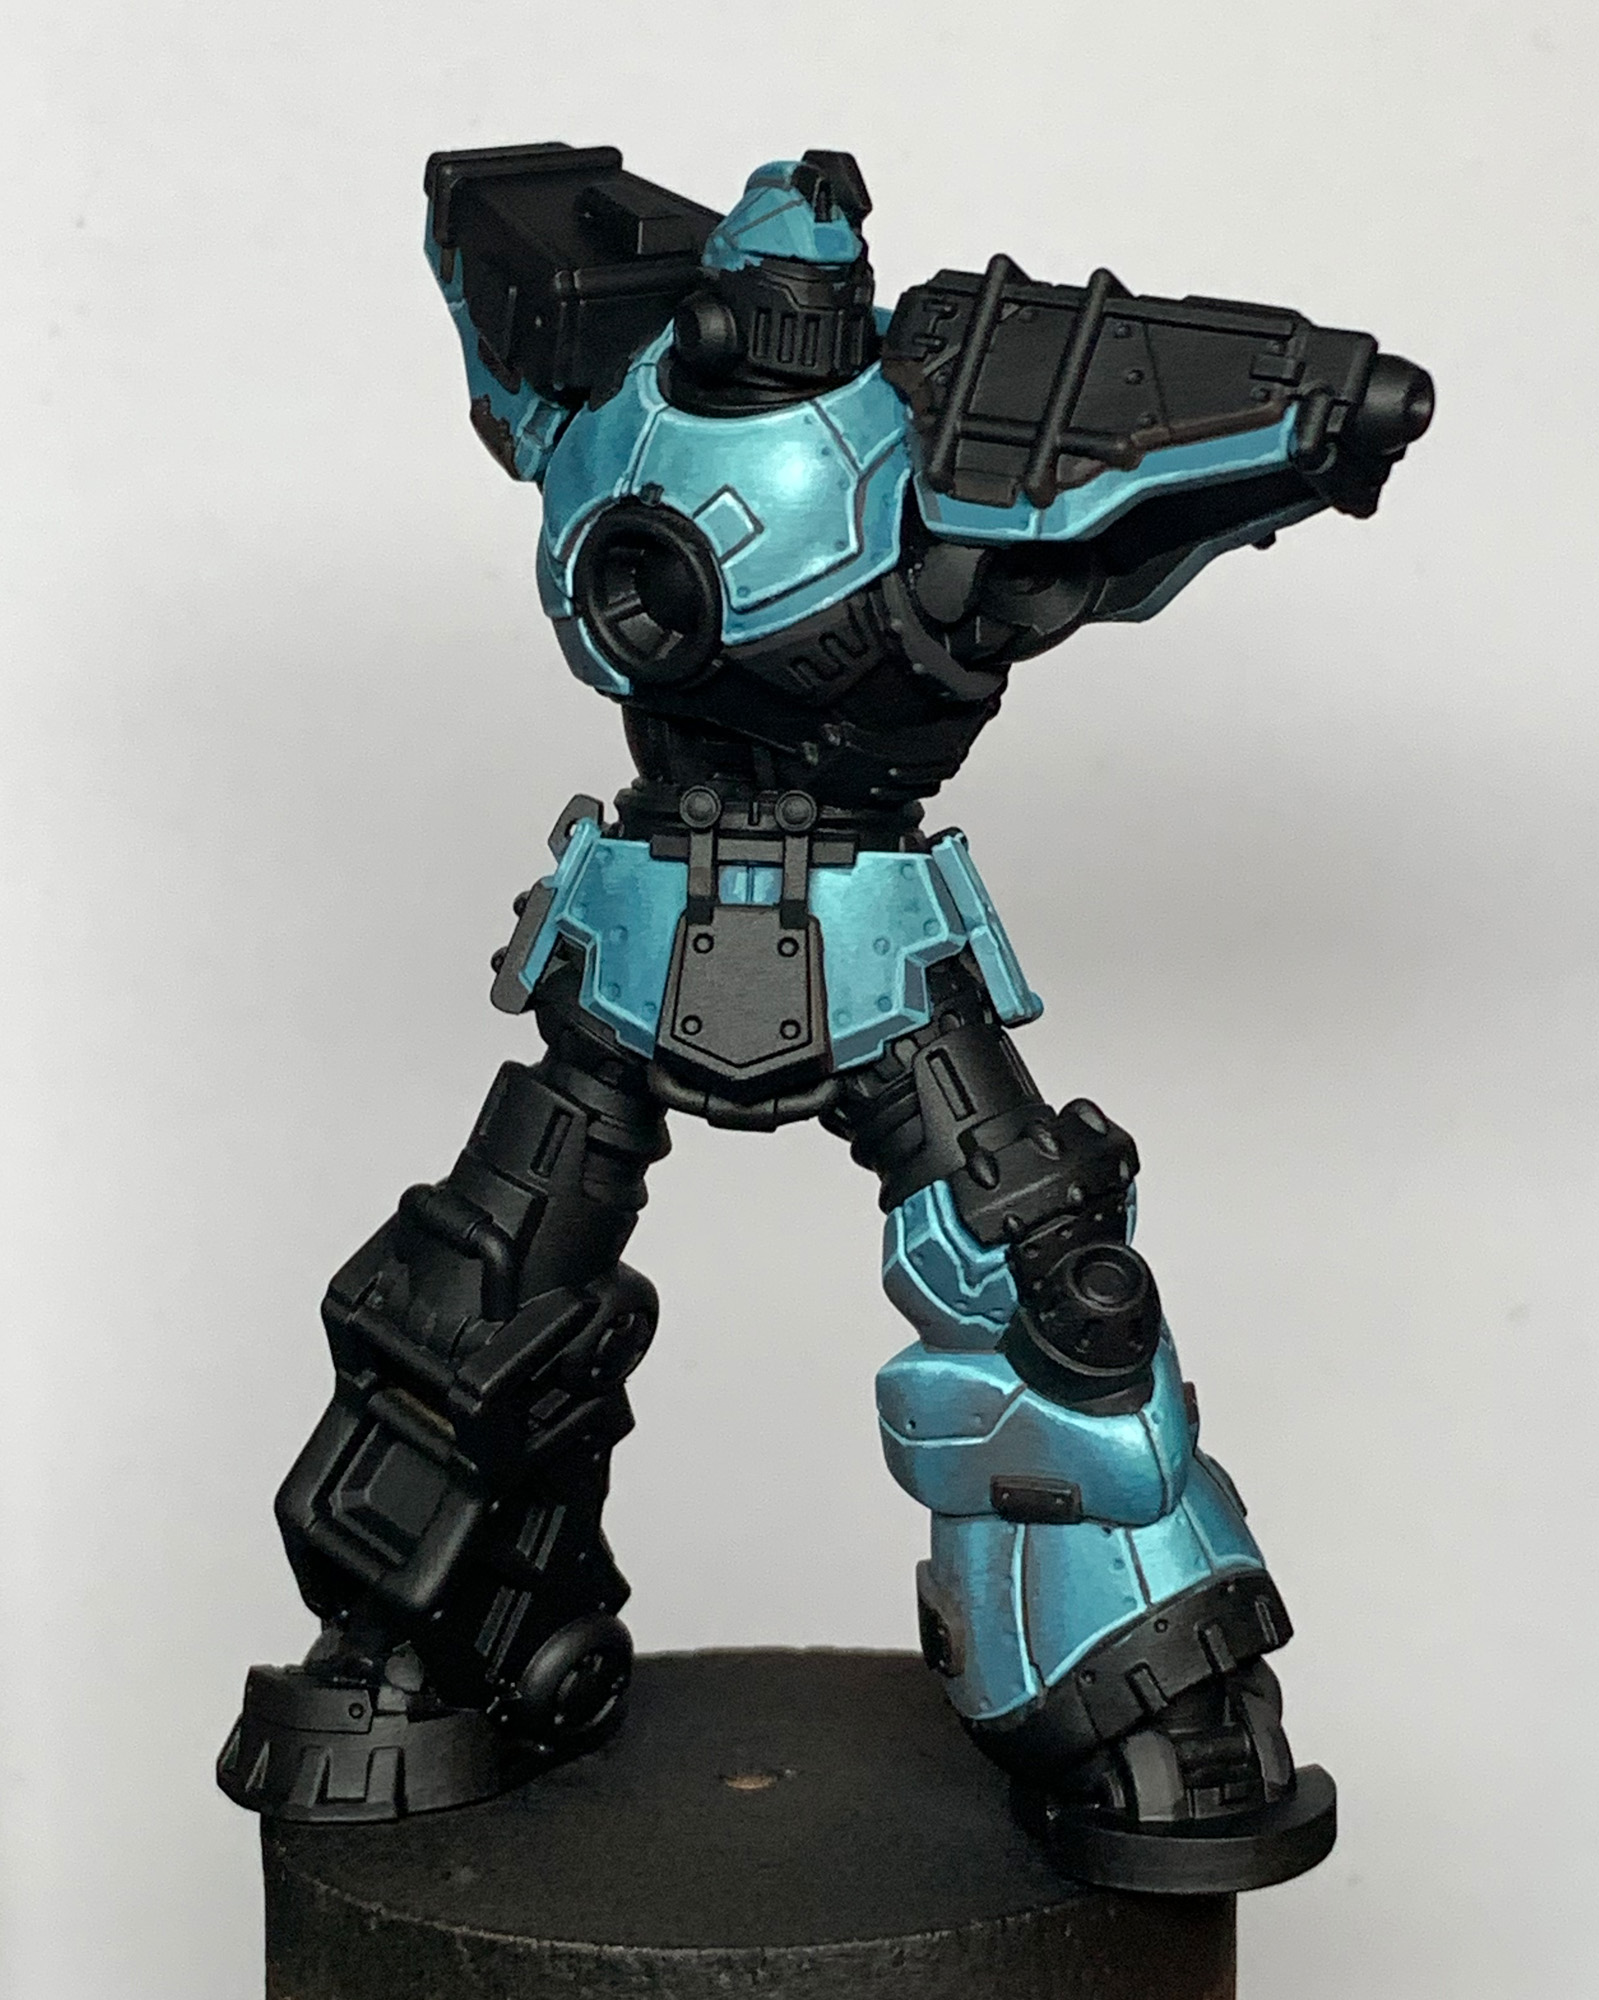
Once I am happy with the general placement of the lights and shadows, I then begin to ease the transitions between the blocks of color by feathering with intermediate mixtures. I paint all of my strokes on a section of armor in the same direction to achieve a brushed metal texture. I paint in all of the panel lines with a dark color and then comes the most important part of NMM: the edge highlights. Every edge should be highlighted to give the shiny effects, but not all edges need to be highlighted to the same value (the brightness of a color).
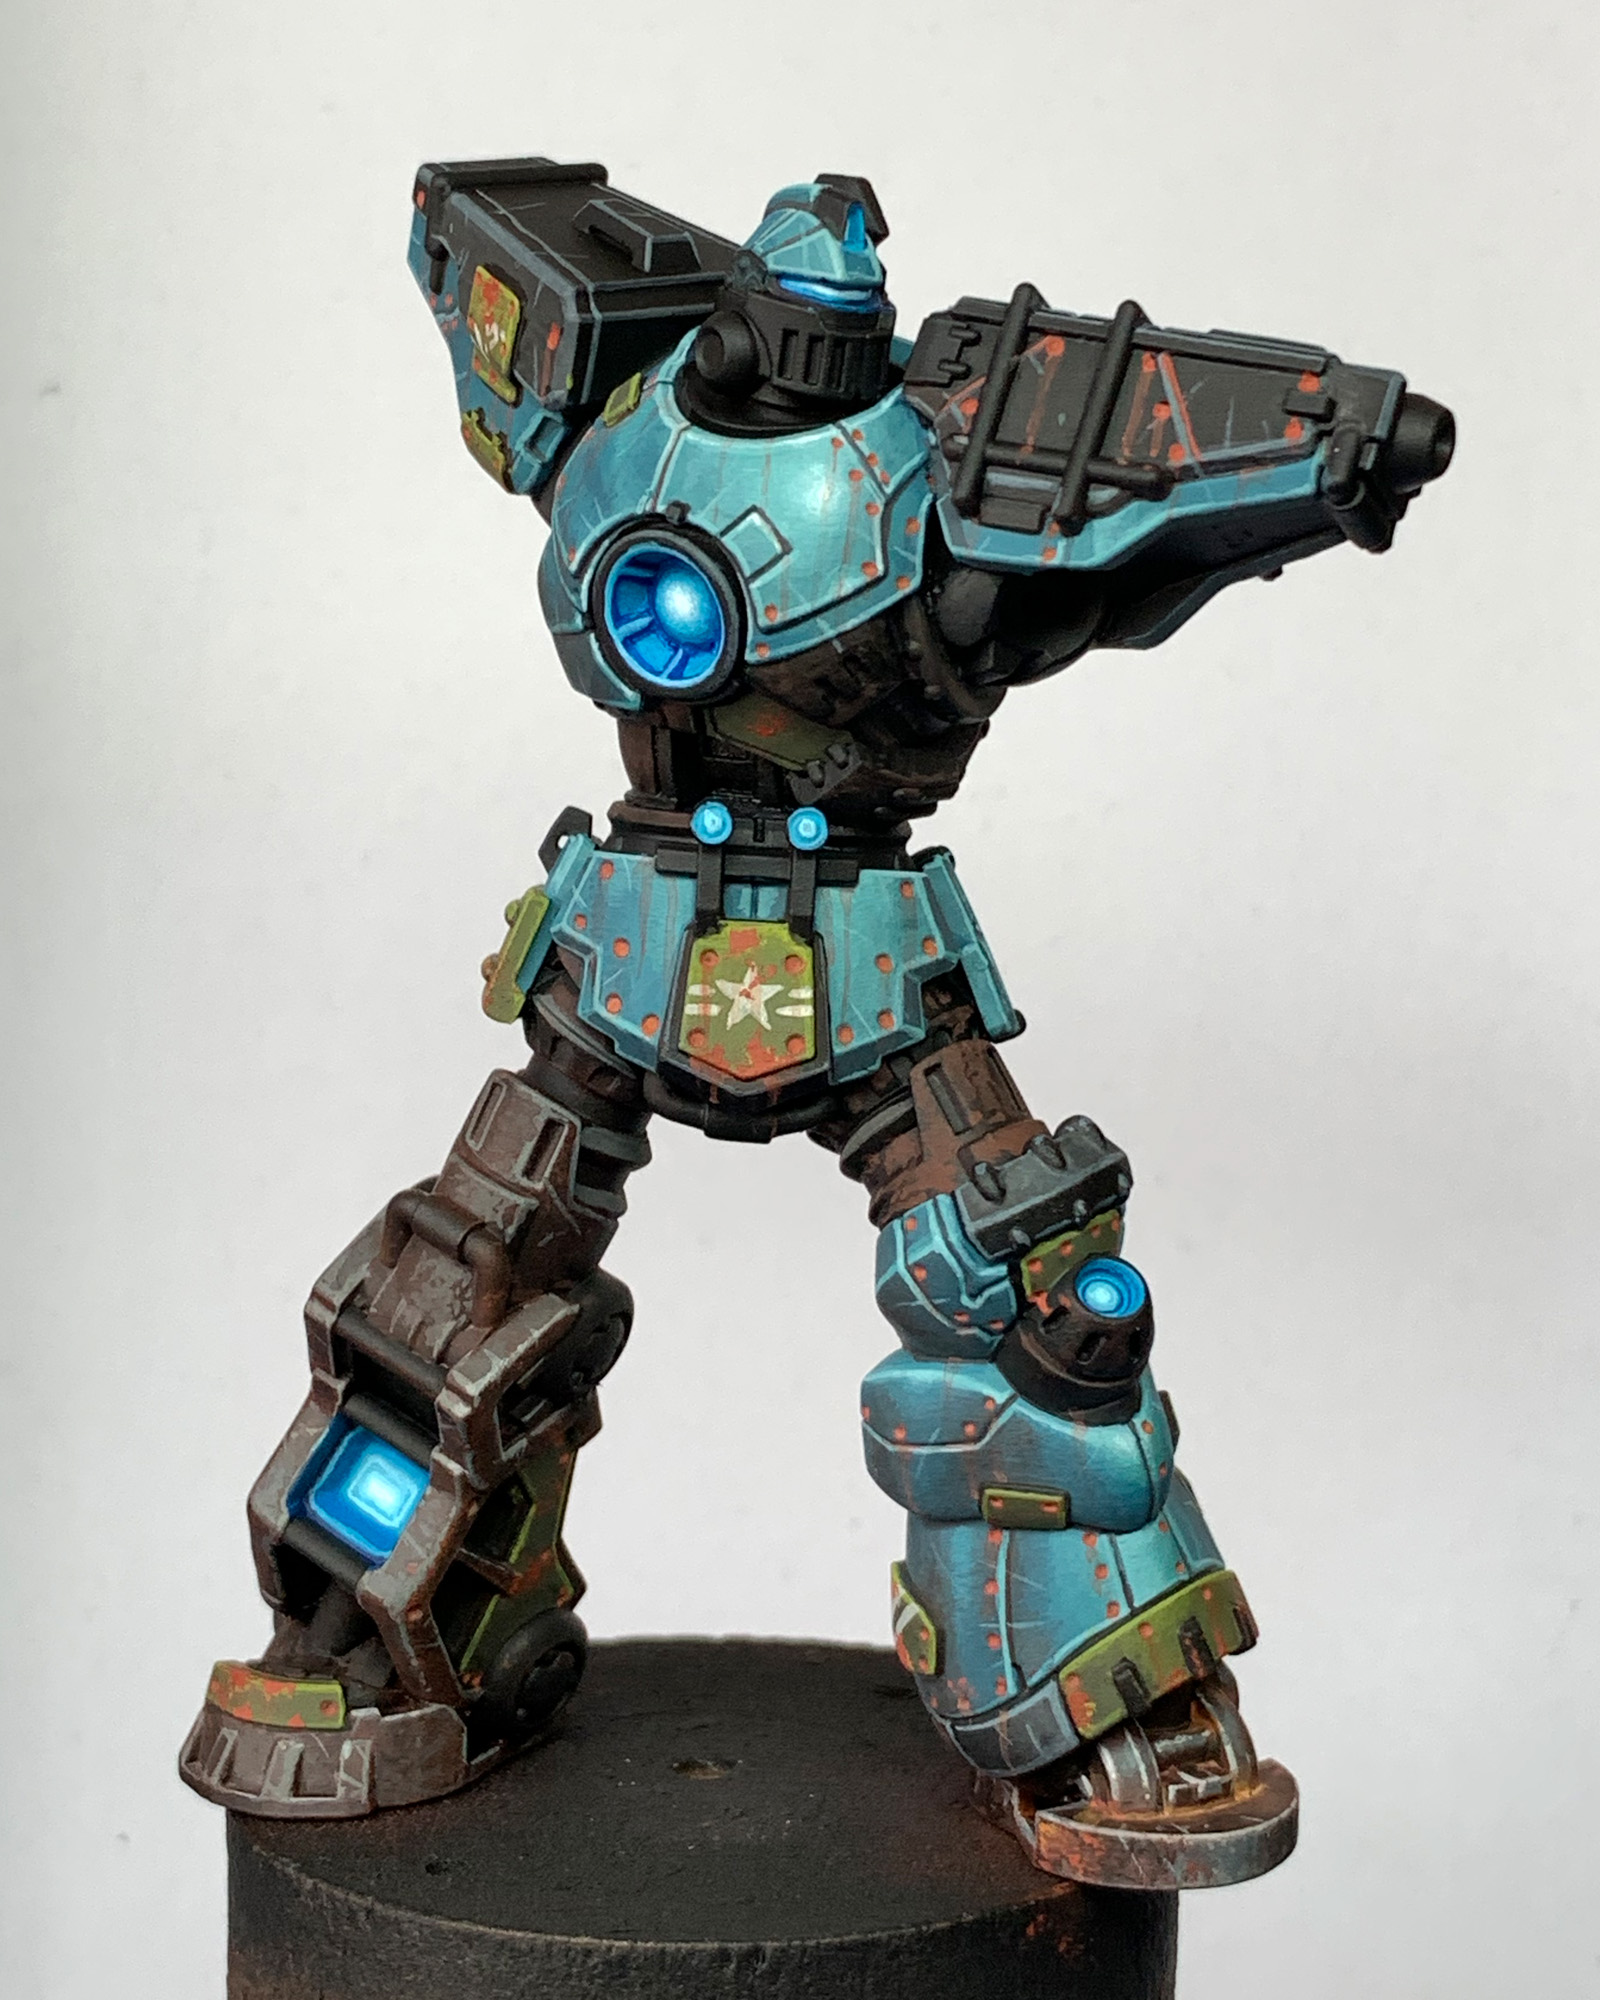
I then move on to the main sections of raw steel. I want a very rusted look for these areas. I start by roughly stippling Umbral Umber with a worn-out brush. (Never throw away your brushes; they always have a use.) I stipple some Bloodstone more sparingly. Next, I stipple some Ironhull Grey in my light areas of the metal and finally paint some small scratches and edge highlights by adding white to the Ironhull Grey and skipping over parts of the edge, leaving gaps in the highlight to give the appearance of a dinged and damaged edge. I add a bit of Ember Orange to the crevasses for some extra rust effect. You can see the various stages of completion in the image below, the finished stage being its left foot.
You may have noticed in the image above that I have begun painting sections of the armor plates in a military green. I tend to jump around a bit when painting, never working on just one part of a model at a time—this is so I can get an idea of how the model is coming together as a whole. I went with the military green to tie the model in a bit more with the Green Fury Faction and further the narrative that it’s made from scrap. I imagine repairs were made with tank or other military vehicle parts. I paint some freehand military iconography on the green sections and then sponge some Bloodstone on them, using blister pack foam to give a rust effect. Again using Bloodstone, I paint in all of the rivets of the teal armor plates and paint some rust streaks running down the model. I also paint the glowing sections such as the eyes, chest reactor, and leg lights.
To break up all of the rusty metal, I decide to change some of the joint areas to a clean steel, using black, Greycoat Grey, and white in various mixtures. It’s important to be extremely contrasted on these areas to give a shiny appearance. I think this creates a nice material contrast against all of the rusty metal and shows that it has some newer parts, too.
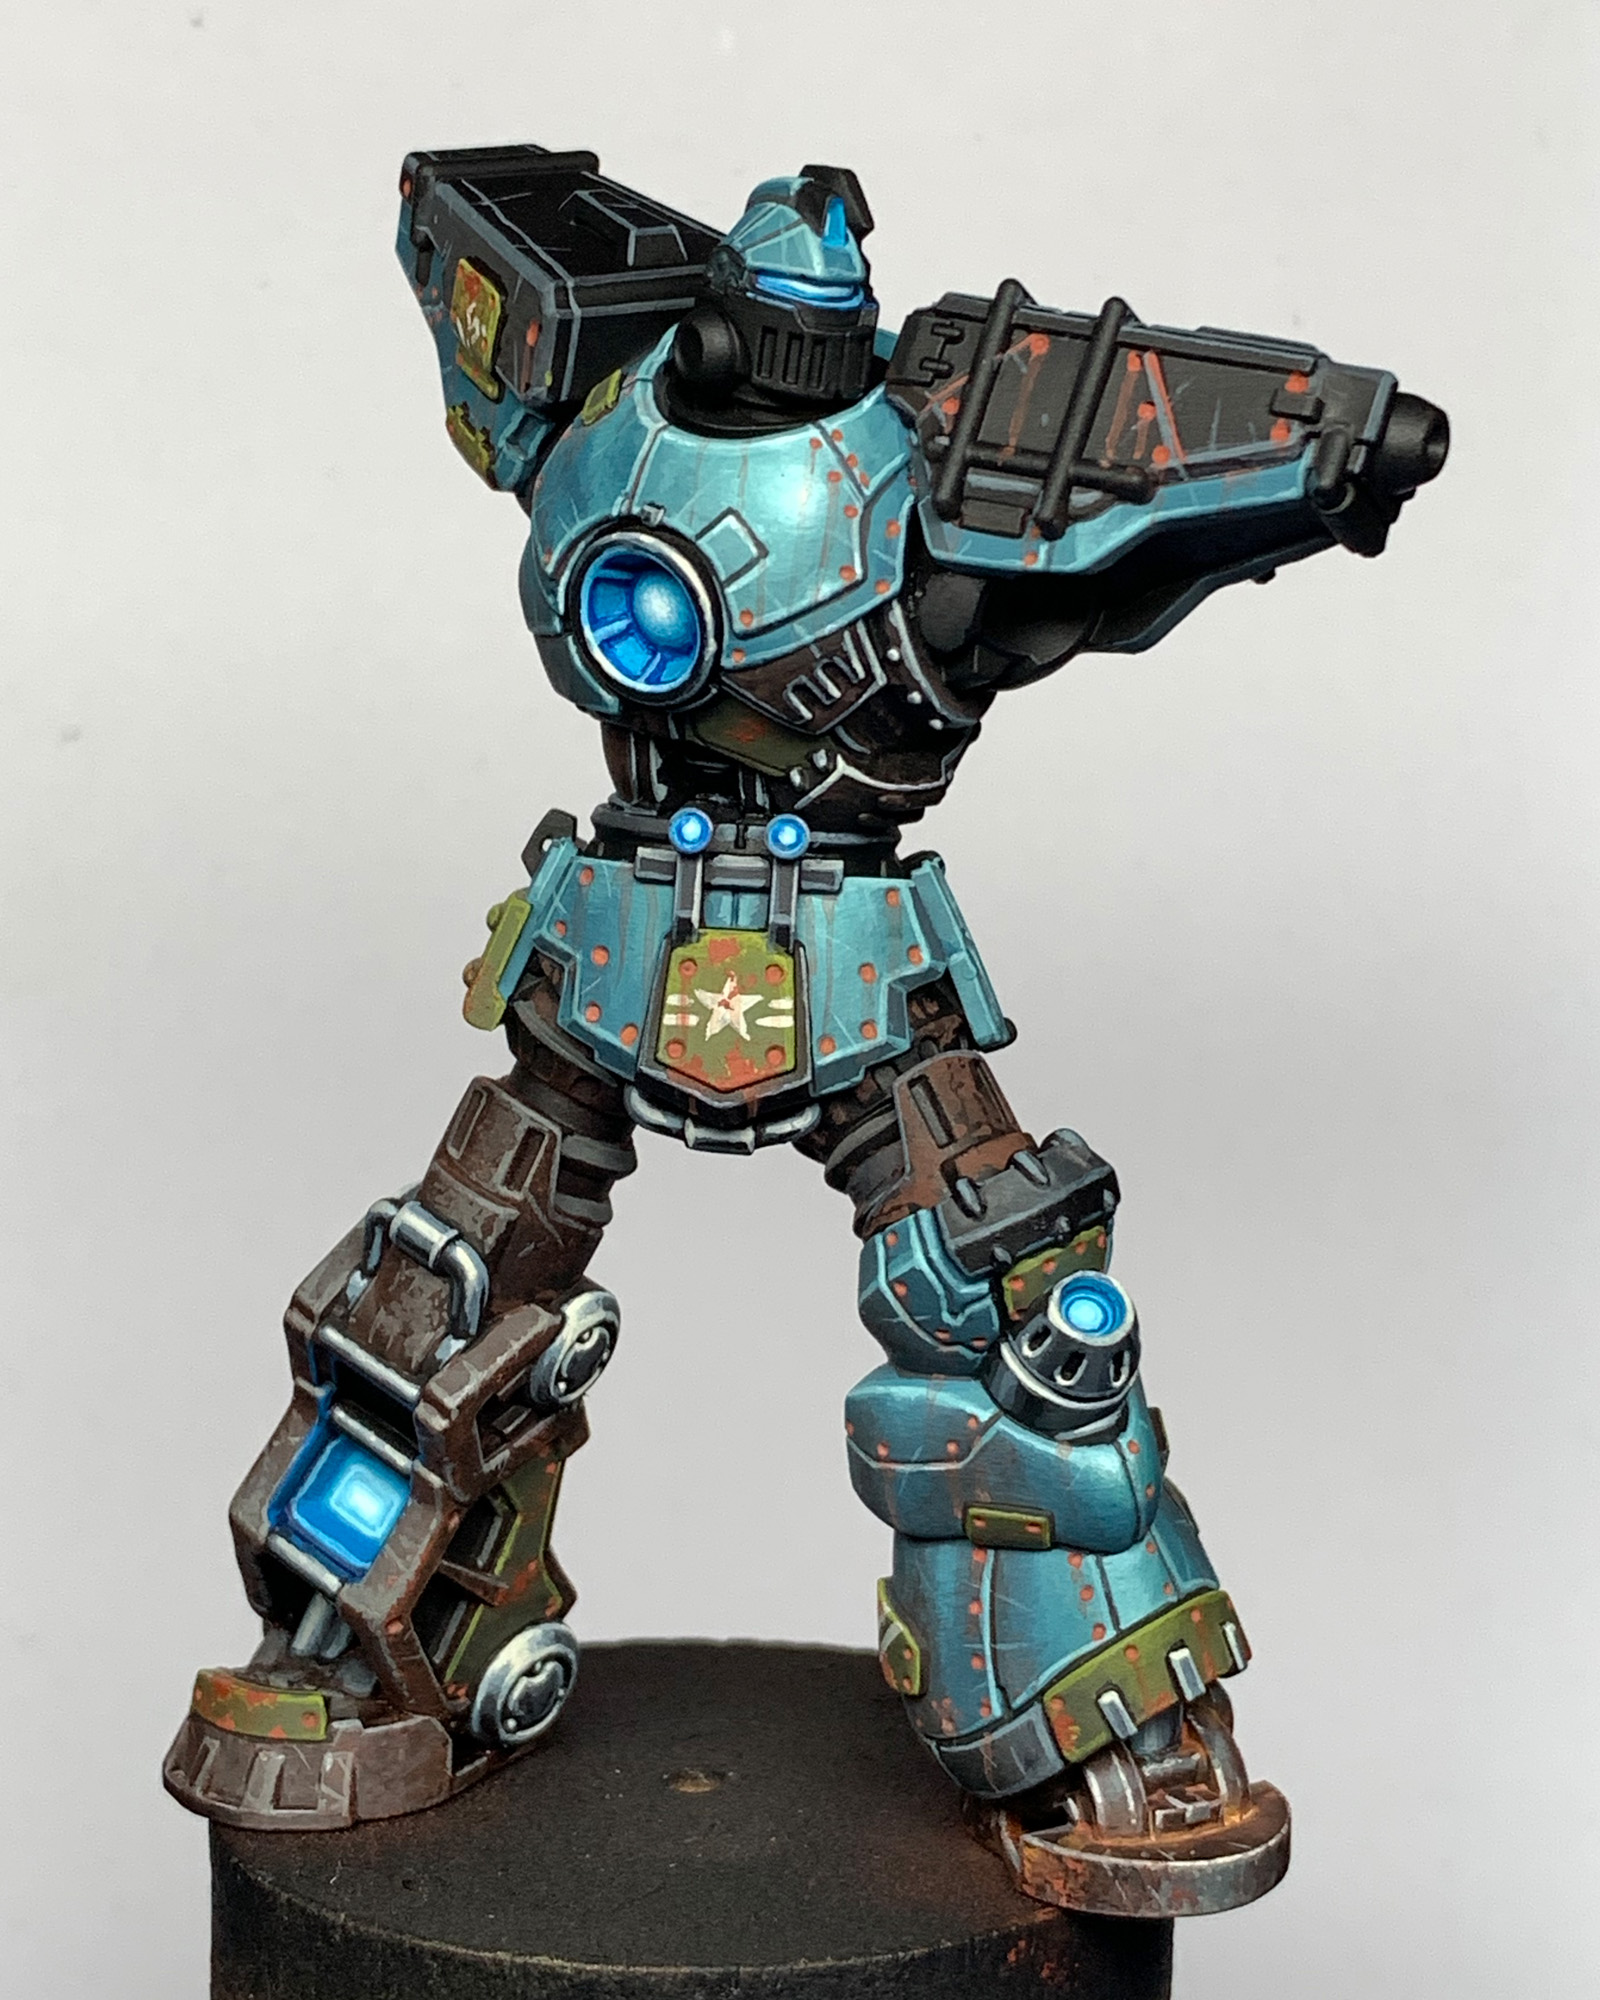
Nearly done with the model except for the arms that were left off for ease of painting (that big shield would really get in the way!), I decide I want to add one more kind of metal and pull in a little bit of the orange from the G.U.A.R.D color scheme. I go with a copper for some of the detail pieces like the facemask and pipes on his shoulder. With the copper, I can pull in some of the same colors I used for the rust and weather it with verdigris (that green stuff all over the Statue of Liberty) using Arcane Blue.
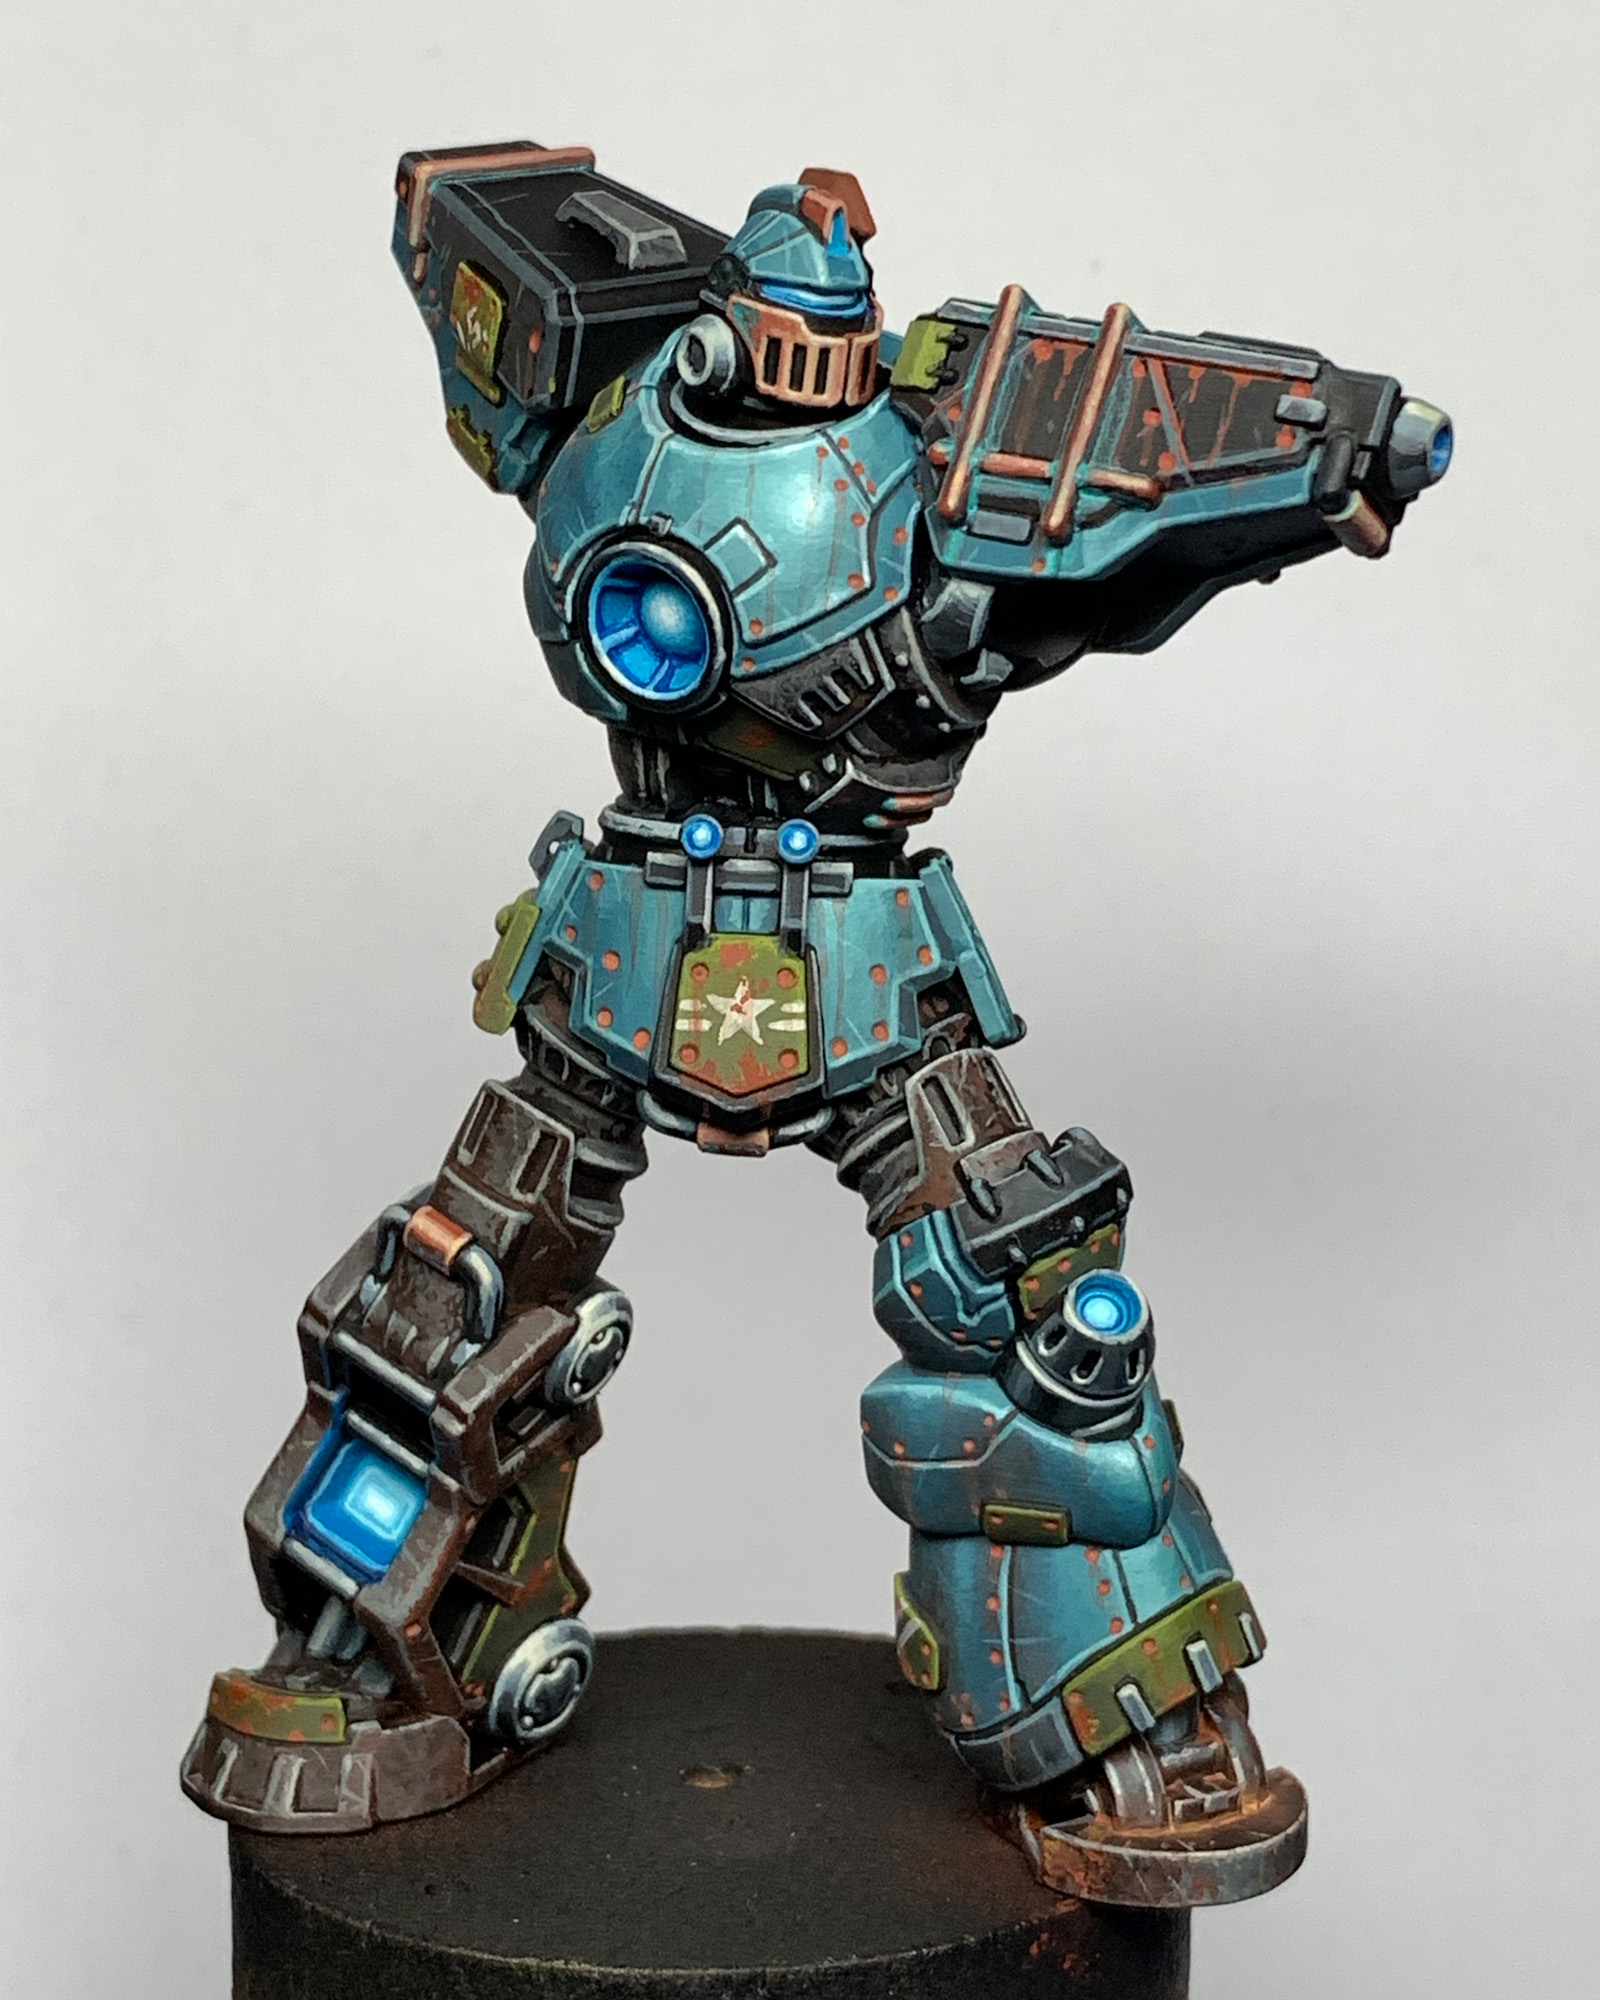
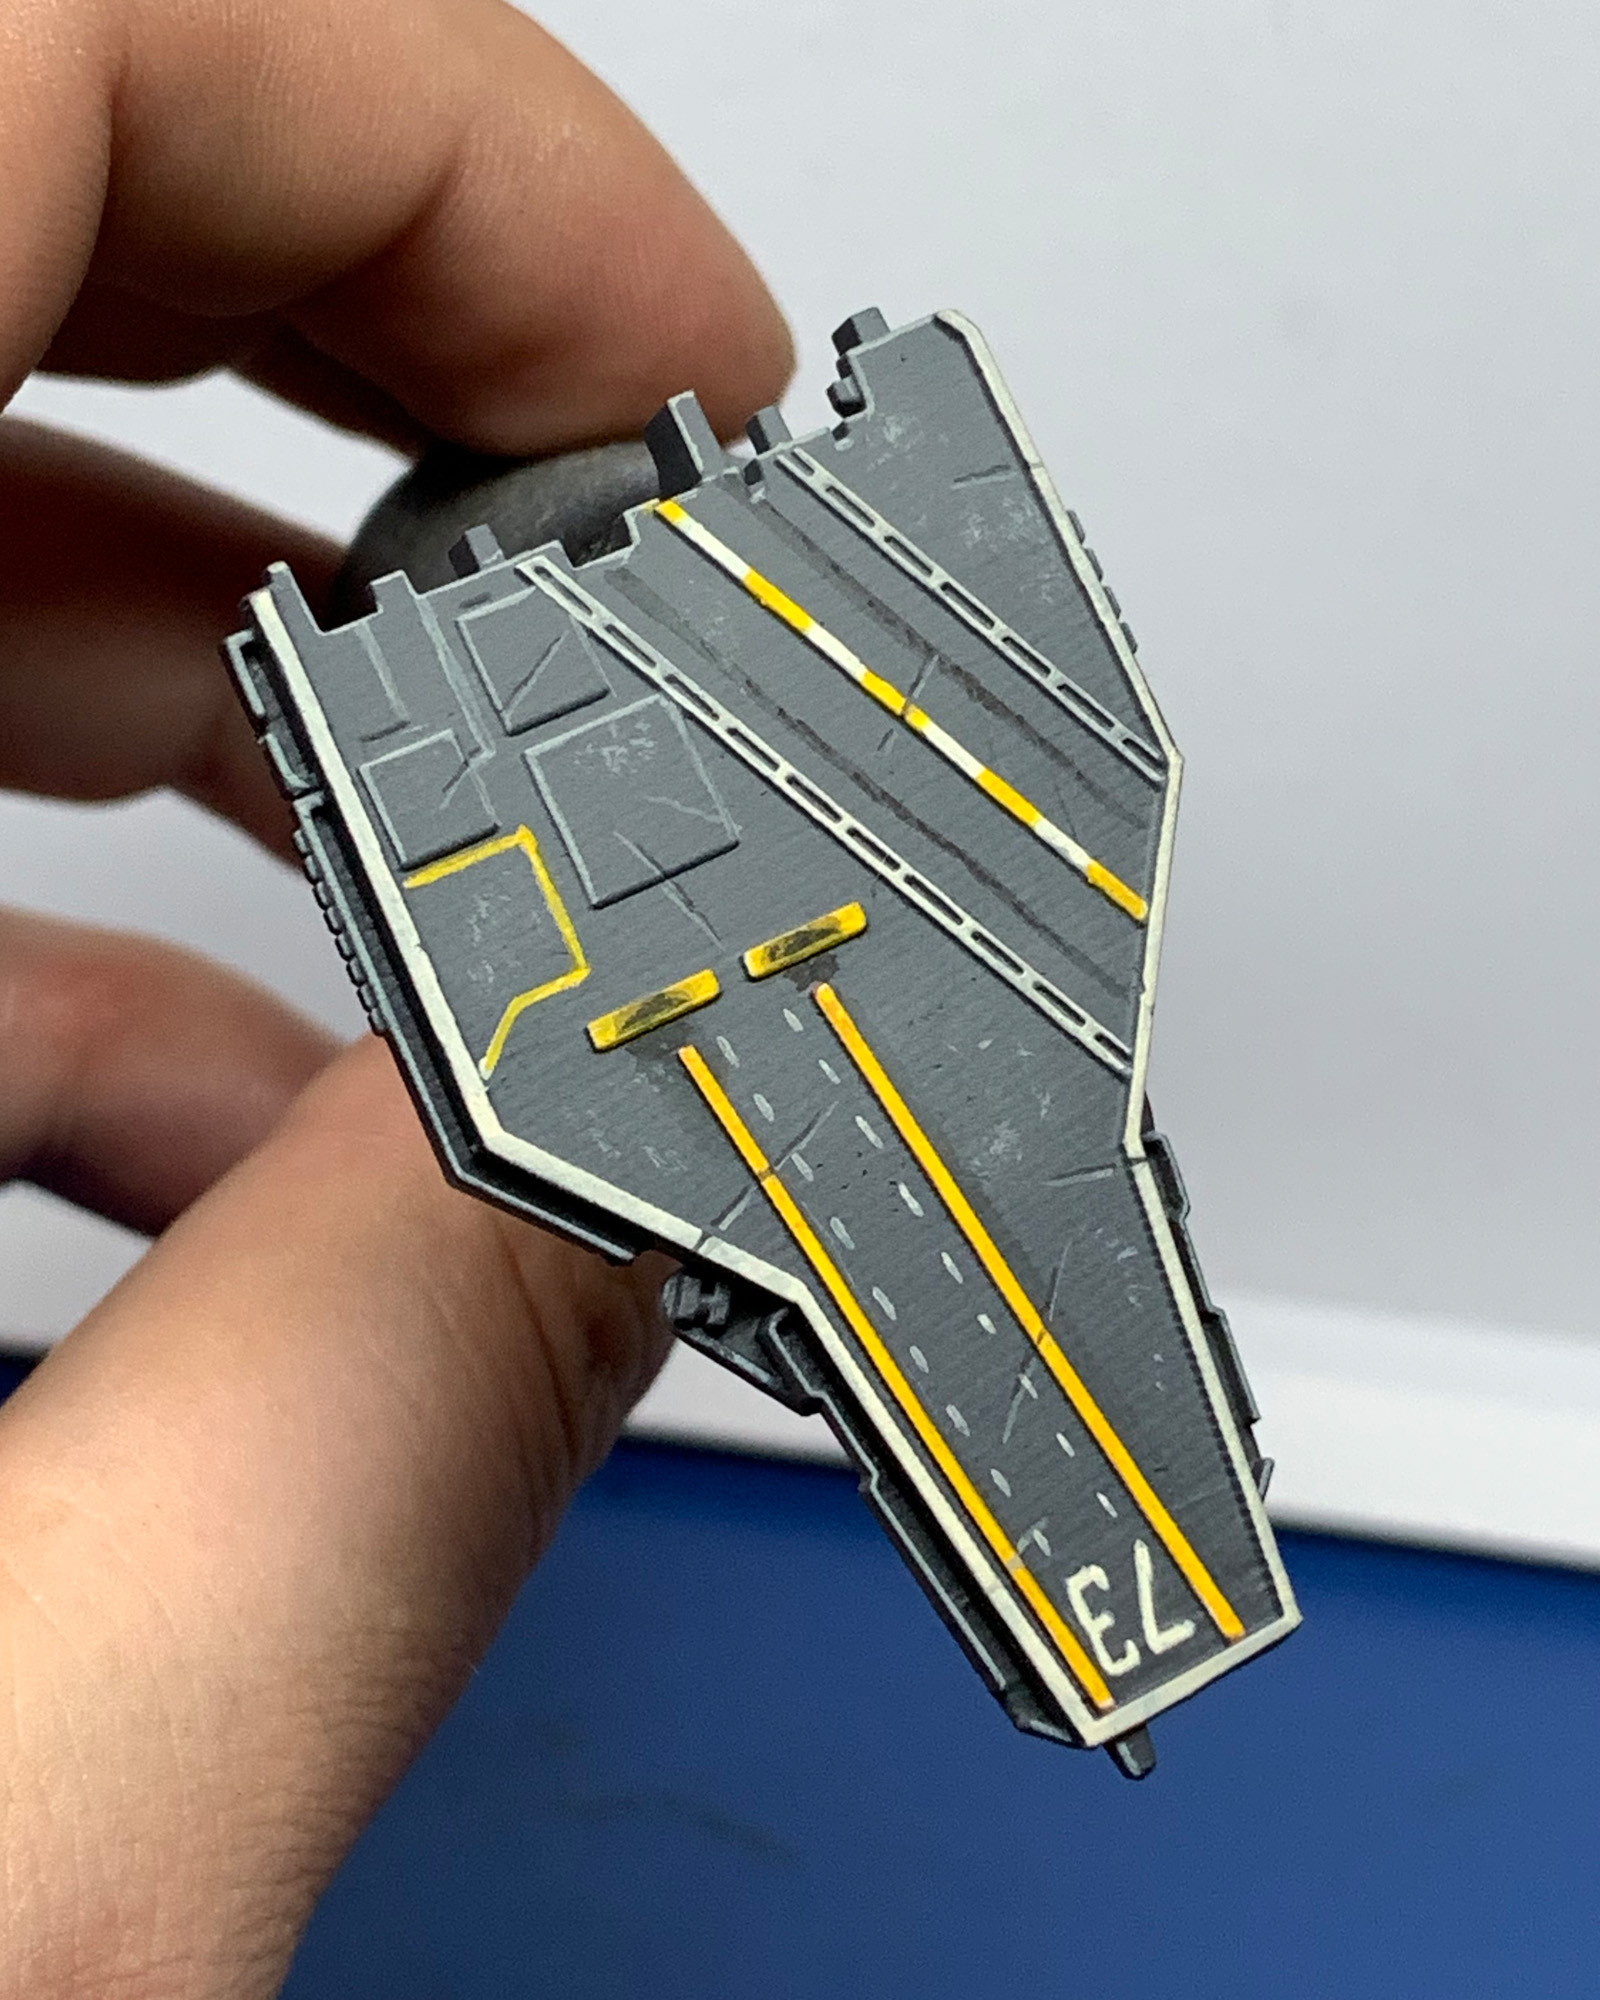
Lastly, I paint the arms. There isn’t much to say about the chainsaw arm—it gets the same process as the rest of the model. The shield arm, however, has a narrative detail I love about this model: he has a freaking aircraft carrier for a shield! The shield itself is fairly straightforward—I airbrush a grey transition on the deck as a starting point. Next, I edge highlight everything with a light grey, then using reference, I paint the markings and some streaking/scratches on the flight deck. Some of them are raised details and some are freehand.
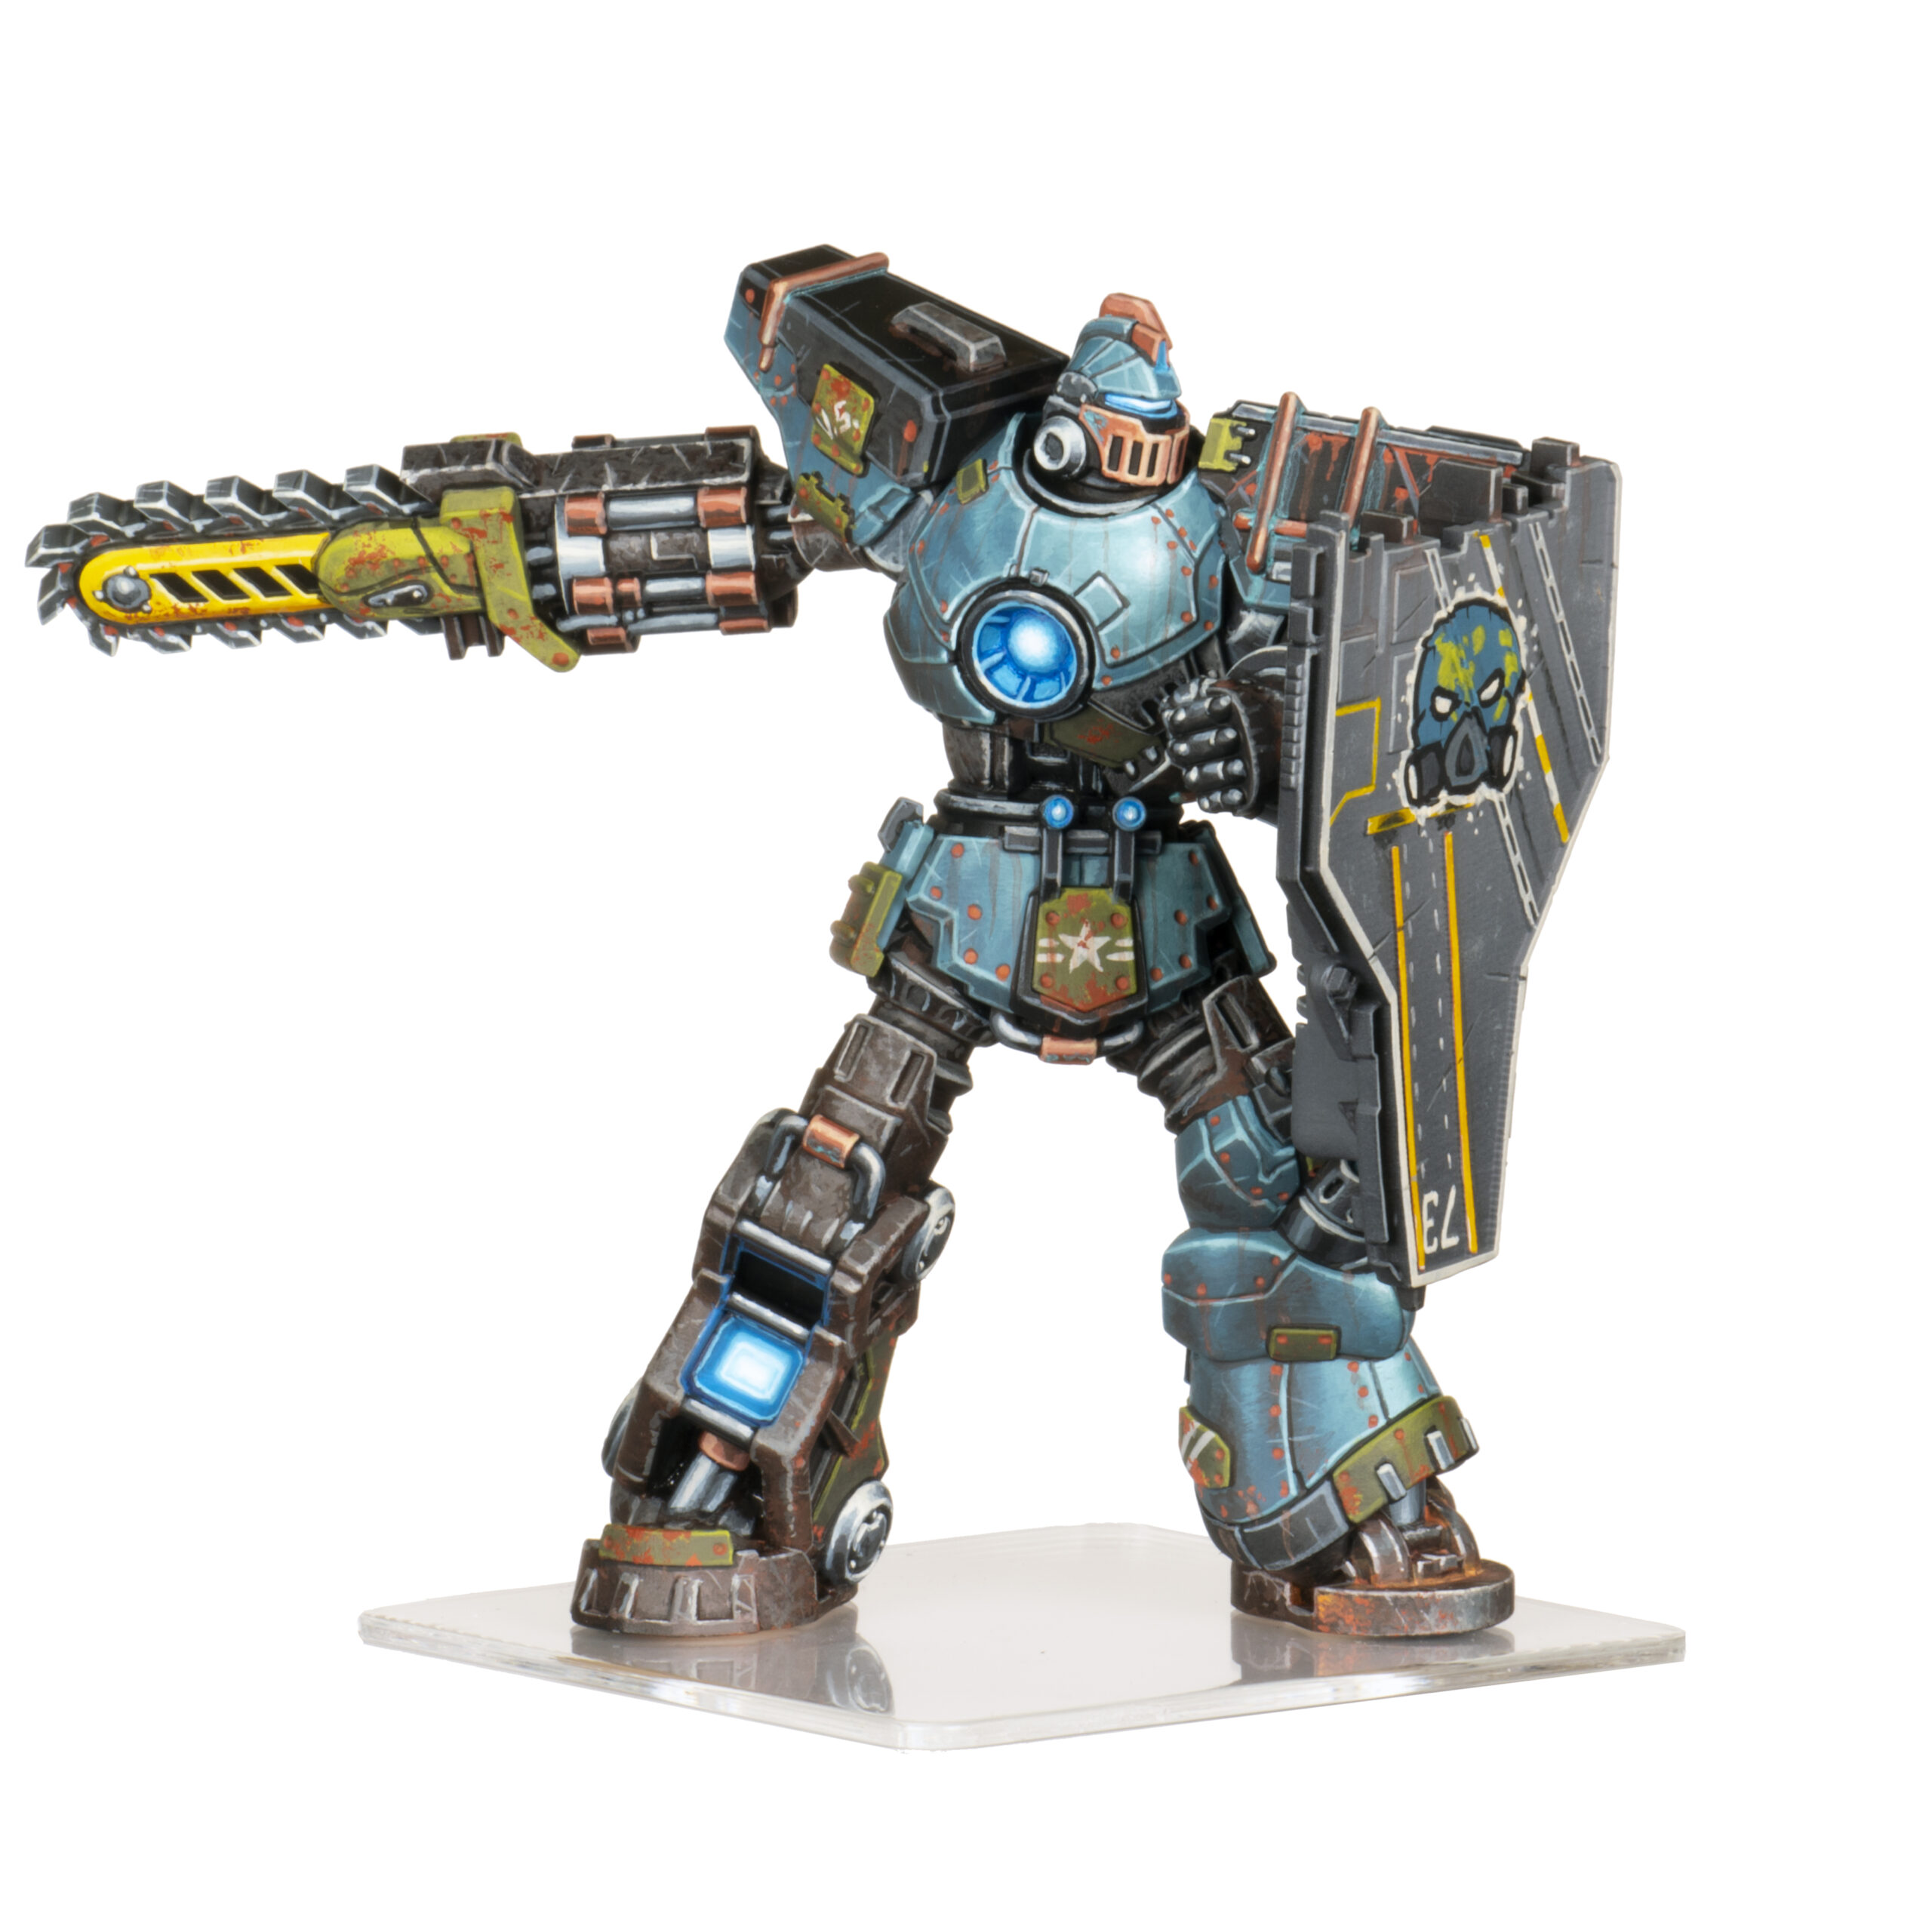
It needs one extra little touch to finish it all off. I freehand the logo of the Green Fury to hopefully push home that this is no G.U.A.R.D. mech anymore. How did I do it? Well that’s a subject for another Insider…
And finally, I present to you the finished Earth Knight in all his rust-bucket glory, ready to smash some kaiju!