by Jason Soles
The following is an overview of the Aeternus Continuum Faction for Warcaster: Neo-Mechanika. In addition to providing an in-depth look into the Continuum’s background and organization that helped inform its design, I will also discuss the models, strategies, and tactics that underpin the Faction and how it plays. Over the coming weeks, we will provide additional overviews of all of the Factions and provide a look into their guiding design philosophies as we developed them for Warcaster.
Part III: The Keys of Hell and Death

Models painted by Jordan Lamb
Now that we have explored the organization of the Aeternus Continuum and its unit offerings, we can dig into the strategies and tactics behind the Faction. We will start with Force construction before looking more directly at the capabilities and tactics of the Faction in play. In this part, I will try to provide insight as both a developer and as a player.
As with any Faction, when you are building an Aeternus Continuum force, you should begin by deciding on a basic plan of attack. Will you focus on heavier models with more staying power like vehicles and heavier warjacks, or will you try to deploy as many light and cheap units as possible to overwhelm your opponent’s positions? Will you favor ranged or melee combat? Such decisions not only help you choose which units and in what quantities to include in your force but also which Cyphers you should take to support them.
You should also take into account the basic turn structure of Warcaster, which allocates at least half of your activations to solos, meaning solos should probably make up a substantial part of any force. Personally, I usually ensure that about a third to a half of the units in my force are solos. Squads take up another third of my units. And the remainder is left for warjacks and vehicles. So, when playing a primary mission, I will generally field 5 or 6 solos, 5 or 6 squads, 3 or 4 warjacks, and a vehicle.
When building an Aeternus Continuum force, I tend to maximize my ranged firepower. While there are compelling melee-focused force-builds for the Continuum—focusing on Scourge warjacks, Vassal Reavers, and easy access to the Corrosion continuous effect—I prefer to focus on the Faction’s movement tricks and powerful firepower.
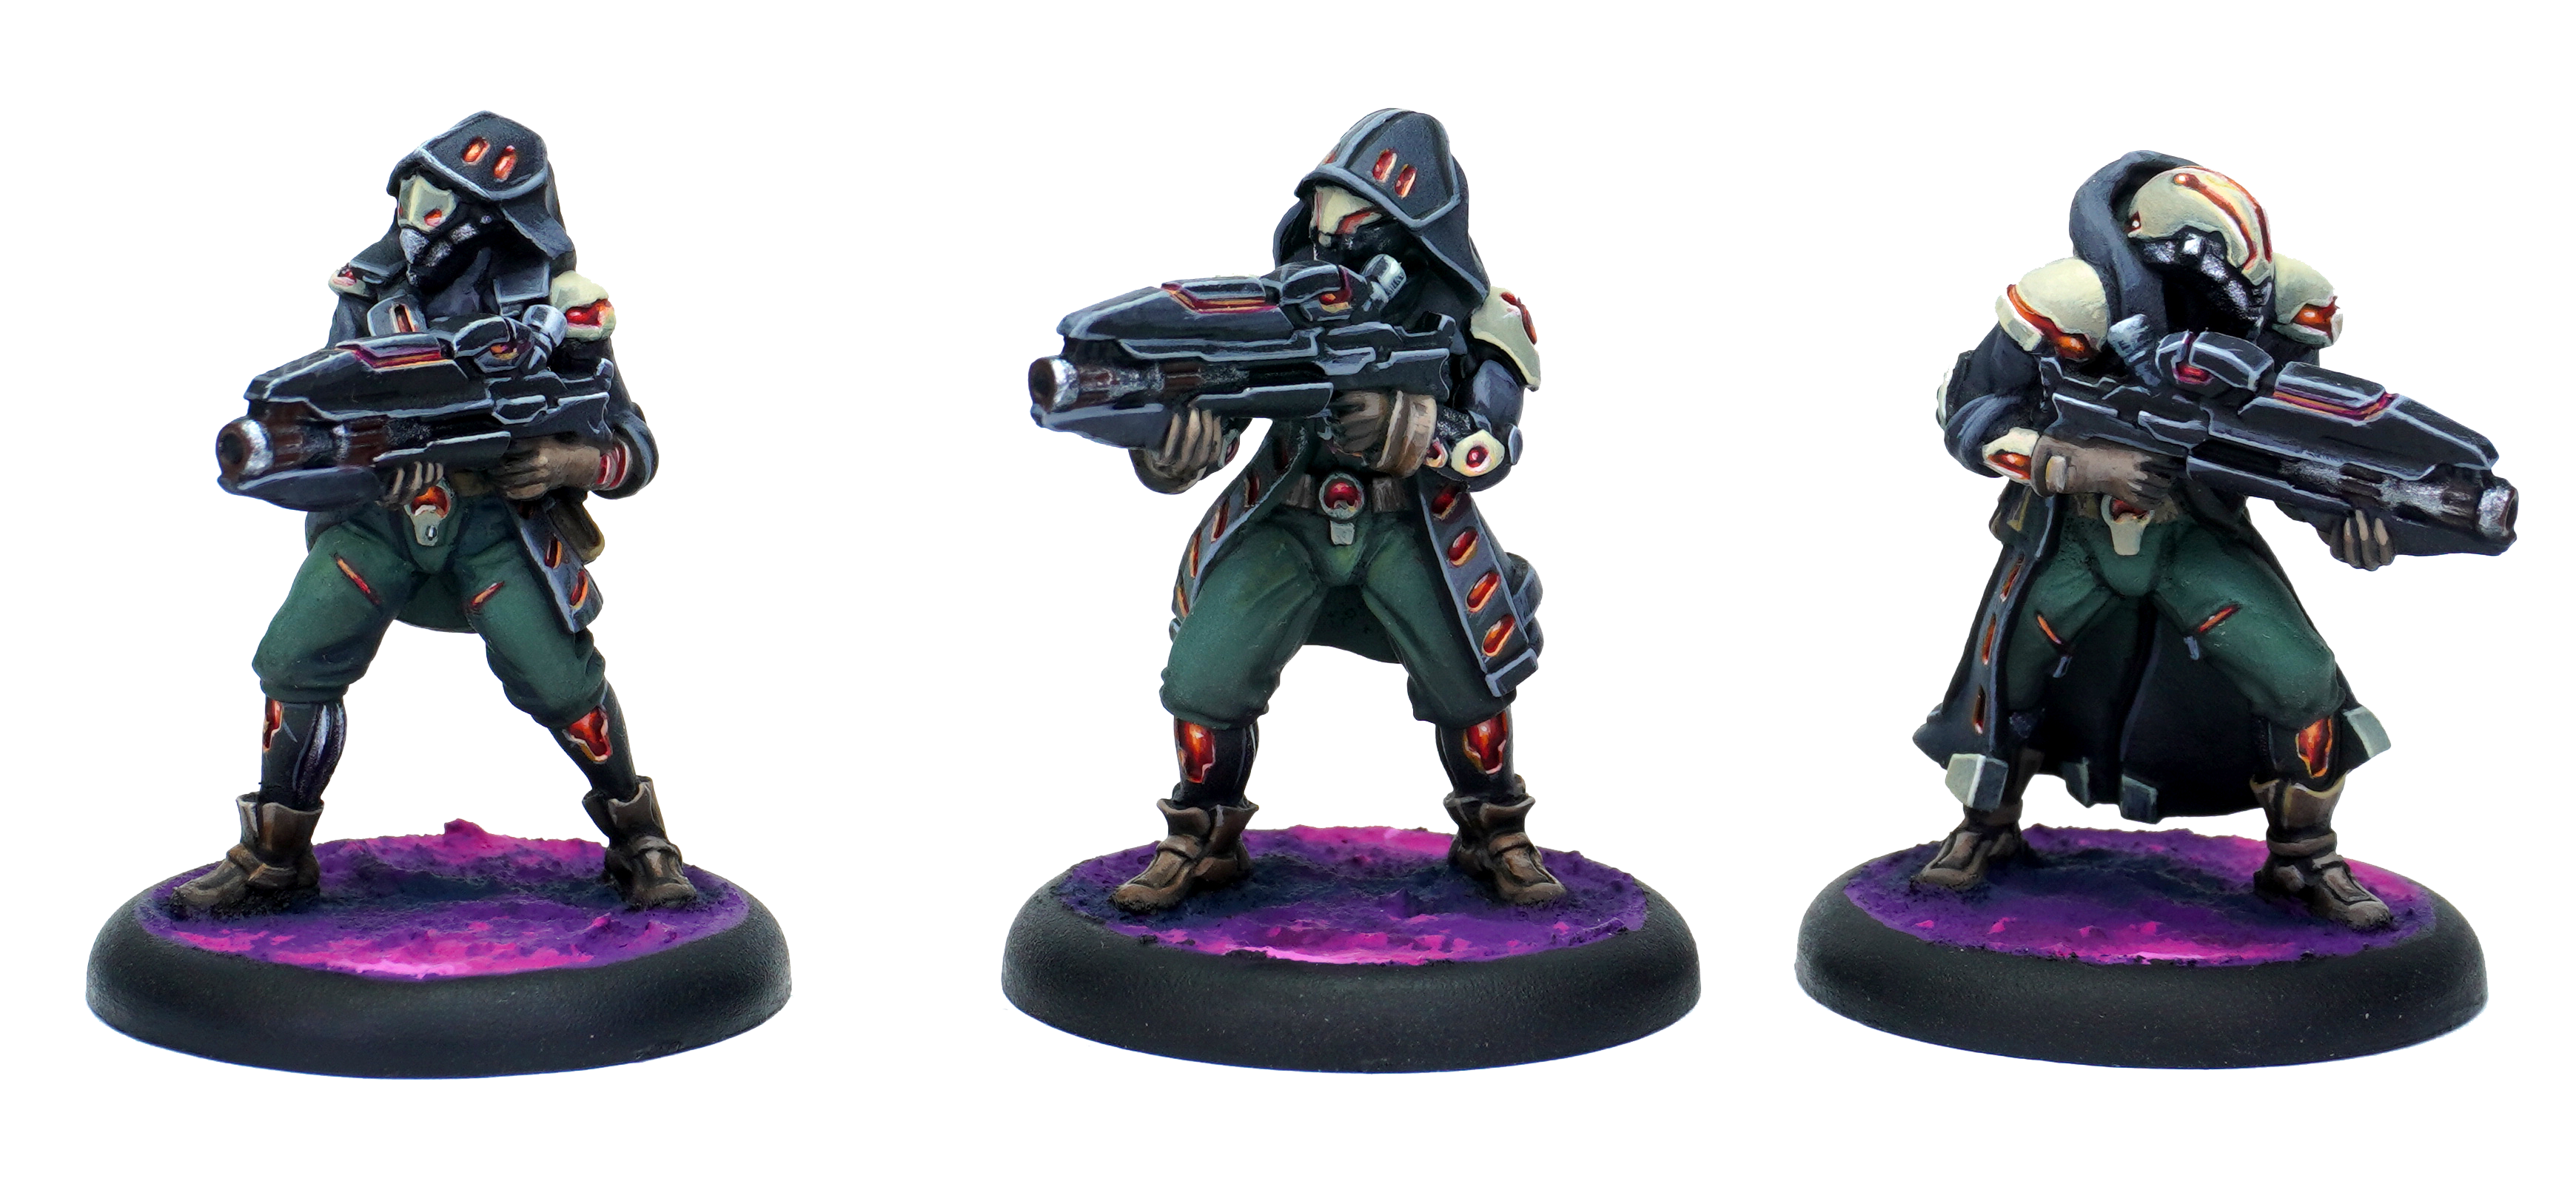
Models painted by Angel Giraldez
I typically begin my force construction with my squads. I tend to favor Vassal Reavers and Raiders over Vassal Witch Hunters, and I usually take 2 of each. Depending on how the rest of my force breaks down, I will take 1 or 2 Vassal Witch Hunters on top of those Reavers and Raiders. It is worth reiterating: these models are pretty soft and are among the most easily destroyed in the game. So, unless you plan to deploy them with Raker attachments to anchor them, you will face high losses amongst the ranks of your Vassals. Rakers are much hardier models and add staying power to your Vassal squads because they can absorb a lot of your opponent’s firepower—if your opponent fires on these models at all. And even after a squad is shot to pieces, as long as any models are left in it, you can target the model with effects such as the Grafter’s Resurrection Protocol or the Mortality Destabilizer Cypher to return those models to play.
That said, I generally deploy my Vassal squads with Rakers and play under the assumption that the squad activates once and moves into position around an objective, and I can then forget about them until they require replacement—at which point, I will need to reclaim the lost objective, deploy a new squad, and rinse and repeat.
I seldom keep my Vassal squads charged from turn to turn unless I want to leverage the Stealth provided by their Mimetic Cloak special rule. The Vassals have easy access to Arc-clearing spikes in the form of the ubiquitous Phase Sequencer special rule, which all Vassals share. This enables them to move through walls or other models. It is generally an effective tactic to charge these models, make your attacks with them, then spike to clear the Arc by the end of their activations, whether they actually benefit from the spike or not. Now, it is certainly preferable to attack first, spike, and then walk your Vassals through a wall to a place of increased defense, but in a pinch, I will spike just to clear the Arc. The Vassal Raiders’ Carrion Ablator spike is another excellent opportunity to clear Arc from these models and to deliver a Corrosion continuous effect to a hard target in the process.
When considering the solos for my Continuum forces, I gravitate toward Immortal Weavers and Marauders over Grafters. I always make sure to have at least 2 each of the Marauders and Weavers in my force. That feels about the right number for Marauders because they are Arc hogs. Leaving Arc on them enables them to clear activation tokens, but having too many in play will definitely sap your resources if you try to keep them all charged.
The Aeternus Continuum relies heavily on Cyphers to round out the weaknesses of their units and to deliver powerful destructive Furies. With this in mind, Hierotheos Raxis is among the first Heroes I put into any Continuum force. When playing a primary mission, I will generally support Raxis with an additional pair of Weaver solos; I am generally comfortable with the attack vectors provided by having three channelers in play in a larger-scale game. And I always make sure to clear the Arc from my Immortal Weavers using their Slip Displacer special rule before the end of their activations to keep my resources as fluid as possible. While some players may see the spike effects on the Vassals or Weavers as weaker than some of those utilized by their rivals, I would counter that viewpoint by saying some of those arguably stronger spike effects are more specific in how they are triggered, thus making them more difficult to use for the purpose of freeing up Arc on such models.
I usually round out my solos with a Grafter or an additional Hero solo. If I take a Grafter, it is generally to support my warjacks rather than my squads.
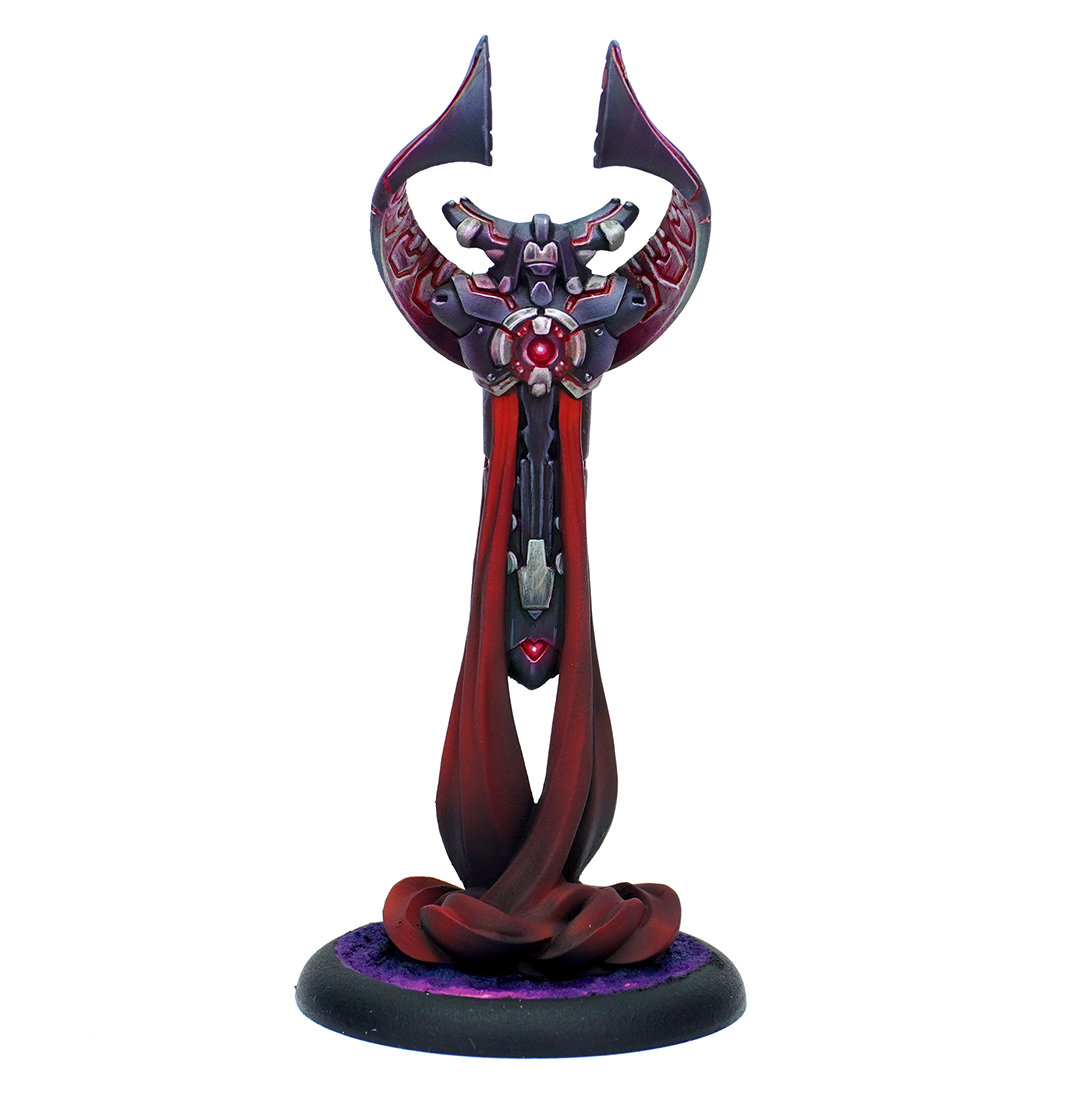
Model painted by Angel Giraldez
The inclusion of Hero solos is obviously based on the scale of the game being played. The first Hero I reach for when playing the Aeternus Continuum is always Raxis—I take him for the extra Cypher card in my hand and the easy access to the cards in my discard pile. I will then usually reach for Captain Jax Redblade, Baron Cassius Mooregrave, and finally, Harlan Sek, the Curator, in order.
Jax is one of my favorite Wild Cards in the game, and I try and take her whenever possible. Her great speed and the potential difficulty my opponent will have in removing her from the table ensures she is one of the first models I will deploy in any game in which I have access to her. Send her screaming up the field and use her to deliver void gates wherever you need her.
While Sek has more dirty tricks at his disposal, I value Mooregrave for his formidable offensive power. When I’m playing the Continuum, he’s my favorite solo for clearing and contesting objectives. But he also has a massive target on his back, and if you are driving your opponent into fits with Redblade, you can bet they will take out their frustrations on Mooregrave.
That brings me to warjacks and vehicles. As a general rule, I like to reduce my cognitive load by standardizing my customizable models. If I am fielding multiples of a given warjack chassis, for example, I arm each one identically with the same weapons and cortexes. That keeps me from losing track of the capabilities of my models or putting the wrong one into play in the wrong position. Further, this enables me to play faster with more certainty of my plans (though I may regret being locked into those choices from time to time, obviously). I also tend to favor the lighter, lower Deployment Cost warjacks over the heavier warjacks because it’s easier to get them on the table when your opponent starts to target your void gates.
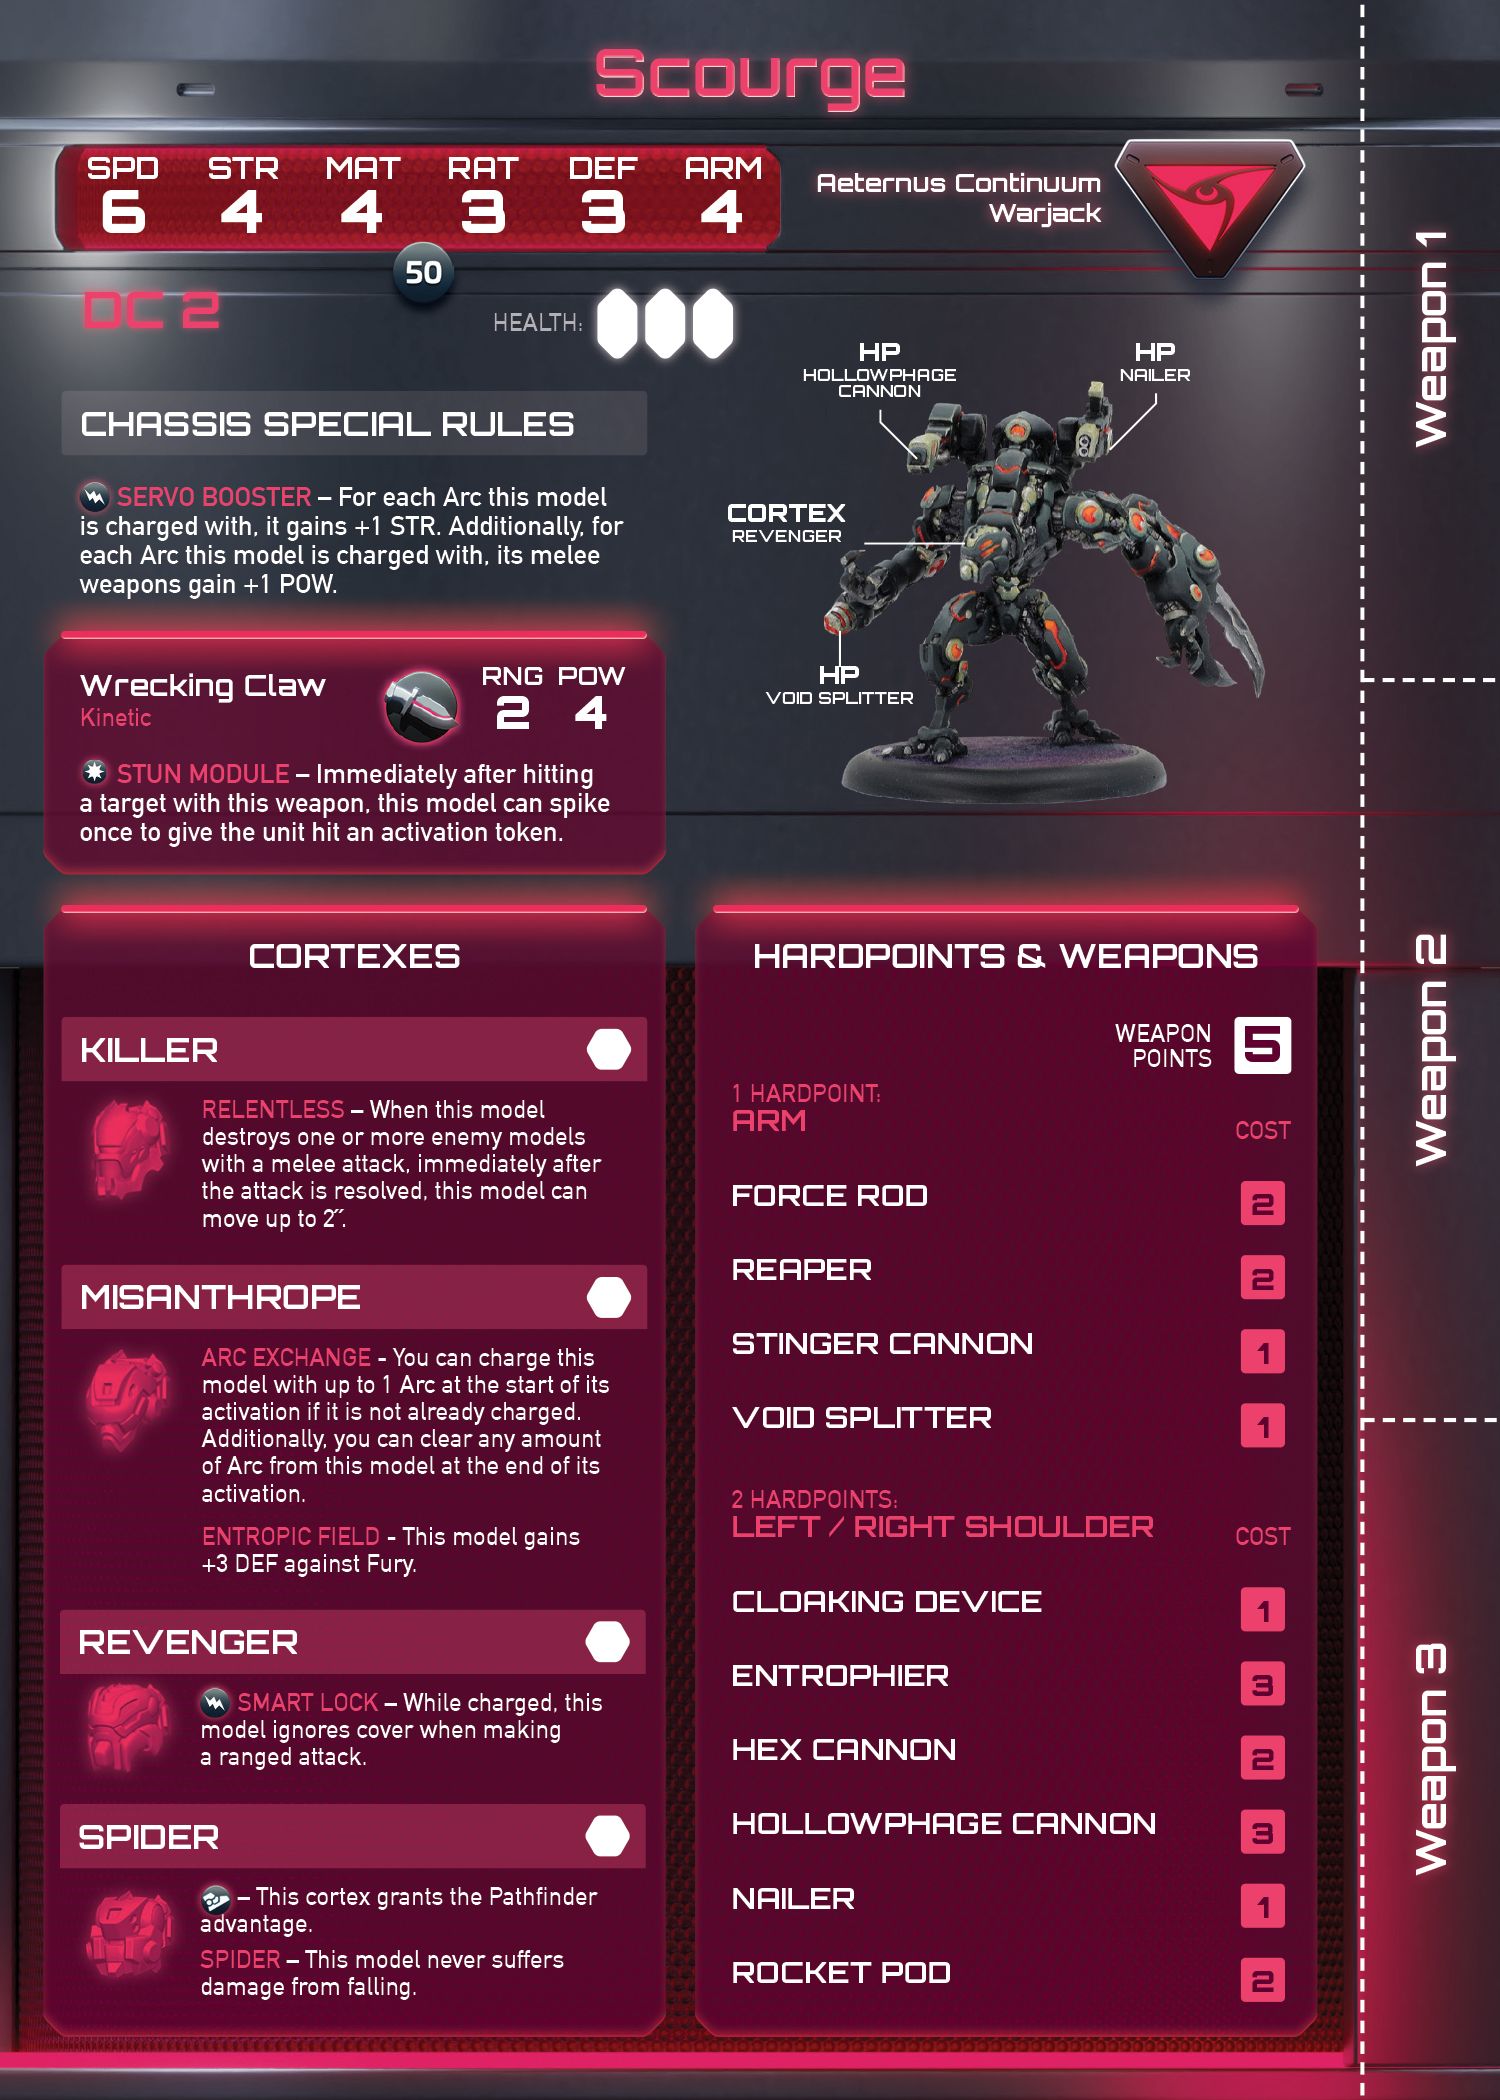
For the Scourge warjack, I generally prefer the Killer cortex, which has the Relentless special rule, or the Misanthrope cortex, particularly for the Arc Exchanger special rule. While I tend to highly value the ability to ignore cover, the Scourge’s melee focus leads me to steer clear of the Revenger cortex. When considering the warjack’s weaponry, I tend to try to maximize its melee might by adding either a Force Rod or a Reaper. I round out the package with either a lone Hollowphage Cannon or a Rocket Pod/Nailer combo. The Rocket Pod’s ability to catch its target in the blast even on a miss make it a compelling option for me on the lower RAT Scourge. It is perfect for removing lower ARM solos that the warjack may not otherwise hit. The Hollowphage Cannon’s automatic application of the Corrosion continuous effect on a hit can make the warjack’s Wrecking Claw all the more punishing, and I always like to play to my Faction’s strengths.
It is worth considering that the Aeternus Continuum has easy and ready access to Corrosion from a multitude of sources by design. The Continuum excels at painting targets with the continuous effect before eliminating them with its arsenal of destructive weapons. These include the Vassal Reavers’ Carrion Ablator special rule on their Spiker rifles, the warjack and Scythe Hollowphage Cannons, and the Continuum’s Atrophic Decomposer and Canker Bane Cyphers.
As I mentioned earlier, the Nemesis warjack is a flying mobile weapon platform. It has incredible ranged weapons options and can carry a lot of guns! That said, it’s expensive to get into play and will draw a lot of firepower from your opponent’s forces until it is removed. I tend to equip mine with Battle Cruiser cortexes, which enable them to move up to 1˝ each time they make a ranged attack. This added movement is great for repositioning the model to safety or closer to an objective but can also be utilized to draw new targets into range. I tend to arm them with some combination of Displacers, Hollowphage Cannons, and Obliterators. You can spike to reposition an enemy model hit by a Displacer up to 3˝ from its current position. These weapons can be absolutely brutal when used in pairs. Obliterators pack the Repulsor weapon quality, and so they add a slam effect to the warjack’s capabilities. Slams can be used to inflict additional damage on your opponent’s forces as well as to boot them away from objectives.
At the same time I consider my warjacks, I also think about vehicles. Before Collision Course, I would general take 5 warjacks, but with the release of the Scythe, I tend to take 4 and 1 vehicle. About half the time, I choose Aenigma over the standard Scythe to add another liquid-fast channeler to my ranks. Sometimes I will even drop a Nemesis from the lineup and take both Aenigma and a standard Scythe. I tend to stick with the Hellfire Cannon for Aenigma, as it is both a powerful spray weapon and grants the Continuum more access to the Fire continuous effect. I arm my standard Scythes with either a Hollowphage Cannon or a Heavy Displacer.
The final step of force creation is selecting your Cyphers. As described above, Cyphers are incredibly important to the Aeternus Continuum, and a lot of the Faction’s strengths are tied to their interactions with Cyphers. The Cyphers you select should suit your plans, tactics, and force selection; if you don’t have a lot of warjacks in your force, for example, you will not need as many Overdrives. Your Cyphers should also help cover your weaknesses and amplify your strengths. Admittedly, I personally tend to lean more toward amplifying my models’ offensive strengths instead of trying to make up for their defensive shortcomings with my Cyphers. But then again, I tend to follow the maxim that the best defense is a strong offense.
You will also want to consider the number of cards in your deck. The more cards you have, the more varied your deck will be and the more options you will have during play. By contrast, the smaller your deck, the faster you will burn through your cards and the easier it’ll be to ensure the card you want is close to hand. I usually discard as much as possible so I can cycle through my cards and be certain my hand is always as devastating as possible at the start of each of my turns.
The Hero solo Hierotheos Raxis has an outsized effect on these considerations. Including him increases your hand size from 5 to 6, meaning if you are playing with the bare minimum 12 cards, you will likely be starting each of your turns with fully half of your deck in your hand. Raxis can also spike to return cards from your discard pile to your hand, making it easier to discard cards that may not have an immediate application on the battlefield because you know you can always return them when you feel the need. This also means you can repeatedly return your most devastating cards to your hand to ensure you always have access to them.
The Aeternus Continuum’s strong focus on offensive Furies is another consideration. The Continuum has the greatest number of channelers of any Faction, and among those, their Immortal Weavers have the greatest ranges of any channelers. There are four I tend to focus on and most make it into all of my decks. Those include Null Collider (which removes 1 Arc from a unit or void gate hit), Instability Equation (because it can destroy up to three models at a time), Atrophic Decomposer (which inflicts the Corrosion continuous effect), and Pyrokinetic Surge (which inflicts the Fire continuous effect).

Model painted by Angel Giraldez
The rest of the cards in my decks tend to support the force I have constructed.
While Cyphers like Force Barrier (Geometric that grants cover to a squad), Interdiction Protocol (Overdrive that grants +2 DEF to warrior models within 5˝ of the target warjack), Plexus Densifier (Geometric that grants a squad +2 ARM but also inflicts –1 SPD), and Mortality Destabilizer (returns destroyed models to play) can be used to safeguard Vassals and keep them in play, I think there are more compelling options for the Continuum. You could embrace the transient nature of life amongst the Vassals and take the Recurrent Apotheosis card, which replaces a Vassal from a squad with your choice of solos from your reserve. This includes Hero solos and can be a great way to deliver Mooregrave to a position of maximum carnage or to deliver a Marauder speedbump directly in your opponent’s path.
Temporal Cycle is another favorite. It removes an activation token from a squad, which can be used to reposition it to safety or to get another round of attacks out of it before its inevitable destruction. If you are concerned with the limited survivability of your Vassal squads, Discordian Agitator or Reiteration Complex may be more your jam. Discordian Agitator allows the models in the affected squad to each make an additional melee attack. When coupled with Canker Bane, which gives the Corrosion continuous effect to the melee attacks of an affected unit, it makes the POW 5 Fusion Saws of the Vassal Reavers a true force of destruction. Reiteration Complex simply grants each model in a squad an additional ranged attack, which may not be quite as powerful on the Vassals as it is on some of the squads of their rivals, but it can still be immensely consequential and certainly enables the Vassals to deal some damage before being shuffled off this mortal coil.

The twin must-haves for your warjacks include Impulse Inducer and Arcane Synthesis. Inducer removes an activation token from a warjack and is a godsend if you have a Nemesis in play. Arcane Synthesis enables you to put any amount of Arc on a target unit, which is especially valuable when targeting a warjack because they can have up to 3 Arc. Try not to leave too much Arc on your warjacks, though, because you will want it in reserve to super charge your Furies.
My next go-to is Devastation Optimizer, which places the Tune Up continuous effect on a target warjack. While no warjack minds +1 STR, MAT, RAT, and DEF, the Scourge howls for more accuracy on its ranged attacks. While I usually add Ascension Catalyst to my decks, I tend not to do so when playing the Continuum because the speedy Nemesis already flies. Just the same, consider it if you have a lot of Scourge warjacks in your force because it can be great for delivery.
Finally, there is a trio of Cyphers I think are worth a little additional thought. Due to the numbers of solos the Continuum tends to play with, their offensive nature and the dependence the Faction puts on them, I find Dominion Imperative (Harmonic that enables all solos in play to move up to 2˝) to be incredibly potent when paired with Continuum forces. If you play with one or more vehicles, you won’t want to overlook the Psychdynamic Infuser, which removes activation tokens from vehicles. But above all, the Continuum has access to large numbers of very powerful weapons that can make great use of the Aggression Theorem Harmonic, which enables a target unit to make a single attack, ranged or melee. That constitutes a Hollowphage Cannon shot applying Corrosion before you activate your models, a last desperate strike from Mooregrave to take down another enemy model before your opponent targets him with all they have, or another chance to make a Displacer attack in hopes of clearing more Arc from a warjack.
When starting a game of Warcaster, I tend to deploy only two units. One is always a solo, and the other is usually the most expensive unit I feel comfortable putting on the back edge of the battlefield; this will generally be a squad I plan to move into position around an objective. When playing the Aeternus Continuum, that solo will almost certainly be Jax Redblade or Hierotheos Raxis, depending on the scenario. The idea is that starting the game with only two units, both of which will be activated during my first turn, I will be able to remove their activation tokens and move them again at the start of my second turn of the game. That should be enough movement to ensure they end up wherever I need them.
Tactically, the Aeternus Continuum is an incredibly mobile force that can pack a real punch. While some may see their solos and warjacks as being slightly frailer than the models of their opponents, they do not hit any lighter. Easy access to the Corrosion continuous effect allows you to paint targets. The large number of movement tricks available to the Faction means bringing models into position to target the models you paint should be easy. And even if a model seems to bring the onslaught, it may yet be finished off by the continuous effect itself at the end of the Pulse Round.
Swamping an objective with some combination of Marauders, Vassals deployed with Rakers in cover, Scythes, and particularly Scourge warjacks can give your opponent fits trying to deal with it all. The hardiness of these models can make them very difficult to remove, and they can mask the threat of your Weavers and softer models that are waiting in the wings.
In closing, I hope you enjoyed this article as much as I did writing it. I tried to include something for everyone while discussing the background of the Faction as it informed the design of the models and finally the tactics and Force considerations that bring them all together.
Here’s hoping you’re having a happy winter season!