Who doesn’t love a good boss fight at the end of a level? I know we do, and that’s exactly why we’re capping off this first season of Riot Quest with the Malvin & Mayhem Boss Fight expansion.
This expansion is packed to the brim with villainous value. You get a brand-new way to play Riot Quest via the co-op boss fight. You get a new Hero to add to your standard games of Riot Quest by playing Malvin & Mayhem’s non-boss version, along with five (!) unique gear cards just for them. And finally, you get a model that you can play in a ton of WARMACHINE and HORDES armies. Let’s cover all three of these separately, shall we?
First off, let’s begin with the new Boss Fight co-op mode of Riot Quest. To play a Boss Fight you need:
- 1–4 players (yup you can play solo, but I will warn you: solo can be kind of tough)
- 1 Boss model
- That model’s Boss deck and stat card
- The one-page rules insert explaining the handful of special rules used when playing a Boss Fight
Our first Boss Fight is, of course, Malvin & Mayhem, so let’s take a look at their Boss stat card.
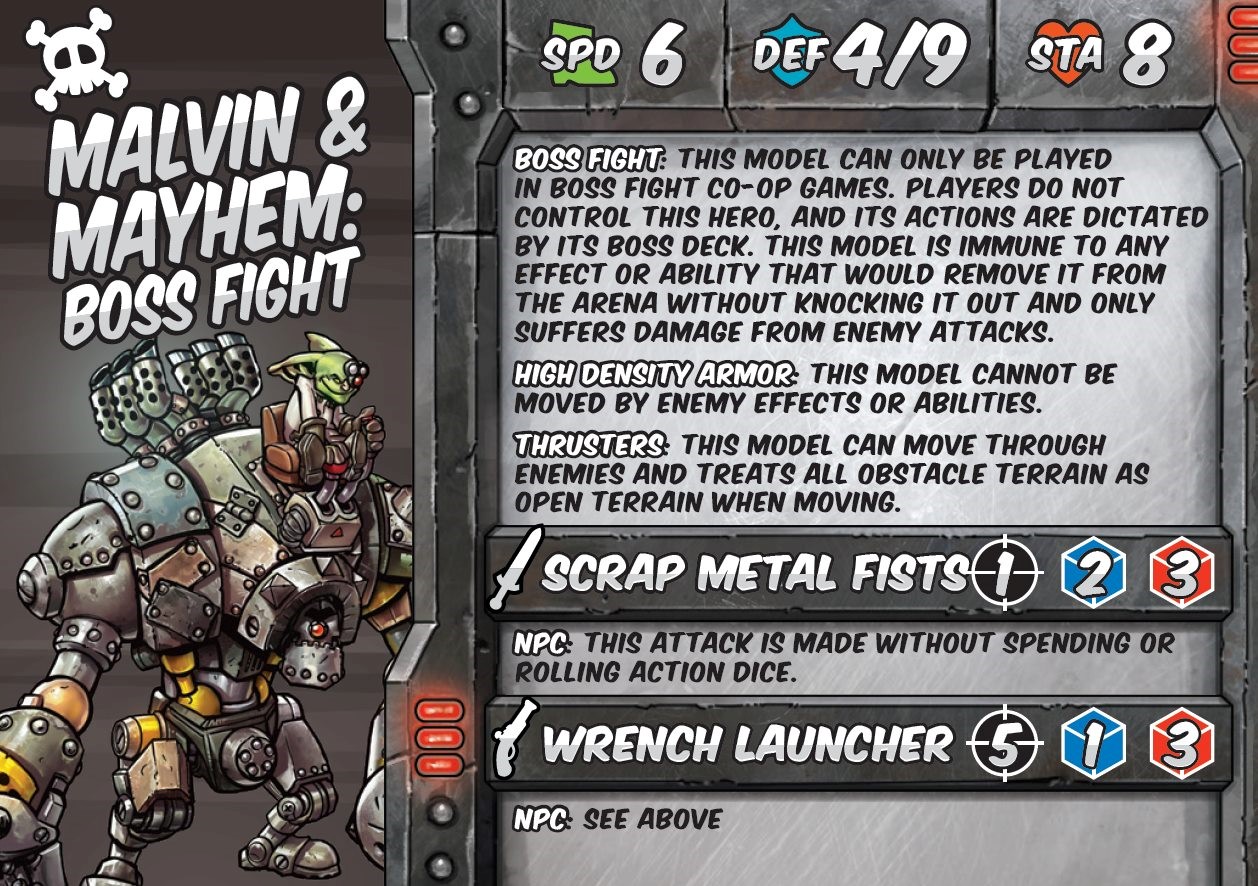
The Boss model considers all player models to be Enemies and vice versa. Interestingly, when you play co-op, you treat other players’ models as friendly but not part of your own Crew. This means any ability that specifies “a model in your Crew” doesn’t work on other players’ models. Sorry, no infinite Bamfist Empowering.
The Boss’ actions are completely dictated by a special deck of cards that replaces the Bounty deck. You still use Treasure decks like normal in Boss Fight but no Bounties. In fact, the way you win a Boss Fight is…well…you beat the Boss. If the players knock out the Boss, that’s it—they win!
However…each time a player-controlled Hero leaves the Arena for ANY reason (knocked out, evacuated, etc.) the Boss gains 1 Scrap card. When the Boss gets 7 Scrap cards, the Boss wins and the players lose.
So, back to the Boss deck, this is the main new mechanic of a Boss Fight. Think of it as similar to phases in a video game boss battle, except the deck is random so you never know which phase is coming up next.
Each Boss deck is unique to a specific Boss model. When you start, you pull out any cards that state “This cards begin in play,” then you shuffle the deck. The Boss area has three zones of cards off the map: The deck, the Lineup, and the discard pile.
It’s pretty simple: cards in the deck are there to be drawn and added to the Lineup, the Lineup is the array of cards that are currently active and indicate how the Boss behaves, and the discard pile contains cards no longer in play.
The Lineup has no max limit, meaning as the fight goes on, more and more of these Boss behaviors will become active, and they can ALL GO OFF at the same time, depending on the card’s specific rules. As the players, you must juggle between removing these cards and damaging the Boss to try to win.
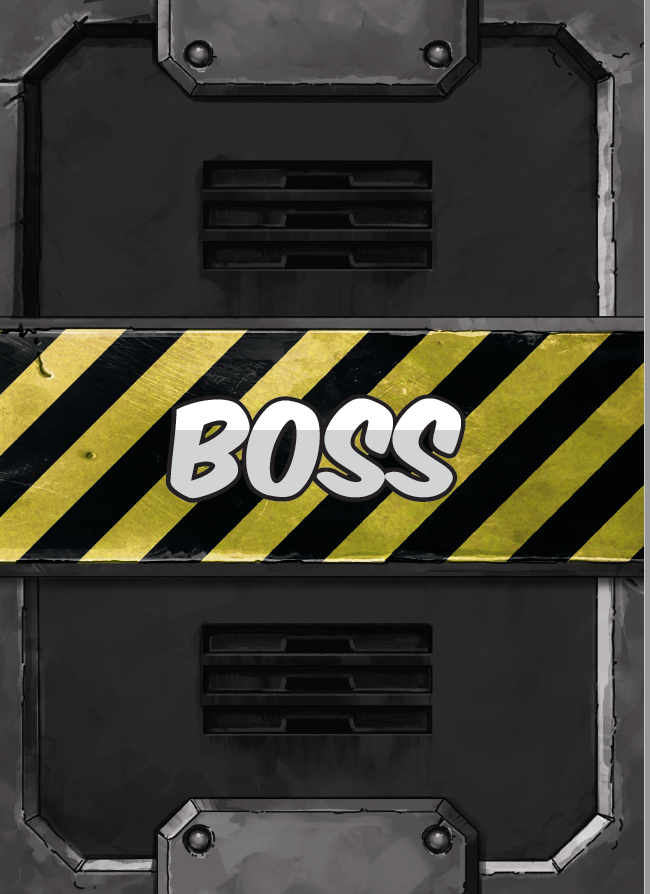
Let me give you some examples. First, let’s take a look at the two Boss cards Malvin begins with in play.
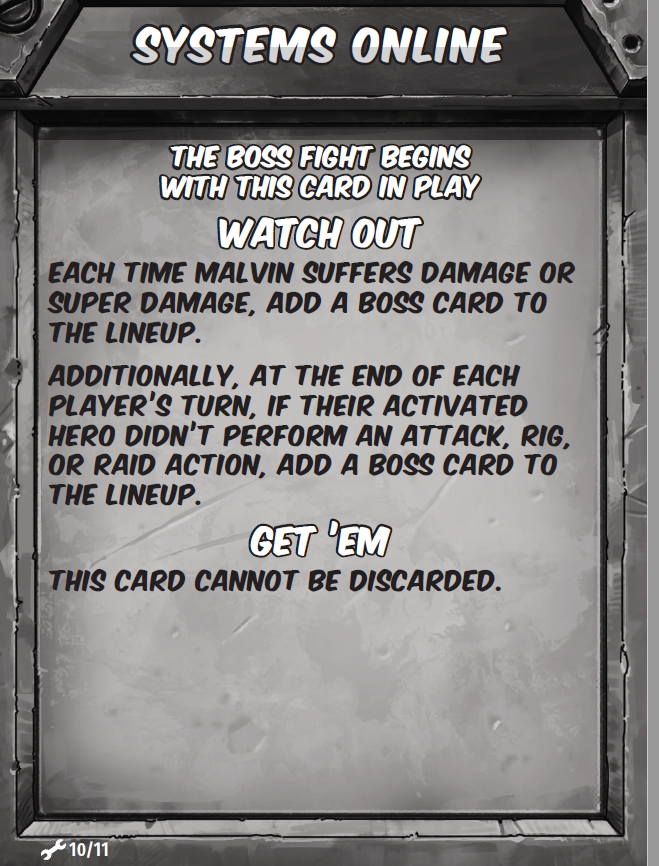
Here we see the first of Malvin’s start-in-play cards. Boss cards have a “Watch Out,” which indicates the behavior that is active at all times while the card is in the Lineup, and a “Get ’Em,” which indicates how to discard the card from the Lineup so it’s no longer in effect. The starting cards, in this case, can’t be discarded!
Systems Online tells us that each time Malvin takes damage or a player doesn’t do enough during their turn, you add a new card to the Lineup. This establishes this Boss’ base mechanic of how it will add new cards to the Lineup, while other Bosses in the future may utilize completely different ways of managing the Lineup.

Initiate Greeting Protocol is Malvin’s other starting card, and it’s an ever-present timer. Basically, every three turns (remember, each Hero activation is a turn), Malvin is going to rush toward someone and try to knock their socks off. This is in addition to ALL THE OTHER cards that might be present in the Lineup at the same time.
When the Boss moves or attacks, any player can move the Boss or roll the dice, but the rules insert has a few basic rules for doing so—things like “Move the Boss the most direct route toward its target(s)” or “Bosses don’t use Action Dice. When they attack, only roll the Boost and Power Dice listed on their stat card.”
Now then, let’s take a look at a couple of the Boss cards you might randomly flip into play as you fight Malvin.

Ratta Tatta Tatta is a brutal card to flip, as Malvin will begin shooting everyone around him at the end of each turn. Remember, a round is made up of all the players’ individual turns, and players take multiple turns as they alternate activating their Heroes back and forth. This means that when this card is in play, Malvin shoots after every single Hero activation. Combine this with other cards in the Lineup that might also make Malvin move, and suddenly you have no idea where you can be safe on the map.
Luckily, this card can be discarded! A Hero can run up and try to rig Malvin as if he were a Bounty card—there’s even a Rig Bonus listed. If successful, the card is discarded, and this Boss behavior is no longer active.
Sometimes the “Get ’Em” effect to discard the card involves rigging, sometimes attacking, sometimes moving to a certain place. You’ll have options as a player for how you want to engage the Boss. Check out another devastating Boss card that can show up, the good ol’ Deathtrap.
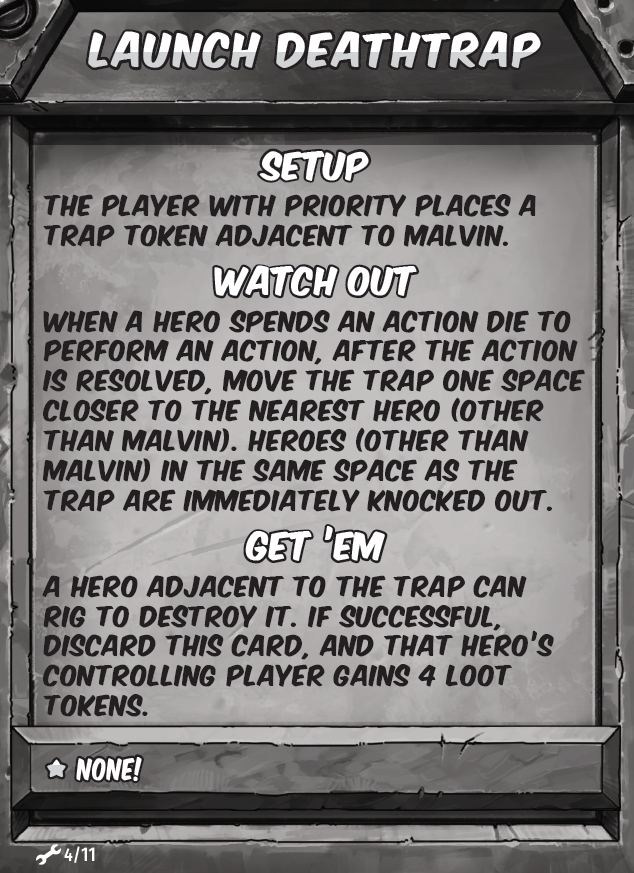
Note that the trap moves every single time a player spends an Action Die! That means if you rig the trap and fail, it moves onto your Hero and knocks them out. Be careful around this thing!
With 11 unique cards in the Boss deck, there’s a good deal of replay value to Boss Fights. Best of all, each Boss Fight only takes about 10–15 minutes, so you can rapid-fire play a few games. In fact, it can be a lot of fun to get together with some friends, separate into two-person teams, and see which team could beat Malvin the fastest!
If you want a real challenge, try beating Malvin with teams that clearly just aren’t good at it—an all-Specialist class team, for example. Now that’s hard!
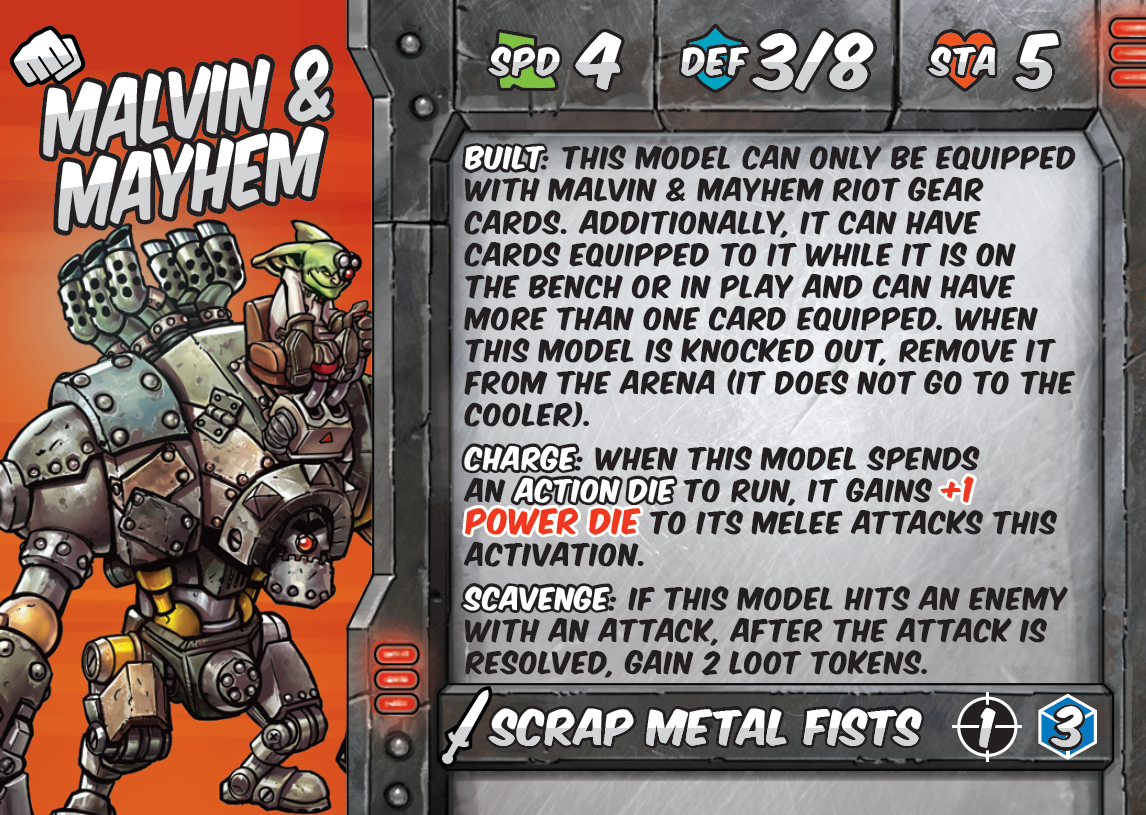
Moving on, let’s discuss playing Malvin as a normal Hero in your Crew. This other version of Malvin’s stat card allows you to play him in any type of Riot Quest game, even co-op against his Boss version. Take that, space-time continuum!
As a standard Hero, Malvin is still very unique. He’s the only base STA 5 Hero in the game, but that comes at a price. When Malvin is knocked out, he’s gone from the game for good, so use him wisely.
Malvin is also unique in that he can only be equipped with Riot Gear cards that are specifically for him, he can have any number of these cards equipped to him (unlike the normal limit of 1 card equipped at a time), and he can even be equipped while he’s on the Bench, waiting to be spawned in.
Effectively, this means that you are building Mayhem on the sidelines while Malvin gets ready. Once you’ve got enough gear on Malvin, put him into the game and watch him wreak havoc! The Malvin & Mayhem specific gear cards are ultra-powerful, but they still take up a slot in your hand of Riot Gear. Most games, you’re probably going to want to give up 1–3 slots for Malvin gear and reserve the rest for gear for your other Heroes.
Let’s take a look at Malvin’s standard Hero card and all five of the Riot Gear cards in this expansion.
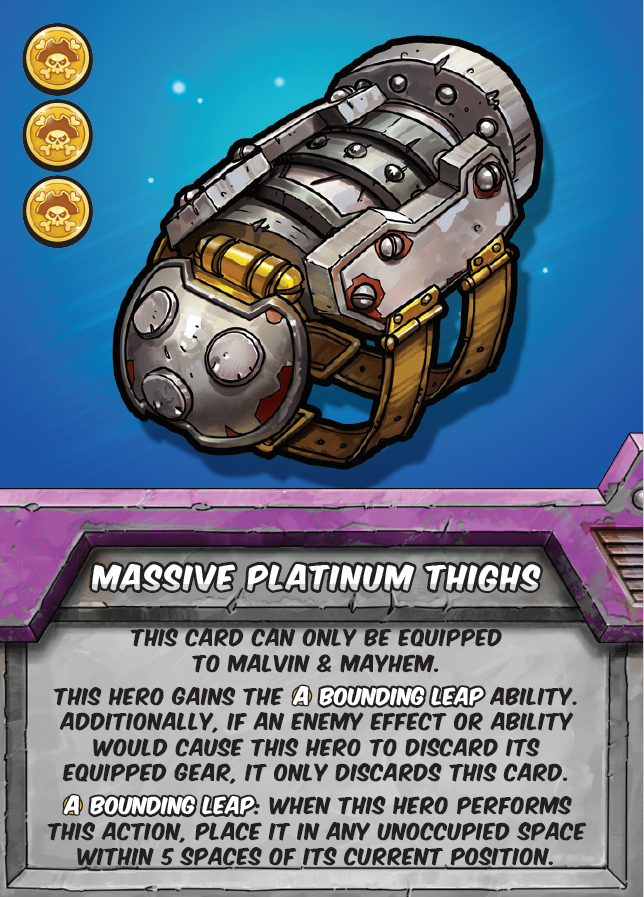
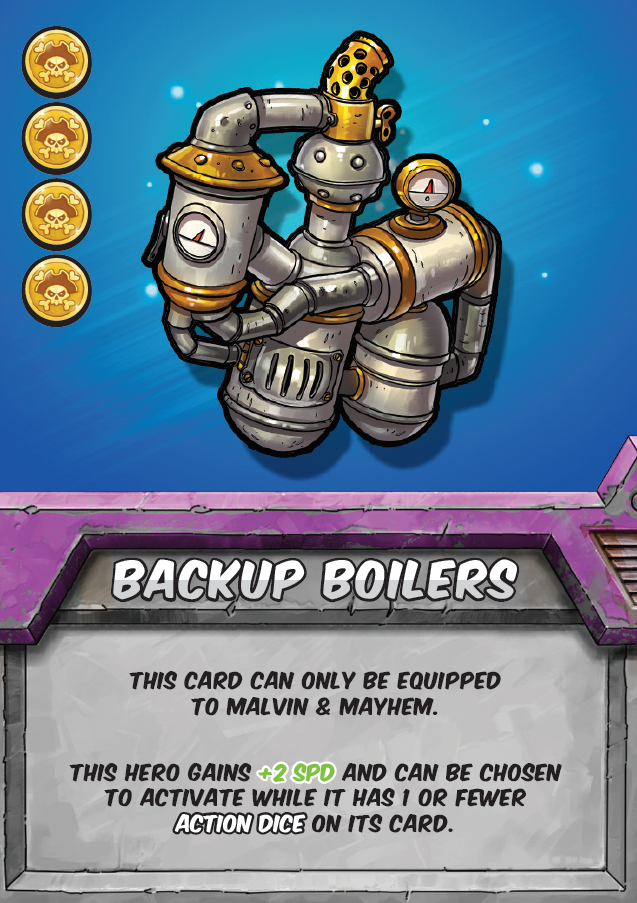
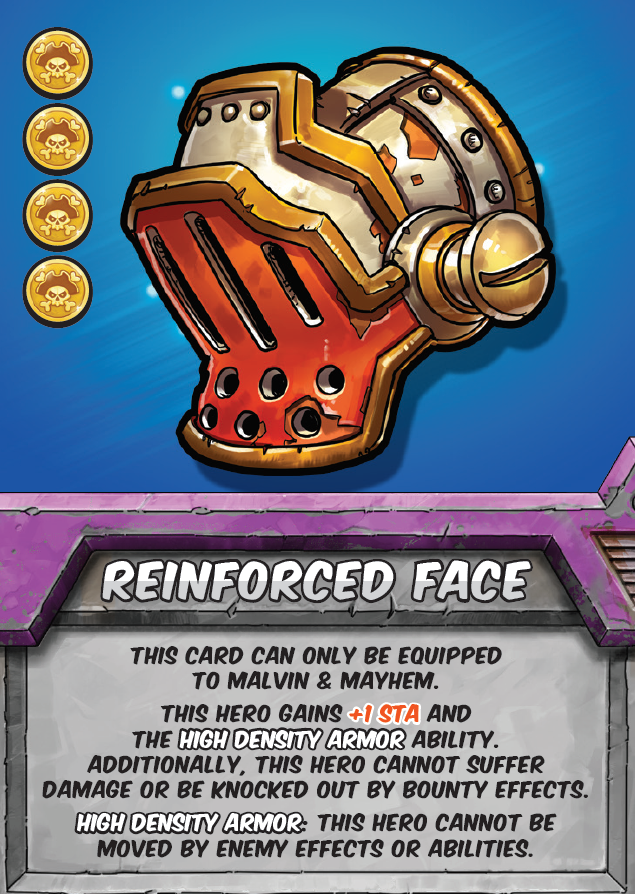
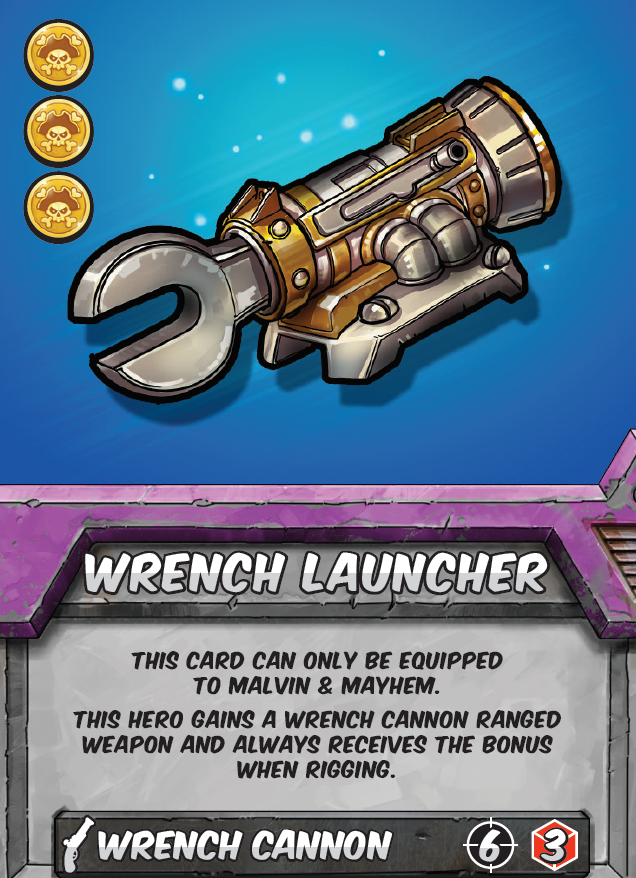
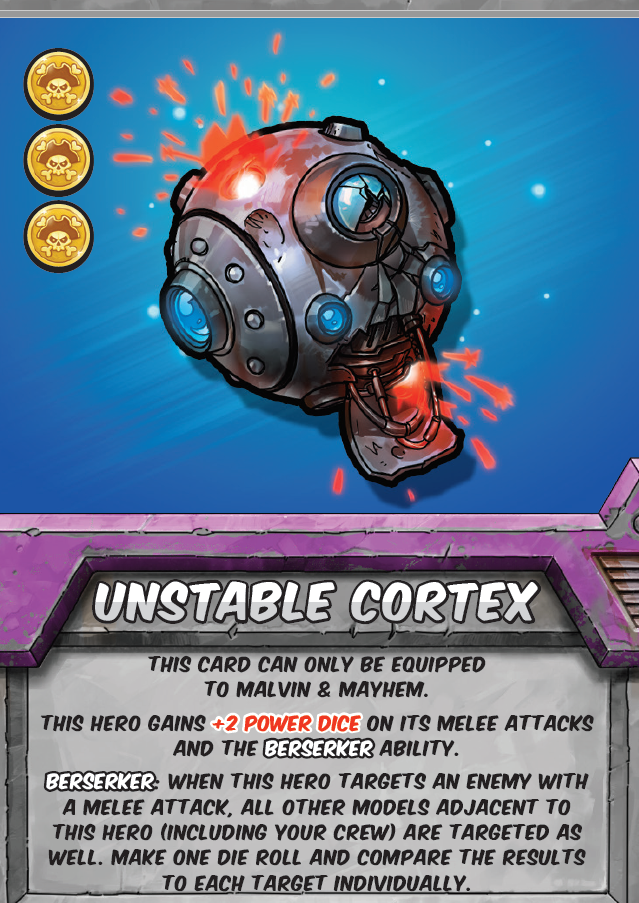
As you can see, there are tons of different ways you can customize your Malvin & Mayhem during the game. Do you want a heavy hitter in melee? Take the Unstable Cortex and Reinforced Face. Want a mobile Bounty claimer? Take the Massive Platinum Thighs and Wrench Launcher. Want to go wild? Take all five. The choice is yours.
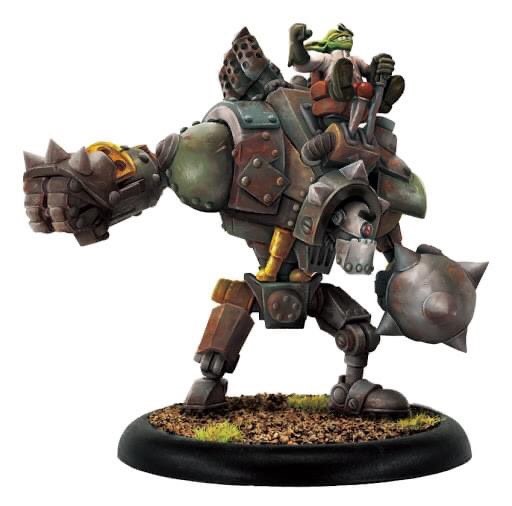
Finally, let’s take a look at Malvin & Mayhem’s current playtest rules for WARMACHINE & HORDES. Quick note, as always: these playtest rules are not final and subject to change before final release.
Also, the damage grid for this model isn’t on this playtest page, but for reference, it’s the exact same as a Mangler damage grid. (Yup, Cortex system and all, in case you are curious.)

Ok, there is a LOT to unpack here.
First off is how Malvin and Mayhem fit into your army. You’ll notice they don’t have the normal Mercenary and Minion rule stating who they work for; instead, they have Mastermind [Gobber]. What this rule effectively means is that you can take Malvin in any army, no matter the theme force, if that army has a gobber model in it. They don’t take up a Merc/Minion slot or anything like that.
So, if your army can take a Goblin Tinkerer, Swamp Gobbers of any sort, Reinholdt, Field Mechanics, etc., then Malvin is an option for you. Given that many themes can get access to a gobber using their Merc/Minion slot, this model can fit into numerous army lists.
Trust me, it can take a second or two to wrap your head around all the options. He can become a friendly Faction model to Stryker 2 in Flames in the Darkness. Play him with Rask, a Swamp Horror, and Lanyssa to give him a massive threat range. Drop him into Primal Terrors with Thagrosh 1 because…why not? Fog of War and Death Shroud don’t hurt. The list-building potential with Malvin is pretty crazy.
Best of all, while there are some crazy combos available, he’s also a model that works on his own without any support from others. As long as his cortex is intact, he’ll get three focus each turn, and thanks to his Arcane Machinery, you can switch him into the right mode to get the job done. When you’re ready to really go nuts, hit The Button to engage all three of his systems at once and mulch whatever is in front of you.
Killing Spree and Warhead might take a bit of time to resolve, but it sure is fun!
So, there you have it: your first look at all the goodness coming later this month when the Malvin & Mayhem Boss Fight expansion releases. I hope you have as much fun playing with this model as we did designing it, and best of luck to you in your Boss battles.
You’re gonna need it!