Hey guys! I’m Danny, the Hobby and Terrain Specialist here at Privateer Press! In this Insider, I’m going to show you how to make a Deathtrap Marker and different types of bases for Riot Quest. To follow along at home, you will need the parts from our most recent hobby hangout kit, found here, as well as the following extra supplies:
- 1 Googly Eye
- Epoxy Sculpting Putty
- Super Glue
- Wire
- Paper Clips
- 1/8th-inch PVC Foam Board
- A Metal Nail
- A Rock
- Sand
- Extra Bases
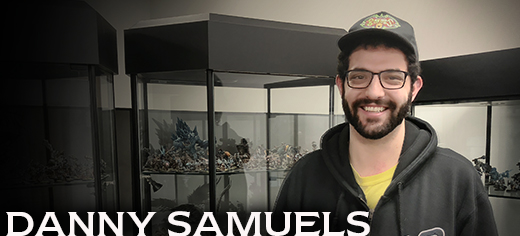
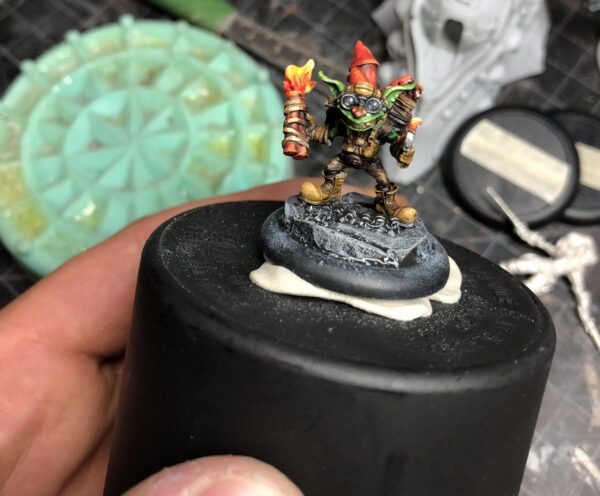
Begin by cutting a hexagon from 1/8th-inch PVC foam. Use the metal nail to create lines for the flagstone. Use a hobby knife to weather and deepen the cuts between the stones. Once you feel good about the carving on the stones, roll a rock over the surface to add texture and put down a little glue and sand to create some grout and debris.

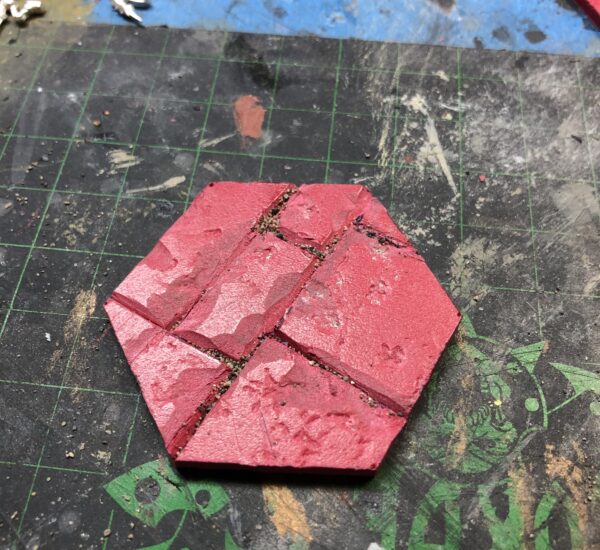
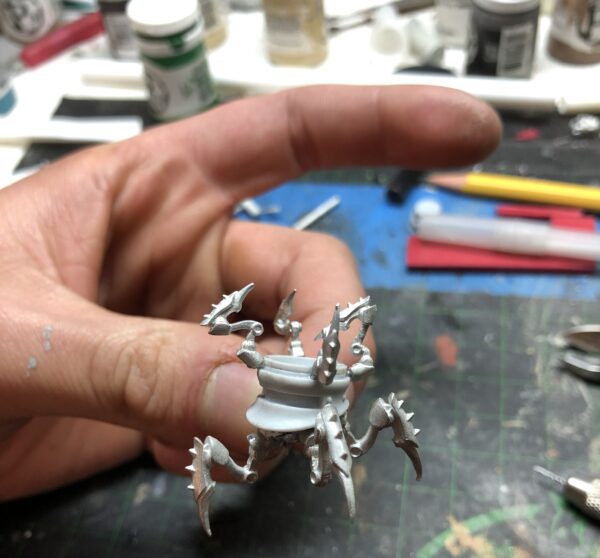
The next step is to build the main body of the trap. Begin by cleaning all the parts. After the parts are ship-shape, it’s time to build the traps body. Start by making four incisions into the googly eye—these should be the same size as the tops of the legs. Glue and insert the legs into the four cuts.
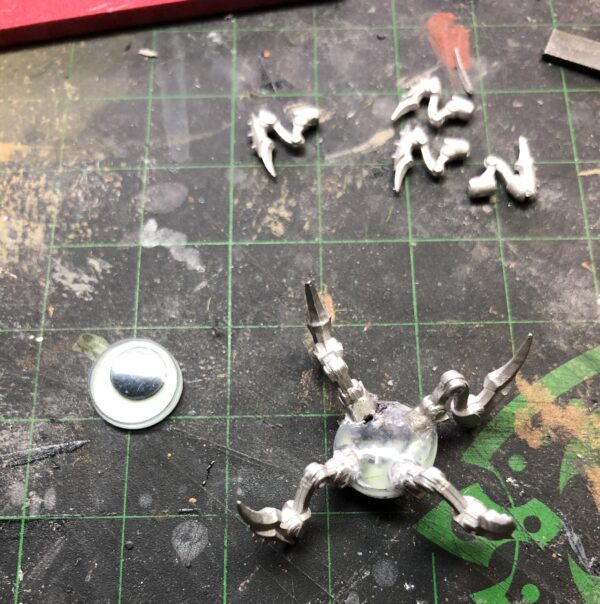
Now it’s time to attach the legs to the railless bit. The bottom has a bit of a concave to it, so you will need to use epoxy putty as well as super glue to attach it.
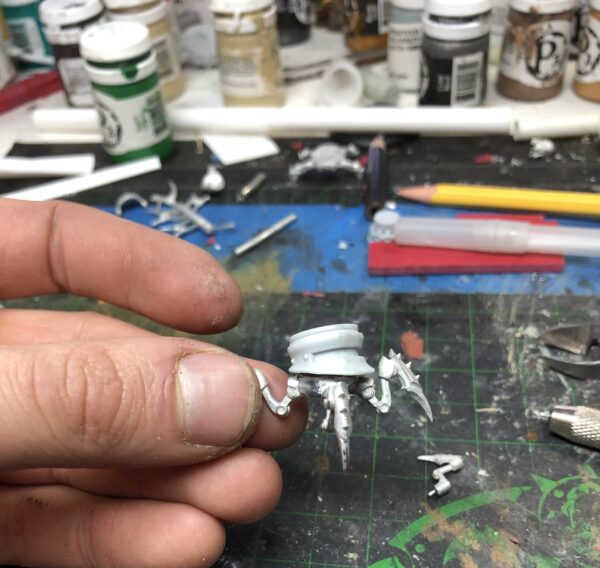
Snip off the top of the hinge on the railless bit, then, pin the smaller legs onto the top of the resin using small paper clips and a pin vise.
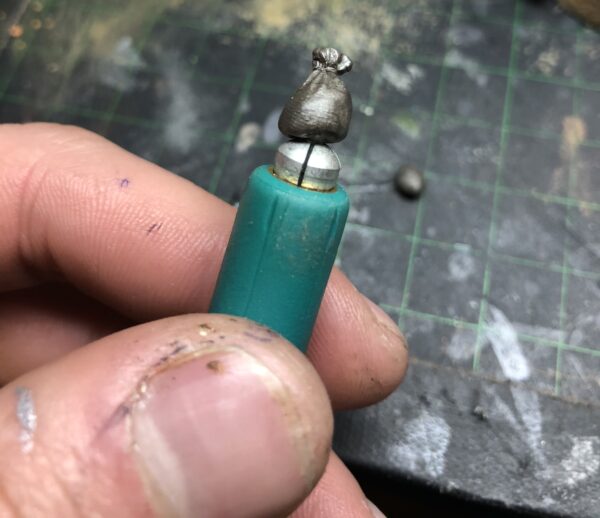
Use the rest of the brown putty to sculpt a moneybag or some sort of shiny treasure to add to the top of the trap to lure in any unsuspecting adventurers!
To sculpt the moneybag, make a sculpting tool by inserting a tiny section of a paperclip into a hobby knife handle. With the brown putty, form a ball around the paperclip.
Spin the whole thing in your hand while holding a hobby knife against it at an angle to push the cinched-looking cloth toward the top. This creates the illusion that it was tied closed with string.
Use a different sculpting tool to push in some wrinkles.
Finally, put a Band Aid on your finger and gently push it into the putty to create an exaggerated cloth texture.
After the bag dries, remove any of the paperclip that’s sticking out of the bottom, and glue it onto the top of the trap!
This is a super-easy project to make and looks super-fun on the table.

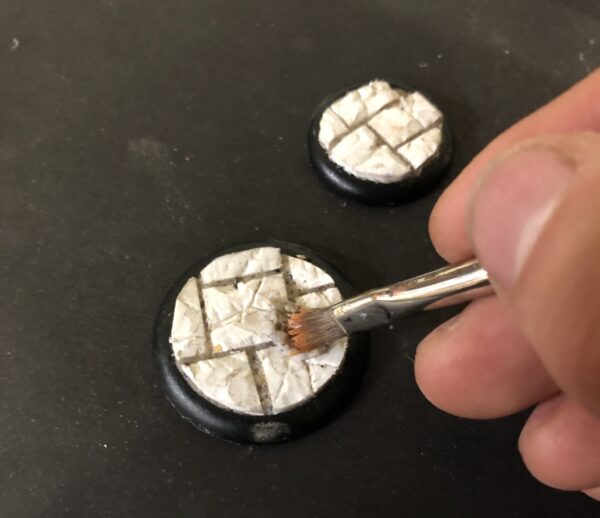
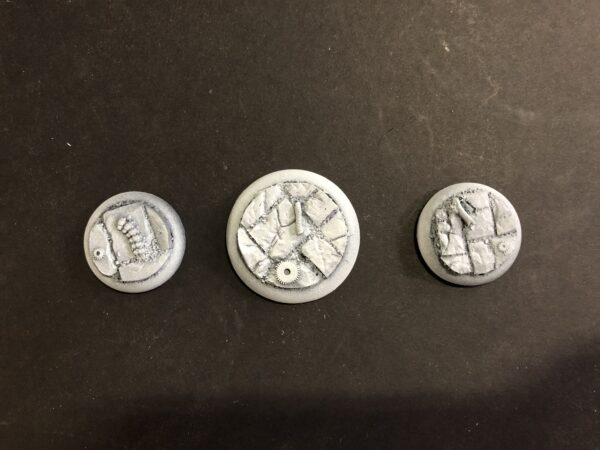
You can also use many of these techniques to do bases for your Riot Quest or WARMACHINE and HORDES models. If you cut the flagstones out of foam board beforehand, it becomes even easier! As you can see below, I cut a strip of PVC foam board and created a ton of dents and dings and texture with my knife and a stone.

Cut different-sized rectangles from that strip and assemble them in visually interesting ways inside your base!

You can use pumice gel to add grout and dirt between the different stones. Once this is dry, all you have left to do is add bits and bobs to spruce up your base! For mine, I used some metal parts from models I had laying around, some gears from an old watch, and some guitar string.
And there you have it! Wasn’t that easy!?
If you enjoy painting and modeling as much as I do, you should take a look at our upcoming Display It Painted competition at AdeptiCon! There are some amazing prizes to win, so be sure to take a look, and remember to always send me your cool conversions and paint jobs!