My desk is usually pretty organized—in a very disorganized way. What appears to be messy clutter is really a well-thought-out layout of the materials and tools I need to keep ready to use at any time.
Most of the clutter I have on hand is made up by my various sculpting tools, from simple needle points to custom-made rivet makers and hole cutters. Here is a picture of the tools I use the most. It’s a pretty standard set for sculpting.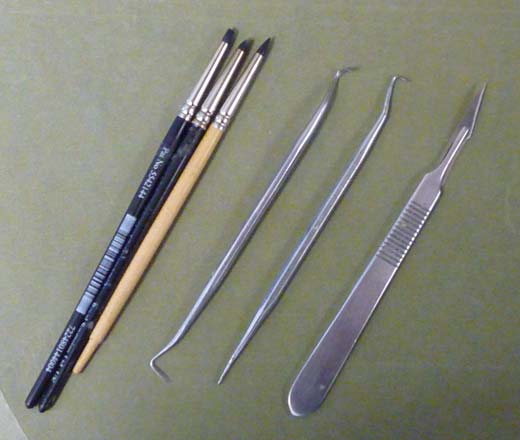
Of these, I use a round, pointed clay shaper and a flat chisel clay shaper the most. I have two of the flat chisel shapers. The old one is broken in and very soft, so it‘s good for smoothing out surfaces. The new one is much stiffer, and I use it for making lines and for the general shaping of polymer clay.
I think a scalpel is a must for professional sculpting. Hobby blades are perfect for modeling and some hobby sculpting, but I like to sculpt with a scalpel because its blade is thinner.
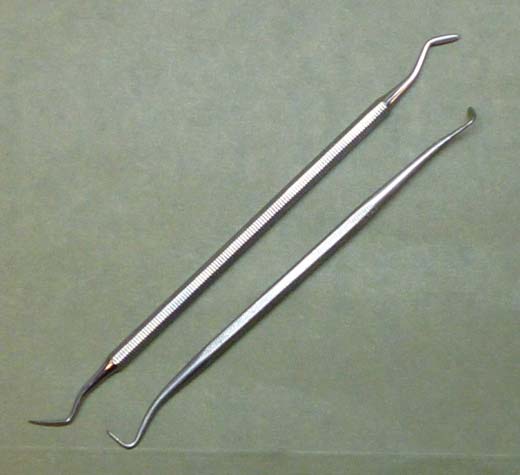
I modified the pictured sculpting tools from their original shapes to better suit my needs. One of the sculpting surfaces has broken off one of them, so I have to make a new one. In this photo the top tool is the original, and the bottom one is my modification.
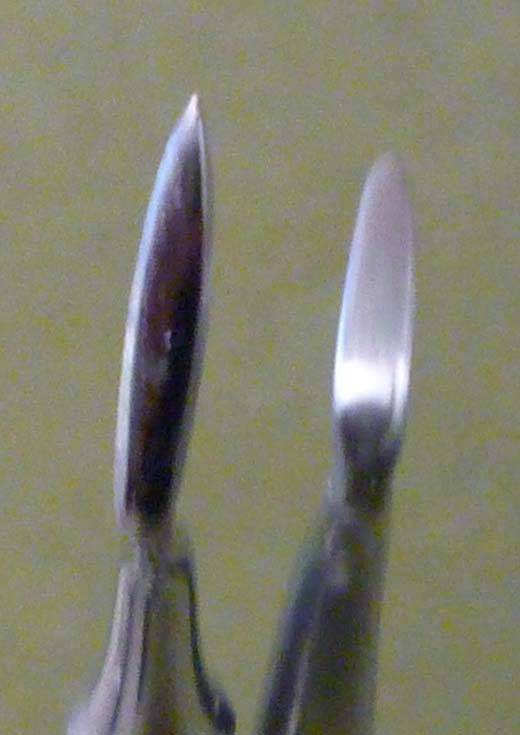
To make my version, I used files and sanding sticks to shape and round out the tool tips and then bent them at a sharper angle with a pair of pliers. Then I used scouring pads to buff out the tool marks and polish the surfaces. Here you can see the original tip on the left and the modification on the right. I wanted a much rounder sculpting surface.
After using your tools you’ll need to clean off any leftover putty and polish the surfaces again. Use very fine sandpaper to remove any residue, then buff with scouring pads. Emery boards—those paper fingernail files you can find at grocery stores or drug stores—also work very well.
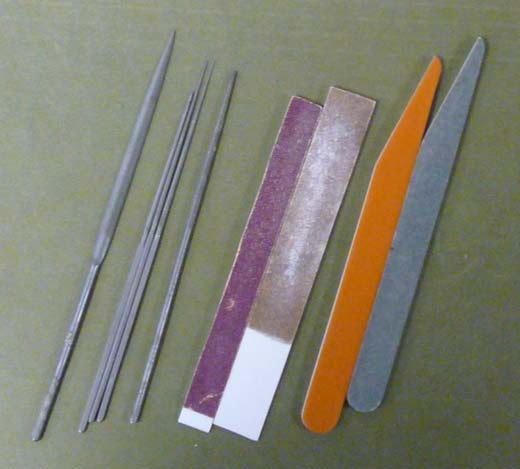
Another tool I use frequently are sanding sticks. You can buy pre-made ones like those shown on the left in this pic, but the variety of grades they come in is pretty limited. I frequently make my own (shown in the middle), which is also much less expensive.
To make your own, buy a large variety of sandpaper grades and some thick plastic card. Both are readily available at hardware stores.
Cut a strip of plastic card to the length and width you want. The thicker the plastic card. the better. Otherwise it can bend and flex too much when you are sanding.
Next spread Super Glue across one side of the stick and press it onto the sandpaper. Once the glue cures, cut off the excess sandpaper. Repeat this process for the other side. I like to use a different grade of sandpaper on each side.
To make a sanding stick you can use to sand curves and holes, you can use the same process to glue sandpaper around plastic or brass tubing.
I use some specialty files as well as my custom versions. I like the smaller, square-handled ones and buy them in grades 2, 4, and 6. Grade 2 is the coarsest and grade 6 is the finest. Whenever I use a coarse file to smooth out a surface, I check to see if I’ve left any stray file marks. I use the finer grade files to remove any I find and to smooth out any roughness.
That’s a tour of my most frequently used tools. I also use an assortment of other tools, which I’ll go over in another blog.